Latest Comments

Guest - Aislinn Dyestuff Citizen Science.
09. Oktober 2026
This is a great project. I look forward to the results. Thanks for letting us know.
Guest - Aislinn Time for...
09. Oktober 2026
Looks delicious!
Guest - Katrin Sprang Discussion
18. September 2026
Hi Rachel, I have looked for more photos of you, but that was not very successful. I found a link on...
Guest - Beatrix Sprang Discussion
15. September 2026
That lozenge pattern element is not a photograph, but a scan. So it should be to scale. But I pinned...
Guest - Katrin Sprang Discussion
15. September 2026
I was not referring to Rachel's reconstruction (is the reconstruction you refer to the one photograp...
NOV.
25
0

Very Old Knitting, Part 2.

So... as seen yesterday, working compound knitting (or double-depth knitting) on a dolly or similar thing is very easy. Let's add some challenge - off to the needles with this!

Ruth Gilbert (who is one of the reasons I started knitting a few years back) brought instructions with her to the Textile Forum, taken from Marianne Erikson's book Textiles in Egypt 200-1500 A.D. in Swedish Museum Collections, Gothenburg: Rohsska Museet. You can find them on p. 235, fig. 23. Or look at the following knitting pictures, where I'm following her instructions.

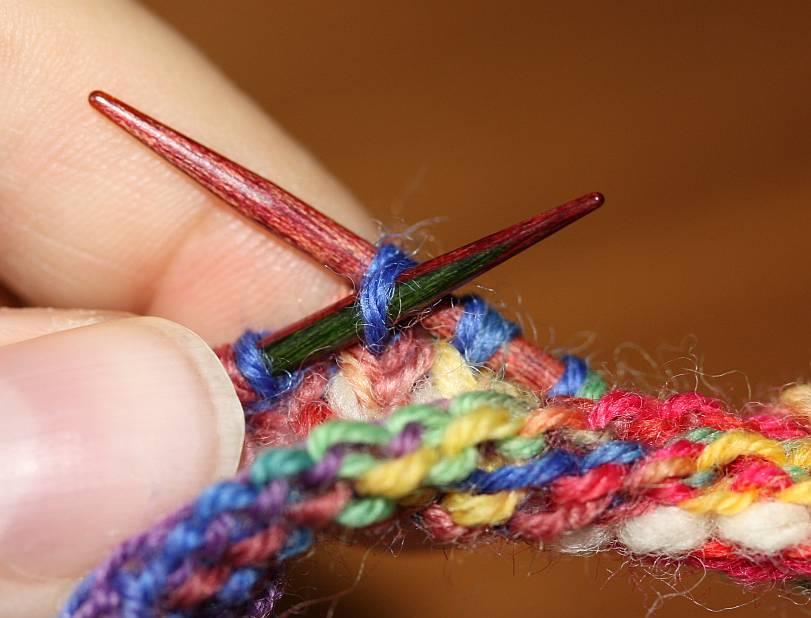
You're always working with a pair of stitches (so cast on double the amount you want to work).

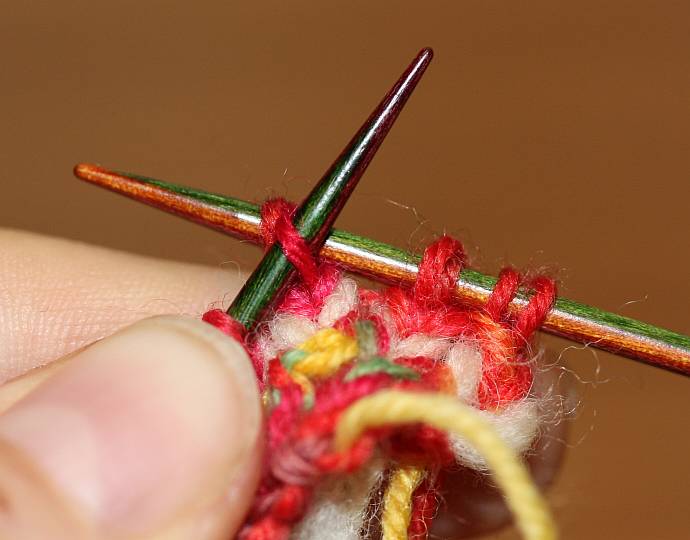
Transfer both stitches to the right needle.

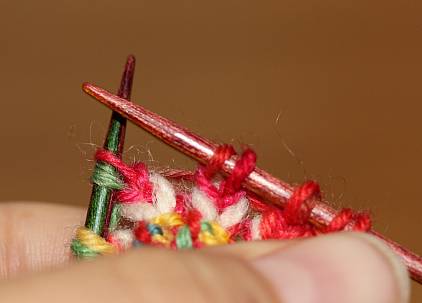
[caption id="attachment_1929" align="alignnone" width="422"]Unworked stitches on the right needle... Unworked stitches on the right needle...


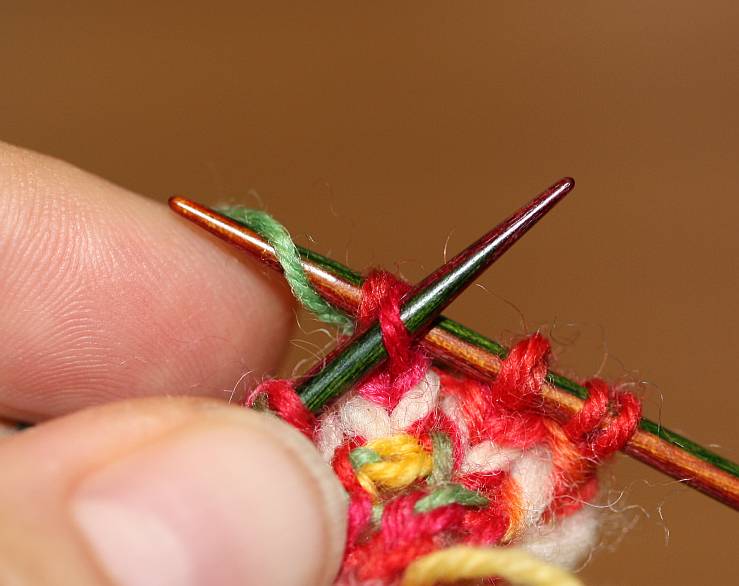
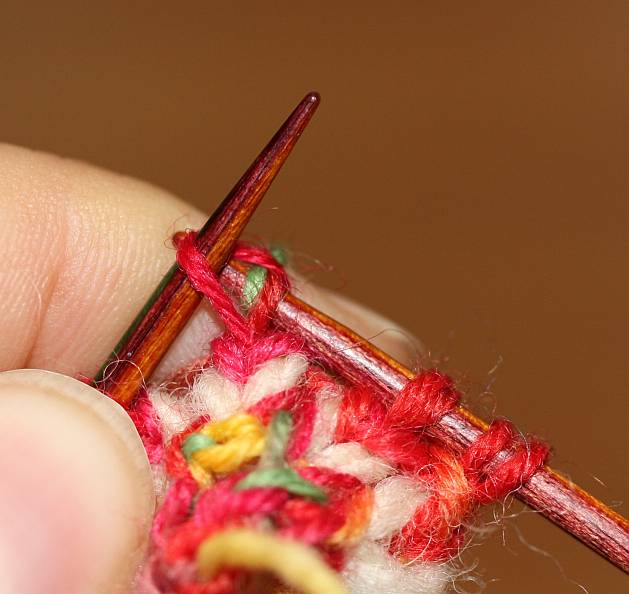
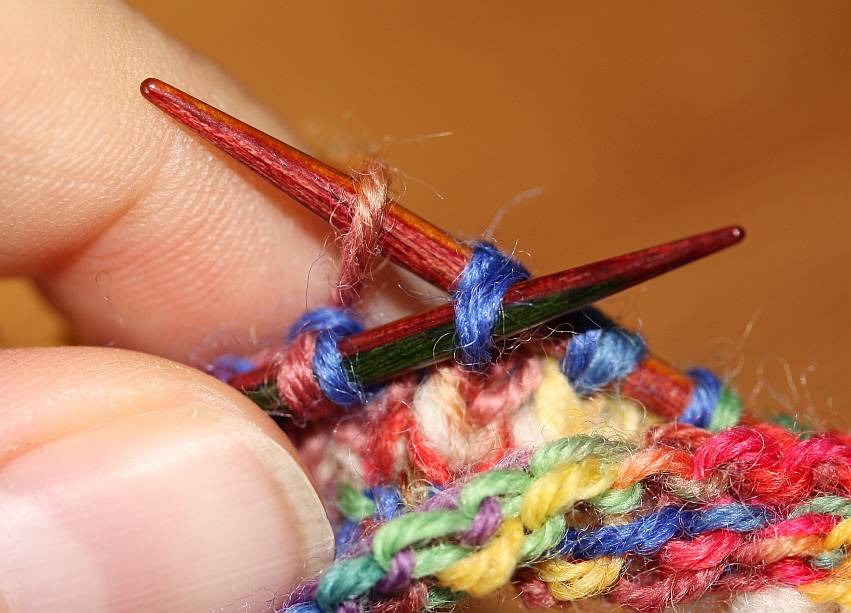
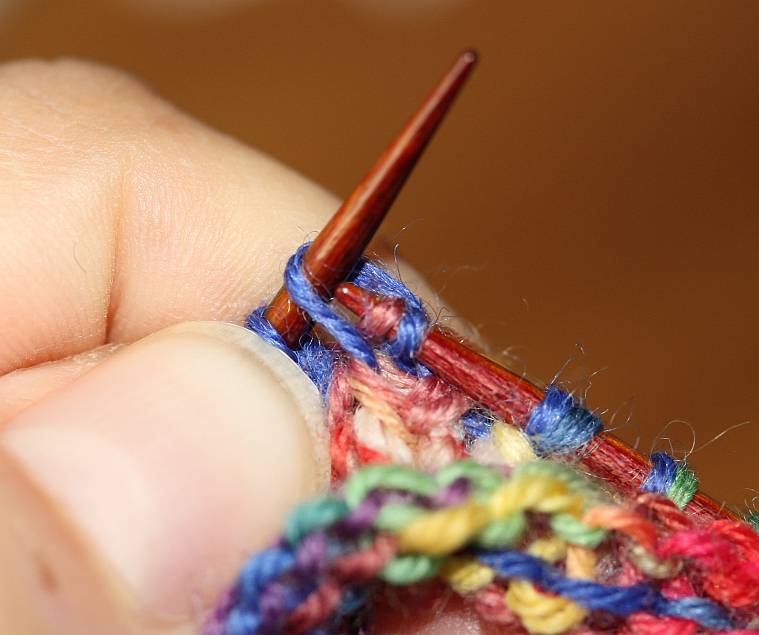
Insert left needle into the right stitch, loop yarn around right needle, and pull yarn and stitch through.

[caption id="attachment_1928" align="alignnone" width="420"]Needle inserted... Insert left needle into the right stitch...


[caption id="attachment_1936" align="alignnone" width="420"]IMG_8086 ...loop yarn around...


[caption id="attachment_1935" align="alignnone" width="422"]... and pull through. ... and pull through.


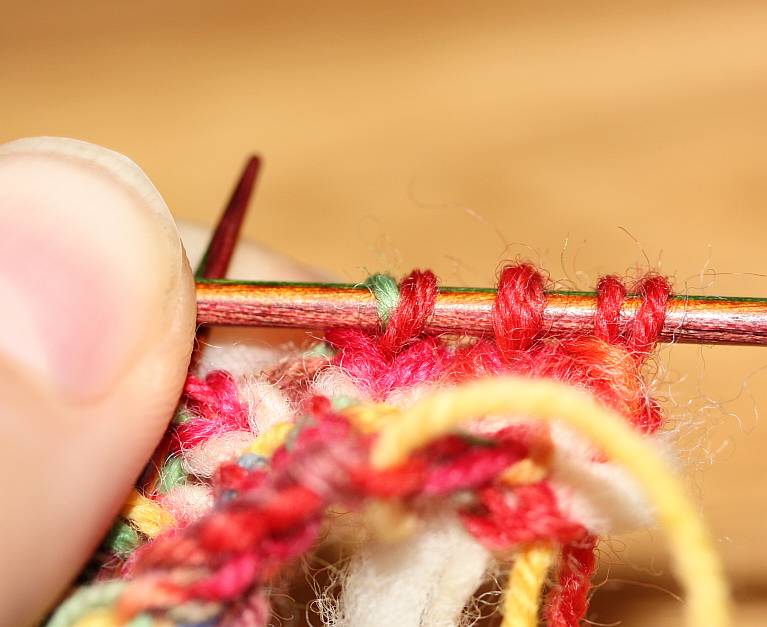
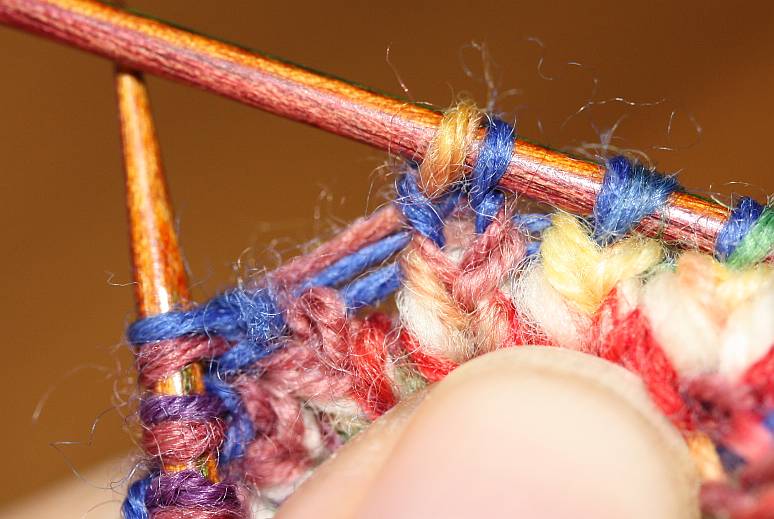
Note the alignment of the stitches: The older stitch lies to the right, its right leg behind the needle; the new stitch lies to the left, its right leg in front of the needle (as is the customary orientation in Western European knitting).

[caption id="attachment_1934" align="alignnone" width="300"]Stitch alignment. Stitch alignment.


For the return row (if you are knitting flat), you insert the left needle into the second stitch on the right needle,

[caption id="attachment_1933" align="alignnone" width="300"]Insert left needle into right stitch on right needle... Insert left needle into right stitch on right needle...


loop the yarn around the right needle, and draw yarn and the stitch on the right needle through.

[caption id="attachment_1932" align="alignnone" width="300"]... loop yarn around... ... loop yarn around...


[caption id="attachment_1931" align="alignnone" width="300"]...and draw through. ...and draw through.


The older stitch now lies again to the right of the pair, with its right leg in the back; the old stitch on the right has its right leg in the front.

[caption id="attachment_1930" align="alignnone" width="300"]Stitch alignment. New stitch to the left, old to the right. Stitch alignment. New stitch to the left, old to the right.


Now transfer both stitches to the left needle and continue.

These instructions totally work - and they are a lot of slipping stitches. It gets less slippery if you work in the round (where you only use the instructions for the first row, working from left to right), but it still feels... awkward.

Is there a better way to do it? One more efficient, and involving less slipping? We'll see. Later this week.
0
NOV.
24
1

Very Old Knitting, Part 1.

After all the computery shenanigans, it's high time for a proper textile post again. And fortunately, I have just the topic!

When I was at the Textile Forum, one of the presentations was about old knitting, more specifically what can be called "compound knitting". These really early knitting finds (from Egypt, dated to about the 5th to 7th century, to give you a rough timeframe) are not showing the same knit structure as we are used to. Modern knitting goes through the stitches in the last row to add the next row to the top. These finds done in compound knitting go through the last two stitches to add the next row. Are you confused yet?

The pieces presented at the Forum are all tubular, usually rather narrow, and sometimes striped across or worked in colour sections. They might have been worked on a knitting dolly, or worked on needles - it is hard to tell. We can look a bit at the different methods, though.

Compound knitting is very, very easy to do on a knitting dolly (or however you call these gadgets with pins to loop your yarn over) - you set up as usual, with base loops, and then you wrap the working yarn around the dolly twice instead of just once. Now when you are working your first round, lift the bottom loop over both the strands above it.

Here's how it looks when you are a few rounds in:

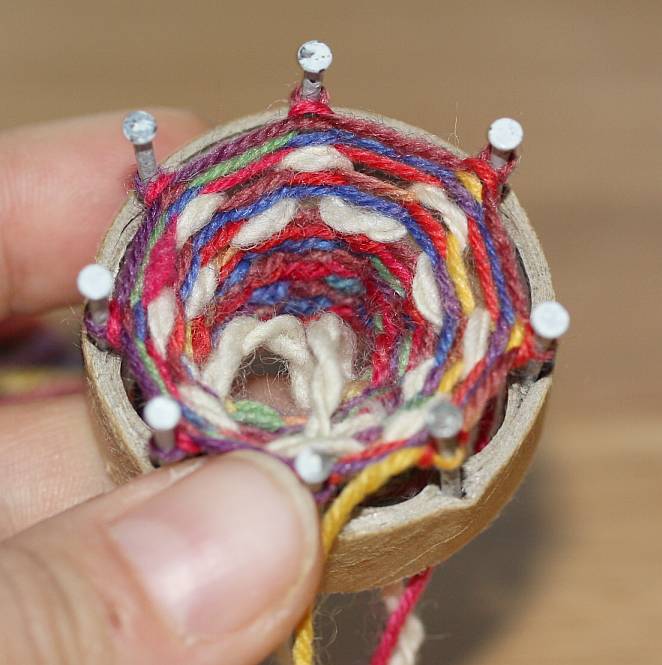
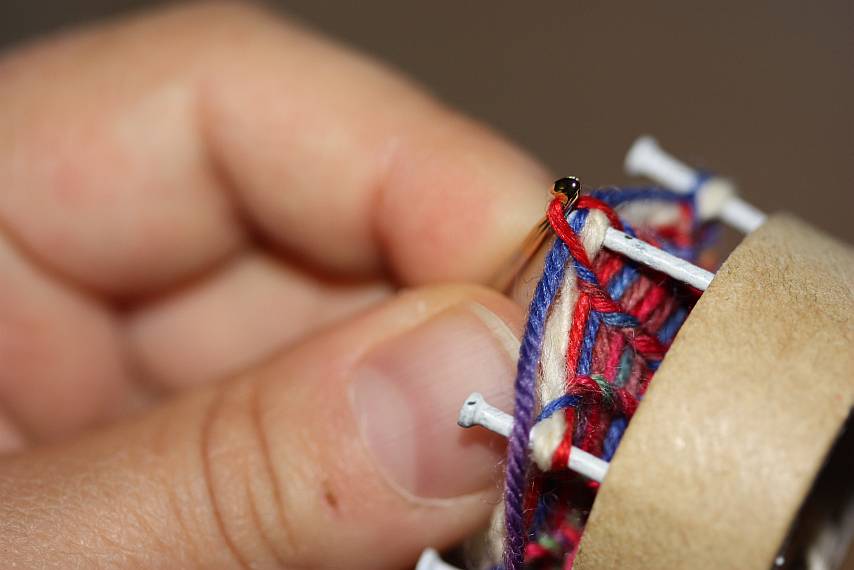
[caption id="attachment_1920" align="aligncenter" width="428"]Lifting the lowest of the loops on the dolly over the one on top of it and the working thread. Lifting the lowest of the loops on the dolly over the one on top of it and the working thread.


The white thread is there for better orientation. You can see the red (lowest) thread being lifted up over the white thread (which has been on the dolly for one round now) and the blue working thread. (The dolly, by the way, is a very crude homemade version that sports some nails left over from my active digging days.)

As a result, you get the compound stockinette fabric.

[caption id="attachment_1917" align="aligncenter" width="437"]Compound knitting on the dolly, knit side. Compound knitting on the dolly, knit side.


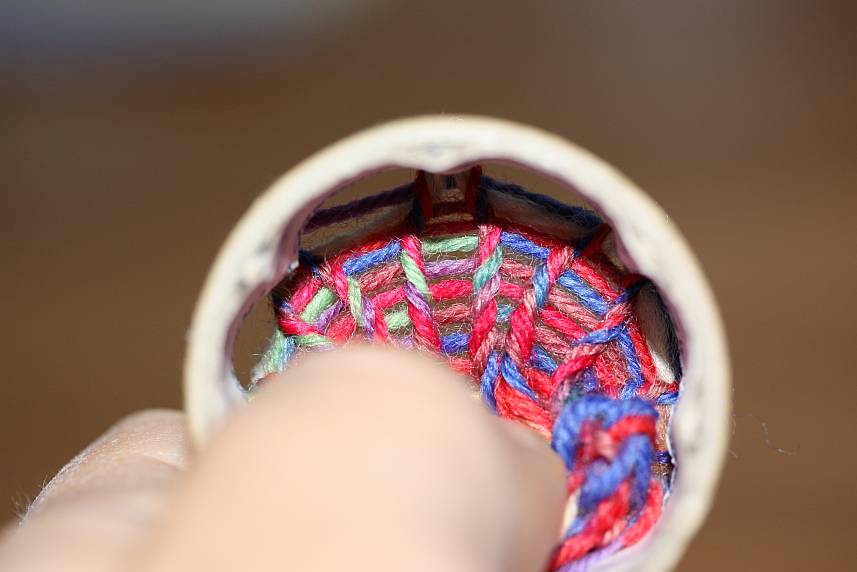
It doesn't look much different from regular modern knitting, but you can see that the stitches go through two of the previous rows - look at the green stitch in the top middle, for instance. This is even easier to see when you use a contrasting thread and look at that:

[caption id="attachment_1919" align="aligncenter" width="386"]Compound knitting on the dolly, seen from the inside. Compound knitting on the dolly, seen from the inside.


When you knit in a single row in a different colour in regular modern knitting, you have the little "dashes" on the purl side in one row, followed by a row of your regular colour, followed by the contrast colour row again. In compound knitting, the dashes are one extra row apart, as you can see in the picture.

Working this on a dolly takes no extra effort to do (it might be a tiny bit more fiddly to pick the loop to pull over, but it doesn't make much of a difference). The resulting fabric, though, is a different creature from regular modern knitting: it is much thicker while still very stretchy.

It gets really interesting when we try to take this to the needles, though... which is something for the next post.
0
NOV.
16
0

Behold the Stretchiness of Sprang.

I've already hinted that I did some sprang at the Textile Forum - and it was an utter joy to do. My previous dabblings in this wonderful technique had always fizzled and died before I got to the stage where I could understand what is going on. Add in a few misunderstandings (I had a knot in my brain and didn't really get what the instructions were trying to tell me) and the resulting mistakes, and there is no chance in really getting it at all.

For those of you who have little question marks hovering above your heads - sprang is a braiding technique where you braid on ends (or elements) that are stretched in a frame. You work in the middle, in a shed, crossing threads from the back with threads from the front, and your work grows from the top and bottom edge towards the middle. Once you are in the middle, you have to secure it in some way to prevent unravelling.

This time around, however, sprang finally clicked for me. Plus I finally got to use a ball of lovely cotton yarn that some friends had given me as a present years ago - a single ball of cotton, about 230 m length, so not really a thing to knit with, and not something suitable for historical stuff.

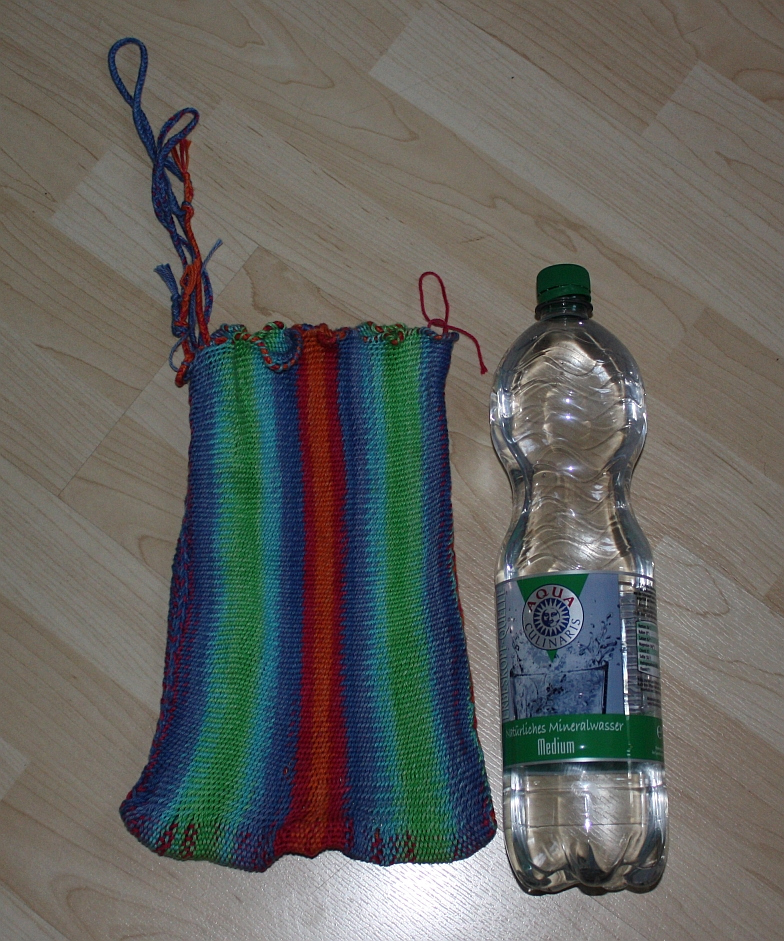
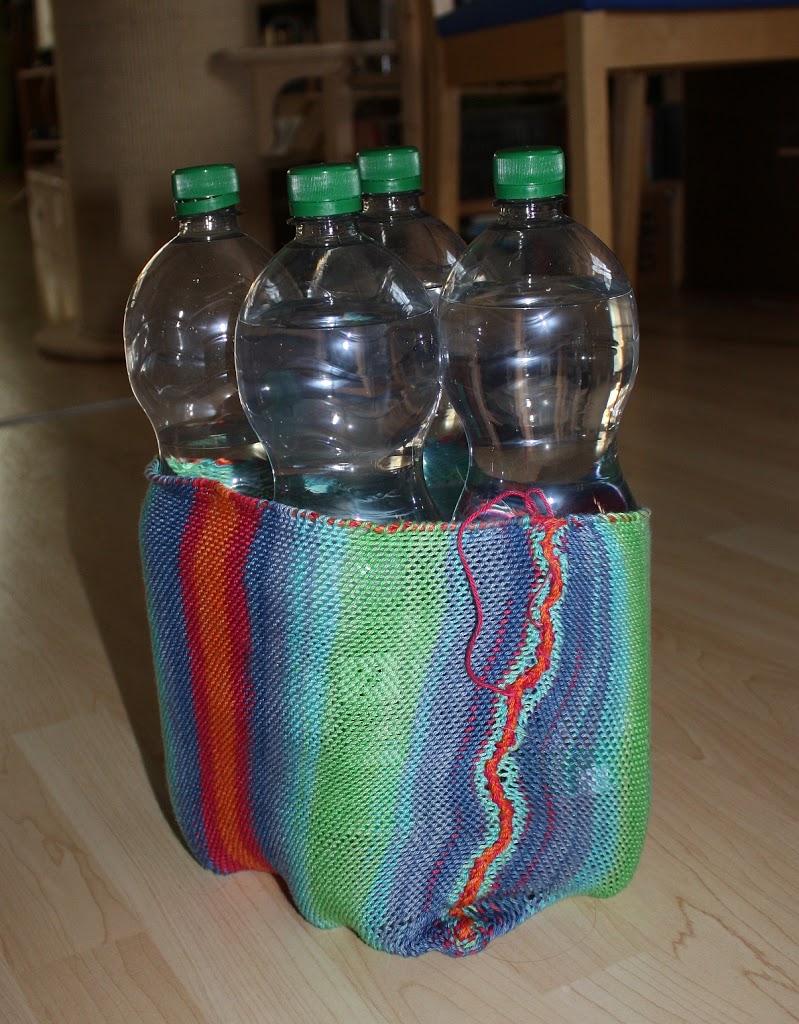
It made a wonderful bag, though:


This is the little bag hanging out next to a 1.5 l bottle of water, for size comparison.

And this picture will show you the amazing stretchability of sprang:


Yes, it will hold four of these water bottles without complaint. It might even hold five, but the cord drawn in at the top (the other place where you have to secure your elements) limits the maximum opening of the bag's top. I think it's still impressive.
0
NOV.
11
2

How to make yourself very tired.

Here's a good recipe on losing some sleep, in a thoroughly enjoyable way:

Have an idea for a conference.
Find a place to run it, organise a caterer, and a place for the participants to stay.
Find about a dozen other people who are passionate about textile research, and historical textiles, and the crafts involved.
Get all of them, plus tools and books and materials, together in said place you organised - to share knowledge and try out things, for one whole week.
Throw a little experiment in with the mix...

... and there you go.

There was sprang, and tea, and coffee. There was much running (at least for me - to open doors, and gates, and nip back to fetch something). There was beautiful weather, and there was chocolate, and of course we had stroopwafels (which is a Dutch sweet and traditionally used for spinning at the Forum).


 There was silk reeling, and with it the admiration of both the intricate process and the dead bugs that made the coccoons.

In short, it was a wonderful week, full of textile crafts and research and learning, of friendly support of each other and discussions about which technique would be suitable, and how this or that could work. It was the European Textile Forum. It was also brutally exhausting - but I couldn't pick a better way to work on making yourself very, very tired!

0
NOV.
02
0

It's time for the Textile Forum!

The Textile Forum has started, and I am in Mayen to spend all week doing textile things - looking into early modern knitting, investigating the differences between knitting and nalebinding, and other things like it.

As I will be utterly busy running this conference, there will be no blogging until Wednesday, November 11 - when I will have recovered from the incredible textile archaeology overload the Forum inevitably generates, and will be able to tell you stories of what we did and how things went.

I'm here! (Well. Behind this thing. More or less.)

0
OKT.
29
2

Breaking things, repairing things, twisting templates. And linen dyeing.

I spent the morning going more into the up-and-coming relaunch, and I did manage to do a test migration into WordPress, so there will be some changes to this blog's looks before the year will end.

The new shop design is also coming along nicely. It will be much lighter, and much cleaner, and there will be larger pictures. Overall, I really like it a lot! There's still a few issues to be solved and snags to be taken care of, and changing the old pallia.net site over into Joomla will mean a bit of re-writing of text and menu restructures (read: a good bit of work, including thinking and figuring out the best way for stuff), but I have hopes it will all work out eventually.

Apart from that, I managed to break my xampp programme (the thing required to test-drive a web page on your own computer, under the charming name of "localhost") and to actually fix it again (by deleting a single line of code that had crept in through an aborted installation of WordPress). Whew!

Now, however, I will have to put this project aside for a bit, as the Textile Forum is coming up (I can't believe it is already almost November) and there's still a few things to prepare for it. Packing linen cloth for our next test run regarding linen dyeing, for instance!

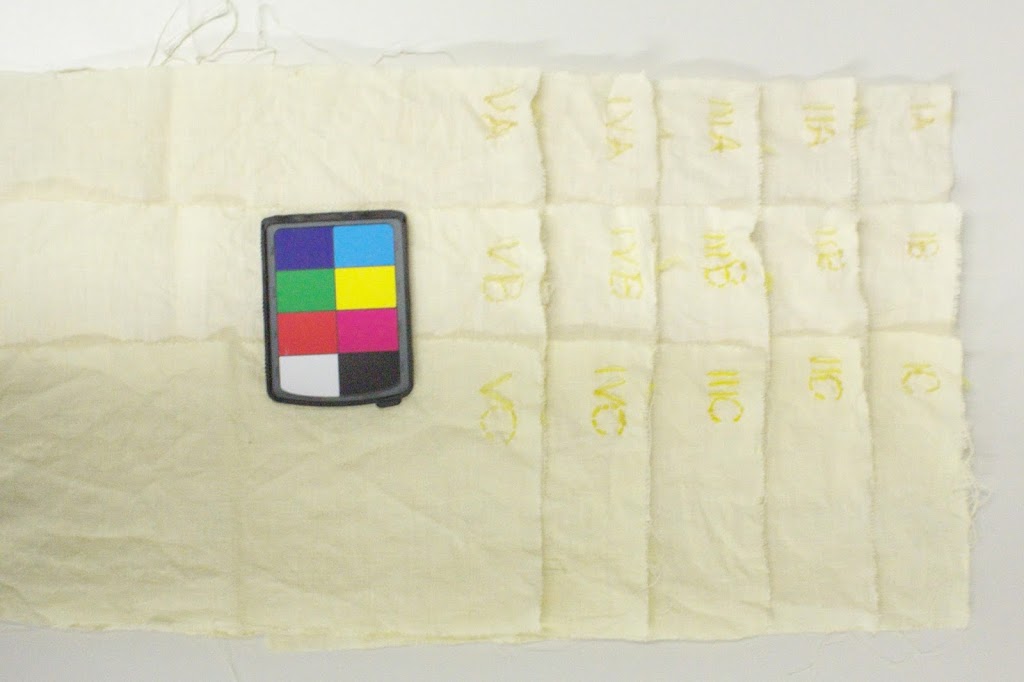
Sabine and I have been thinking about the chemistry involved with dyeing linen for a few years now, and we did a first trial run on exploring linen dyeing at last year's forum. One of the possible influences on how well the linen takes the mordant (which is usually not very well at all) is the pH of the mordanting and dyeing liquid, so we set out to test this.

Last year's test results. As you can clearly see, there was not much dye taken up by the linen fabric, regardless of the pH adjustment of the mordanting and dyeing baths.
We'll try different concentrations of alum this time. We've also planned to test a pre-treatment with sulphur fumes, though the required sulphur strips have not arrived yet - I'll keep my fingers crossed that they will come today.

The reason for sulphur pre-treatment? It seems that the metal components of the mordant bind to wool through a connection to the sulphur bonds the wool has. So if it's possible to sulphurise the linen, it might be possible to have a much better mordant uptake, and thus dye uptake. Next week we'll know more!
0
OKT.
06
1

Oops.

You're getting the promised blog post, even though you're getting it very, very late... today was completely gobbled up by lugging stuff out of the car (with plenty of help from the most patient husband of them all) and getting the book-keeping up to date, including sending off the taxes for the past quarter.

That on top of the post-fair exhaustion, and the blog post almost got forgotten!

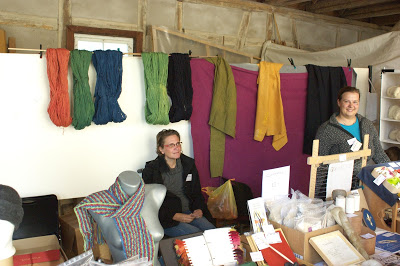
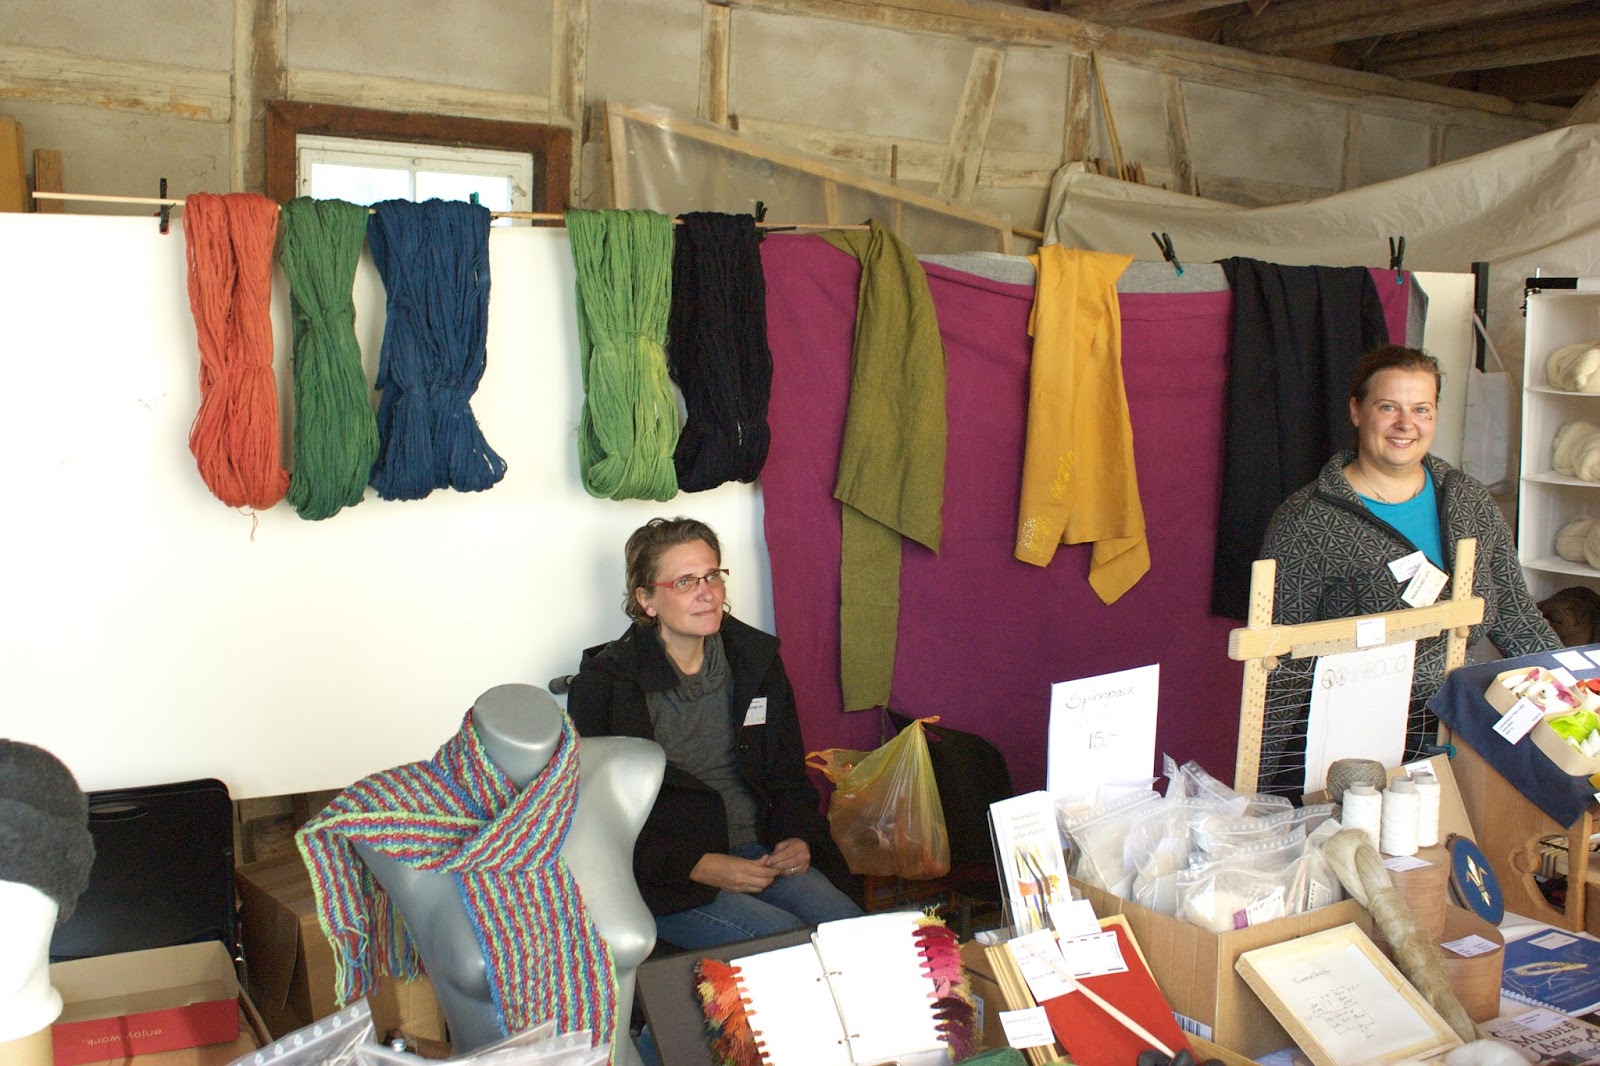
Sabine and me behind our sales table in the former carriage shed.
The fair, by the way, was in an extremely lovely place, with brilliant weather on both Friday and Saturday. The baroque gardens showed themselves at their very best, the castle staff had prepared special guided tours with more textile information than they give usually, and we had lots and lots of very interested visitors. Sunday was rainy, unfortunately, and thus more towards the drab and grey side of autumn, but it did clear up in the afternoon.

I had a lovely time at Weikersheim, and I've already heard that they are planning to do this again. Not next year (that is already booked with events), but probably in 2017, and if my schedule will permit it, I'll definitely be there again.


0

By accepting you will be accessing a service provided by a third-party external to https://pallia.net/

Kontakt