")
")


I have a stash of wonderful, hand-dyed, soft-spun single wool hanging out here, and it's been hanging out here for a long while, too. It's indigo-dyed in two shades of blue, plus there's a grey and a brownish grey to go with it. However, it seems to have some make-a-bad-decision vibe hanging to it.
Originally, I bought it to knit myself a Pinwheel Sweater - only to find out, when the thing was almost finished, that it does not flatter me at all and, to be blunt, actually even looked butt-ugly on me.
[caption id="attachment_2149" align="alignnone" width="902"]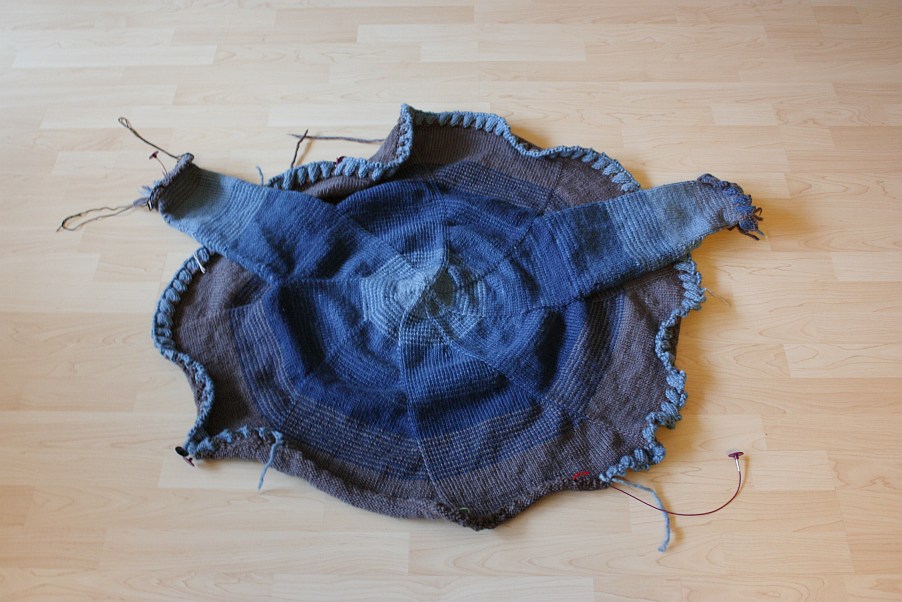 Almost done. And unfortunately not The Thing For Me. At all.
[caption id="attachment_2148" align="alignnone" width="902"]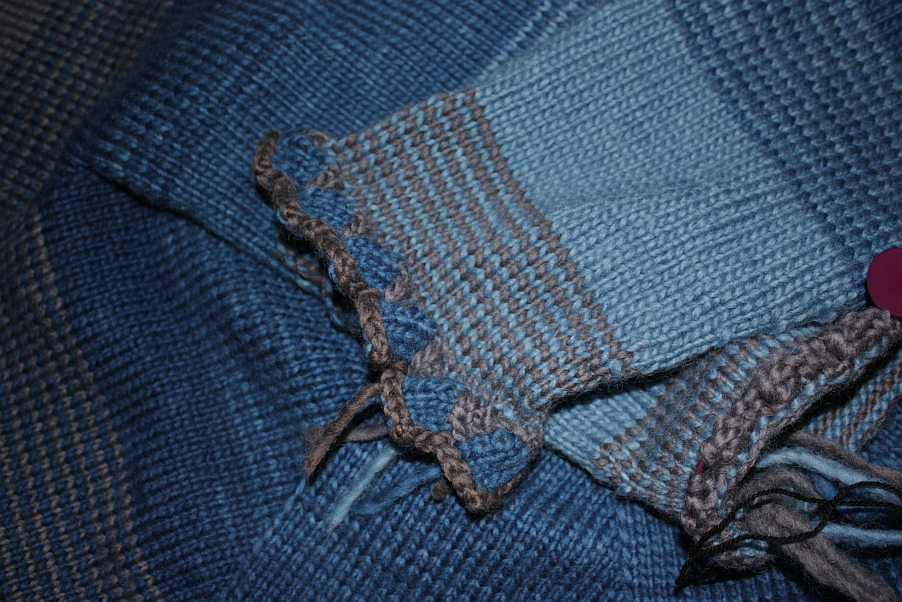 Sleeve finished with a tiny bit of entrelac-like knitting.
So I frogged it. And then thought about what to do with it, and I came up with the idea to do an illusion-knitted Tardis scarf. Which I started, and I made good progress on, and now it has been almost finished for a while...
[caption id="attachment_2147" align="alignnone" width="602"]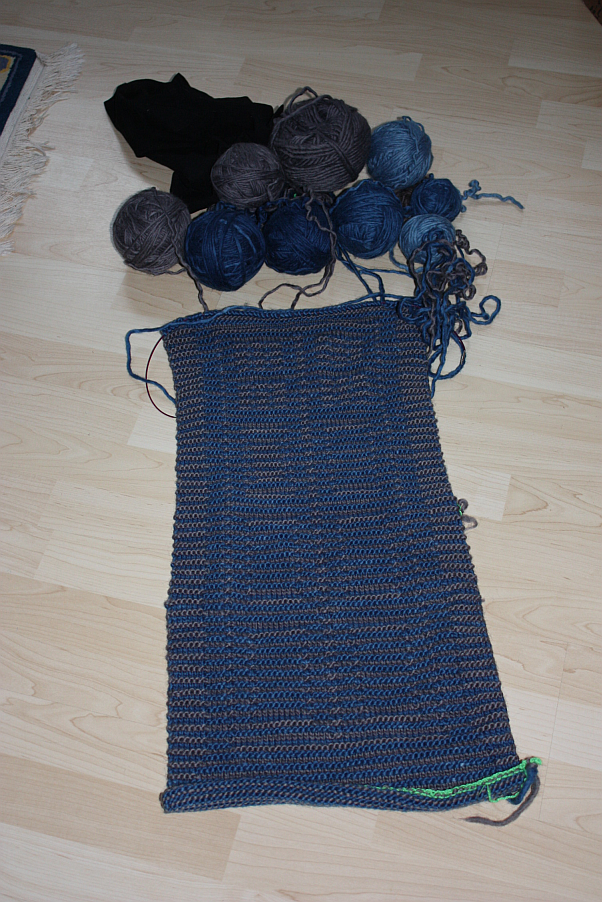 The Tardis knit, seen from above...
[caption id="attachment_2146" align="alignnone" width="640"]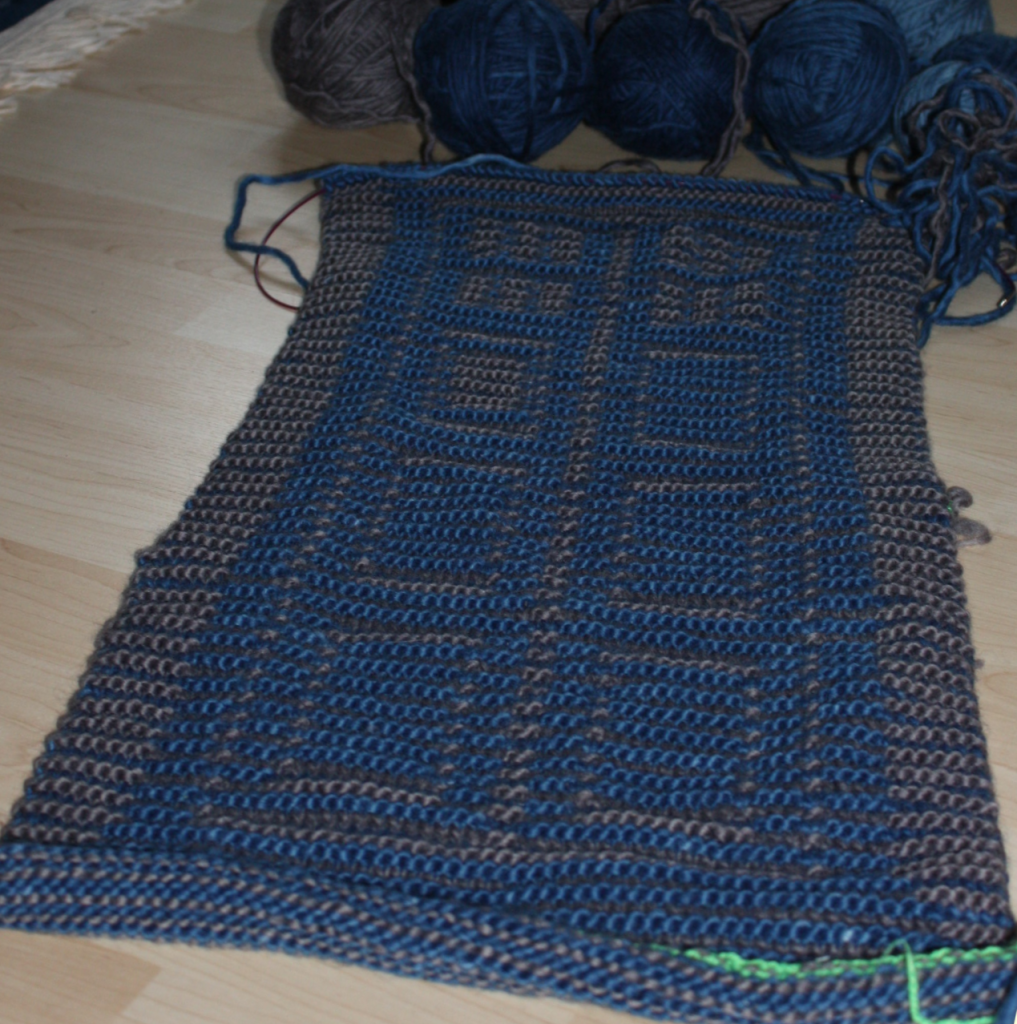 ... and at an angle. It really looks Tardis-y!
This, however, has proven to be another bad decision. Illusion knitting, to work properly, needs to be rather firm. The result of this? A very wide, very firm piece of knit fabric that will not be comfortable or easy to wear as a scarf. Or anything else, actually. And I do intend to wear my knit things - otherwise I could decide to use it as a rug, or wall-hanging, and it might do nicely there, but somehow, I'd prefer it to be wearable. (It's also not as illusionary as I had hoped; the motif is rather visible from straight downwards still.)
So I will frog it again. And next time? Well. I'm thinking about trying to make a jacket/cozy sweater-like thing out of the wool again, but this time, using a pattern that actually flatters me, and probably employing the mix of colours to do some nice entrelac.
[caption id="attachment_2145" align="alignnone" width="640"]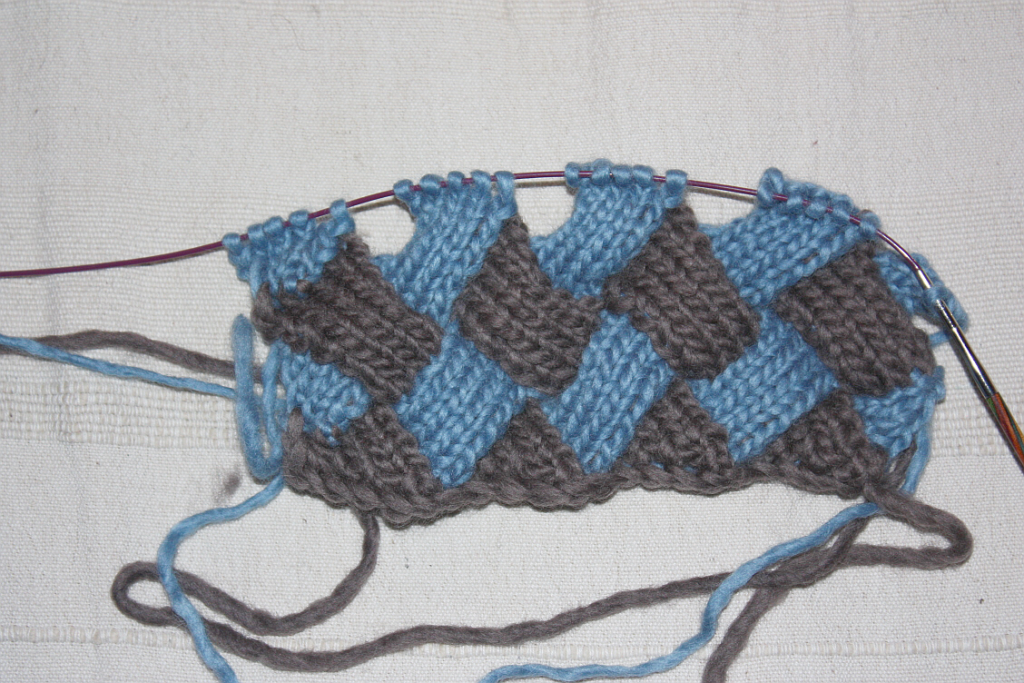 Entrelac knit with the same kind of wool. I think this will be the thing.
After all, this looks promising, doesn't it?
Originally, I bought it to knit myself a Pinwheel Sweater - only to find out, when the thing was almost finished, that it does not flatter me at all and, to be blunt, actually even looked butt-ugly on me.
[caption id="attachment_2149" align="alignnone" width="902"]
Almost done. And unfortunately not The Thing For Me. At all.[caption id="attachment_2148" align="alignnone" width="902"]
Sleeve finished with a tiny bit of entrelac-like knitting.So I frogged it. And then thought about what to do with it, and I came up with the idea to do an illusion-knitted Tardis scarf. Which I started, and I made good progress on, and now it has been almost finished for a while...
[caption id="attachment_2147" align="alignnone" width="602"]
The Tardis knit, seen from above...[caption id="attachment_2146" align="alignnone" width="640"]
... and at an angle. It really looks Tardis-y!This, however, has proven to be another bad decision. Illusion knitting, to work properly, needs to be rather firm. The result of this? A very wide, very firm piece of knit fabric that will not be comfortable or easy to wear as a scarf. Or anything else, actually. And I do intend to wear my knit things - otherwise I could decide to use it as a rug, or wall-hanging, and it might do nicely there, but somehow, I'd prefer it to be wearable. (It's also not as illusionary as I had hoped; the motif is rather visible from straight downwards still.)
So I will frog it again. And next time? Well. I'm thinking about trying to make a jacket/cozy sweater-like thing out of the wool again, but this time, using a pattern that actually flatters me, and probably employing the mix of colours to do some nice entrelac.
[caption id="attachment_2145" align="alignnone" width="640"]
Entrelac knit with the same kind of wool. I think this will be the thing.After all, this looks promising, doesn't it?
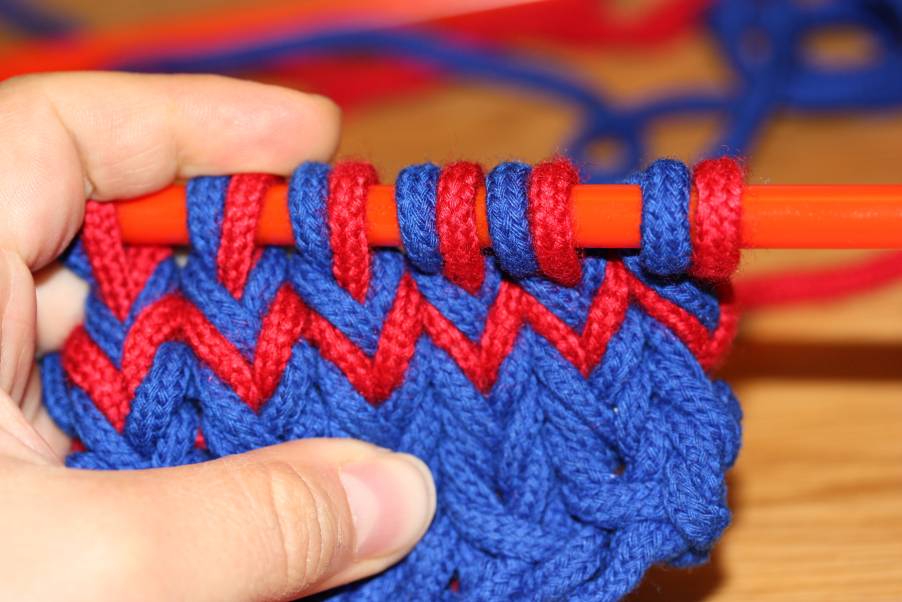
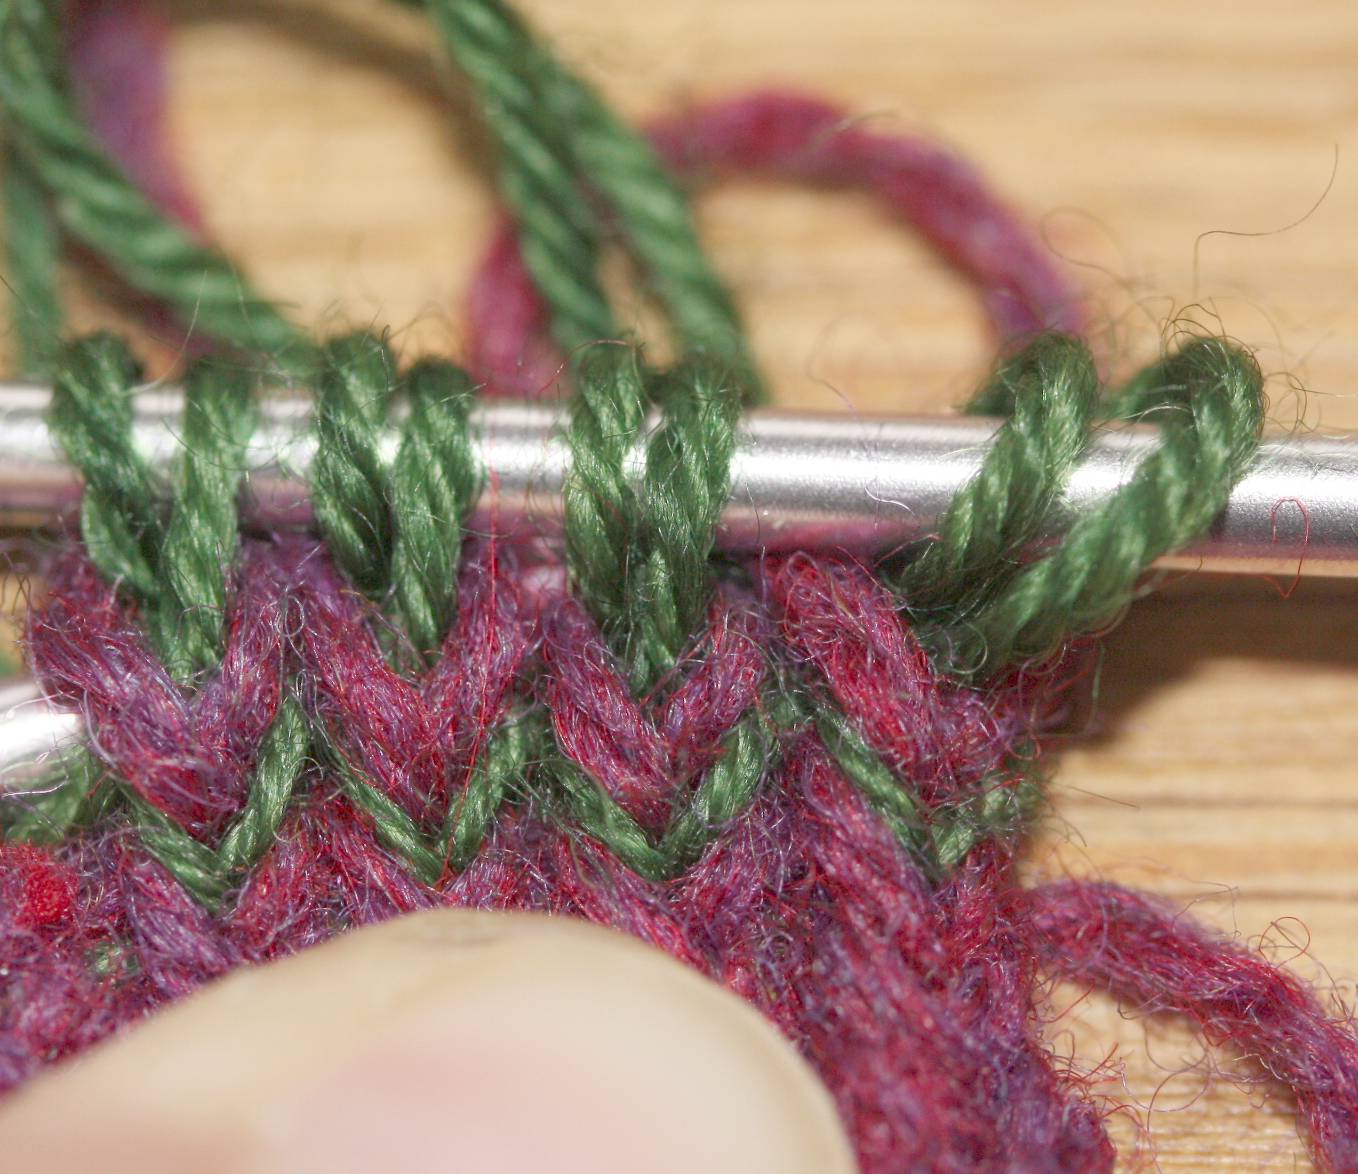
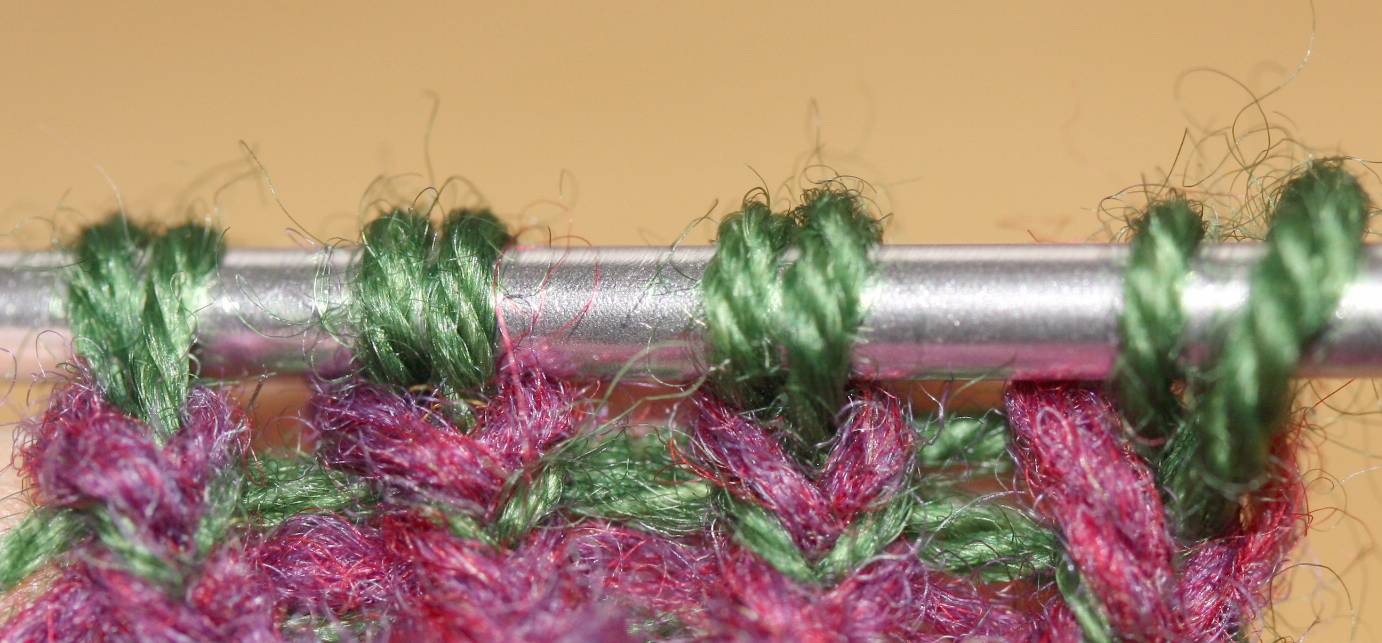
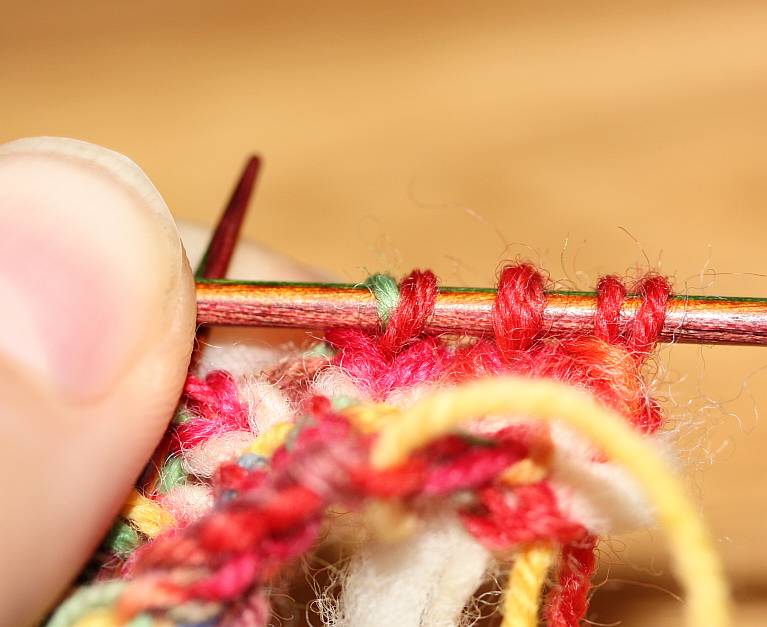
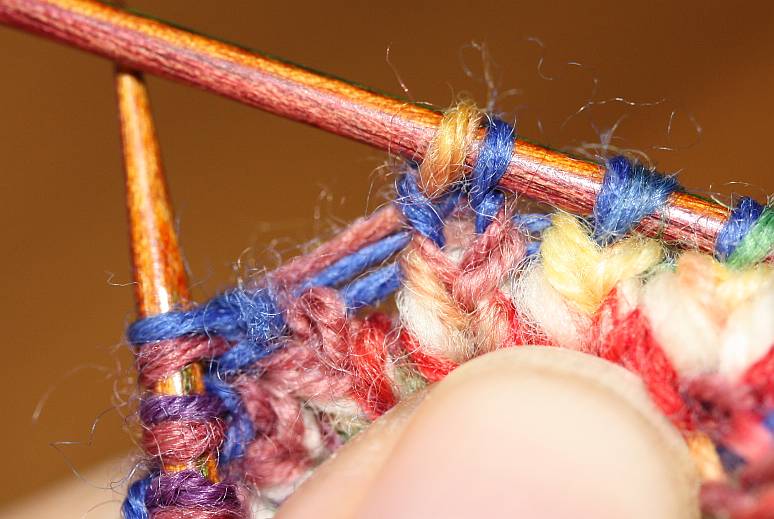
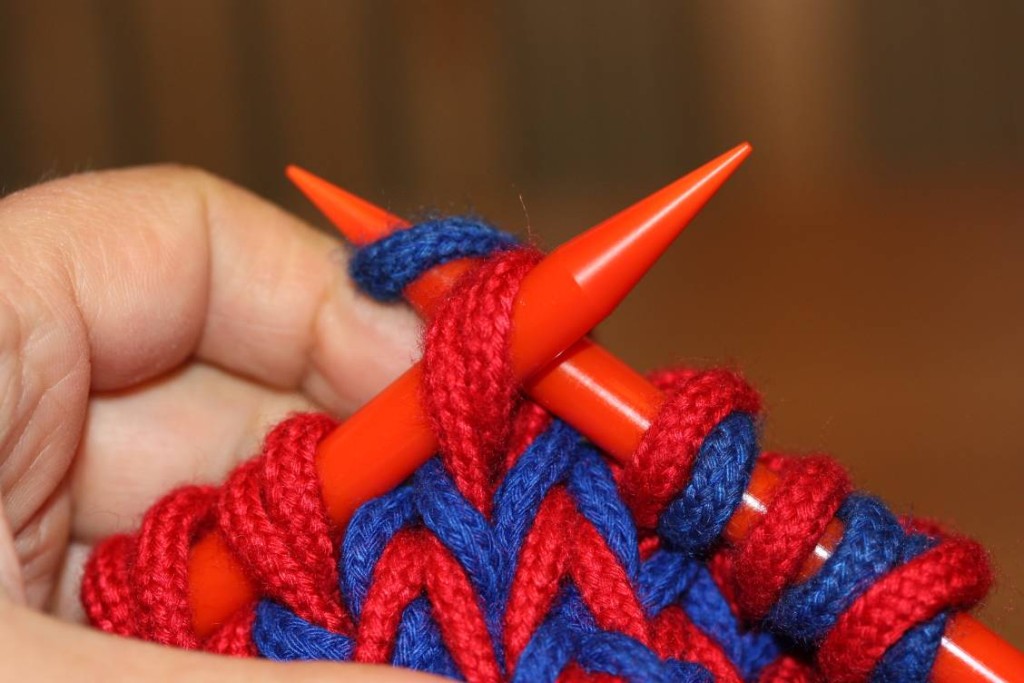 Insert right needle straight through both stitches on the left needle and wrap yarn from back to front (so the right leg of the new stitch will lie in the back)...
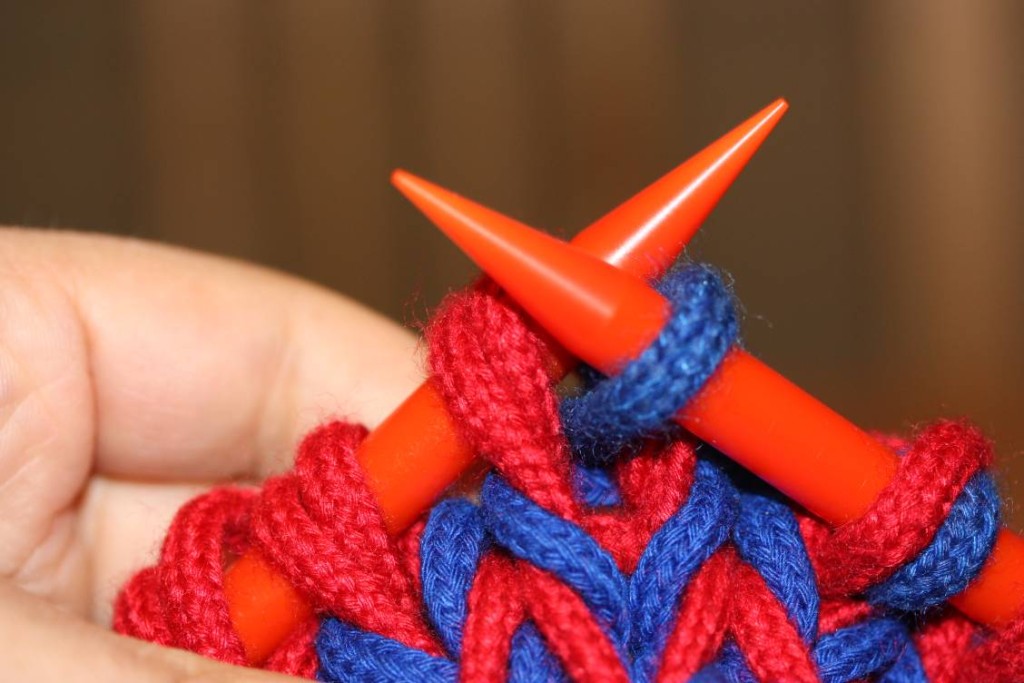 ...draw through both stitches on left needle...
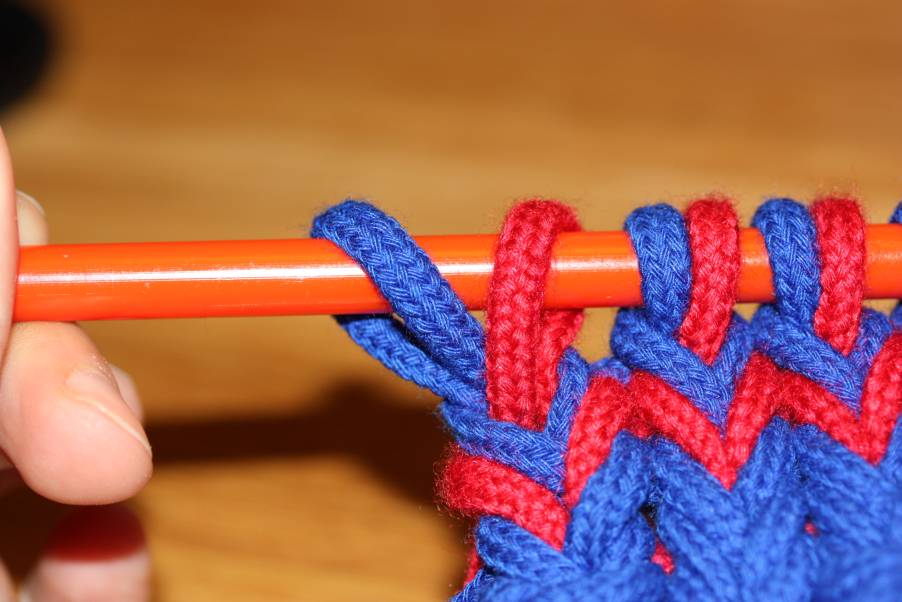
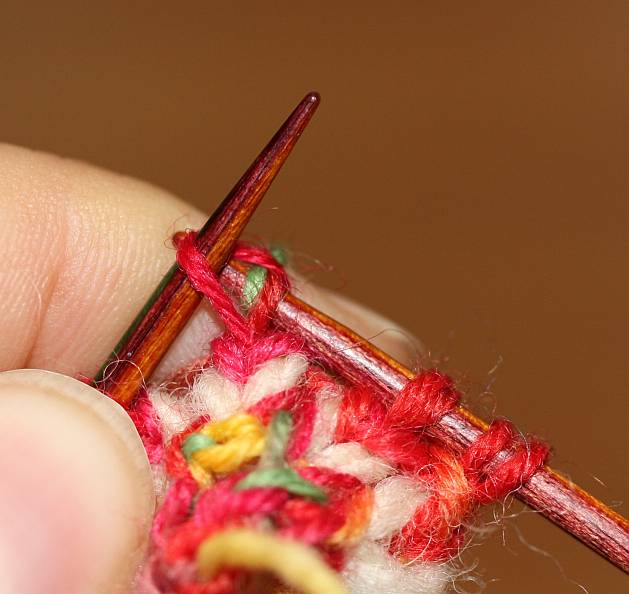
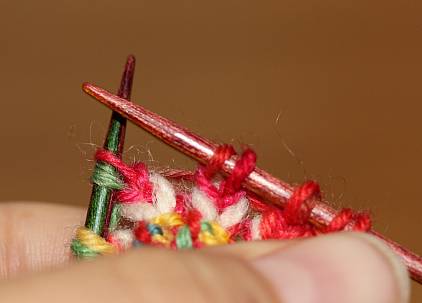
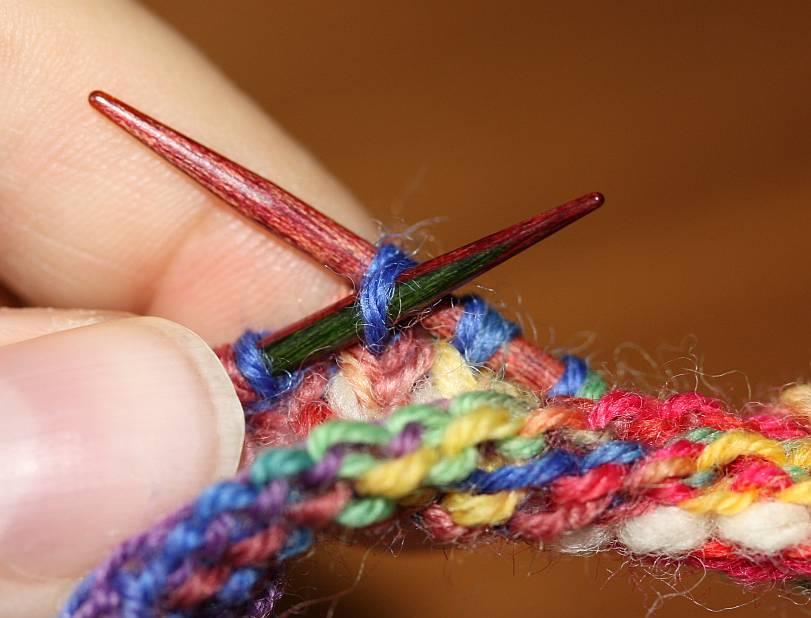
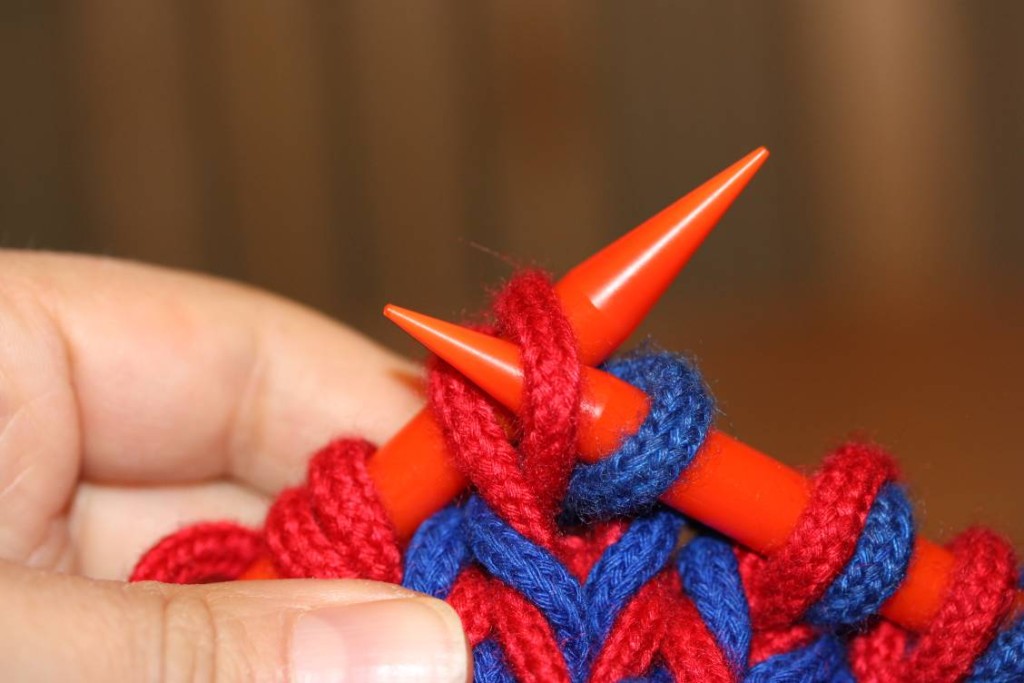 ...and move the first stitch on the left needle over to the right.
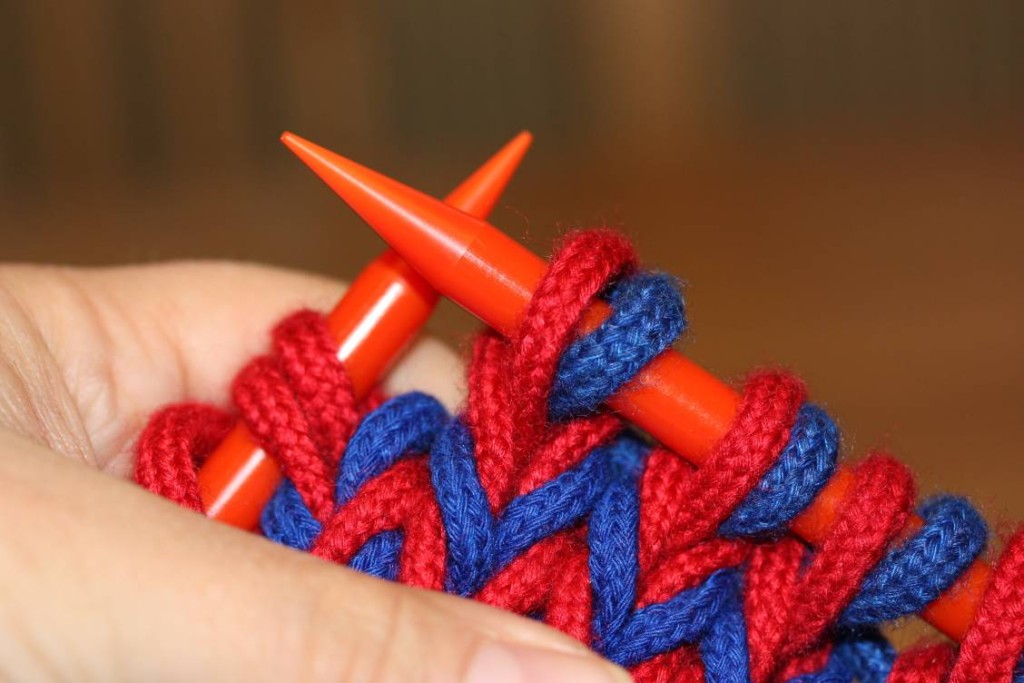 The new stitch lies on the right, the older stitch on the left.
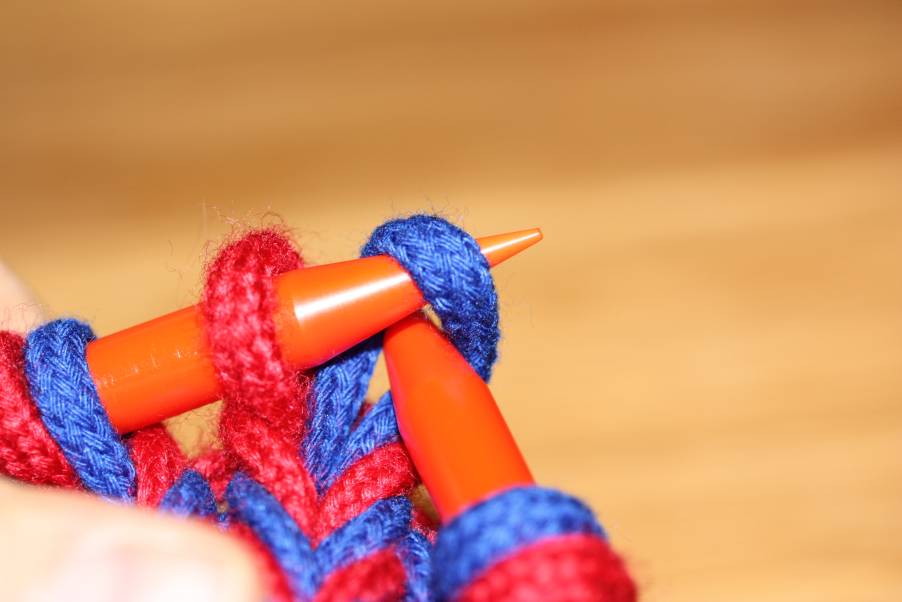
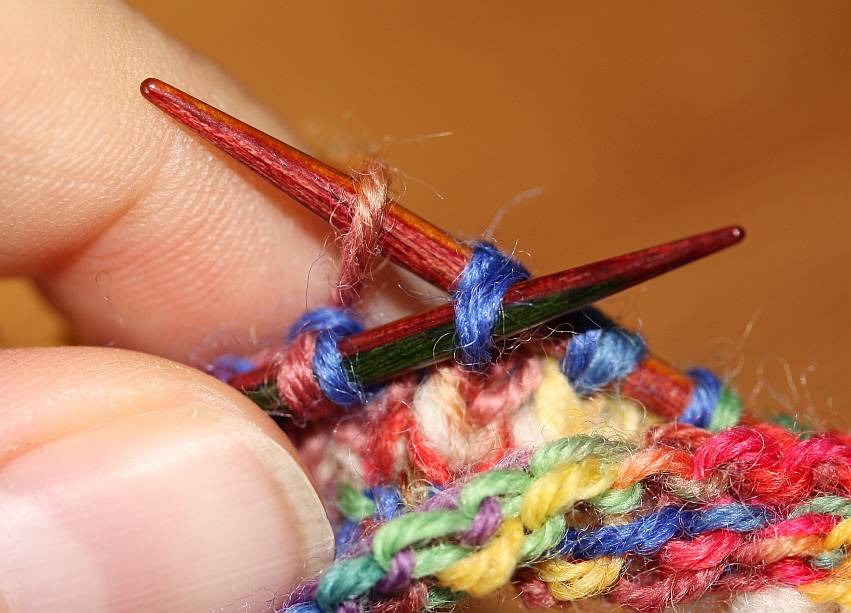
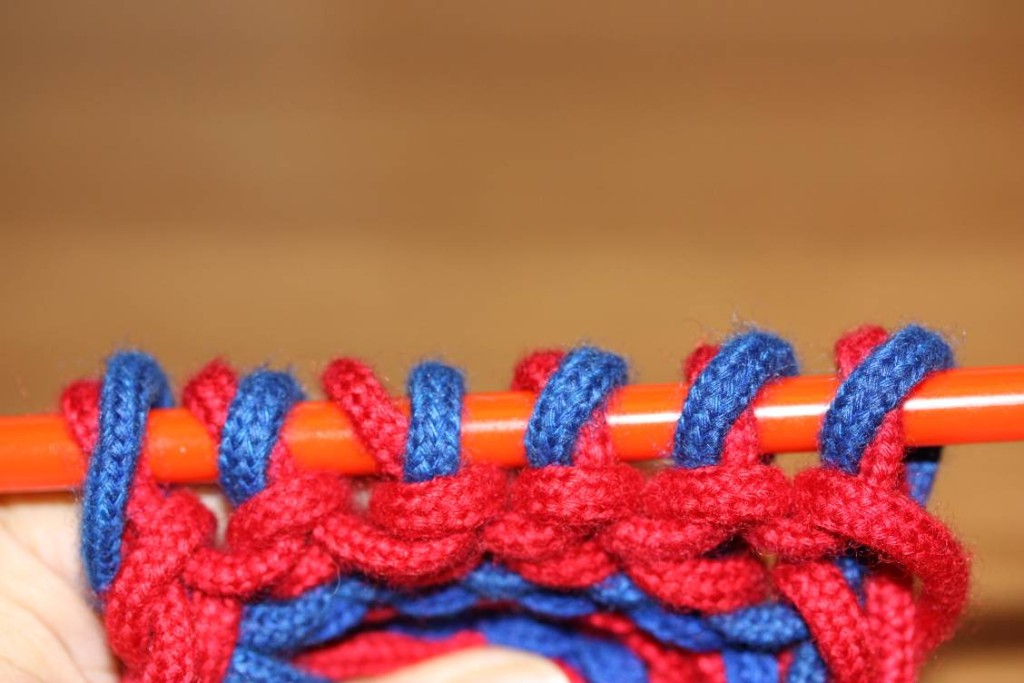 View from the back - you can see how the stitches sort of cross over each other on the needle.
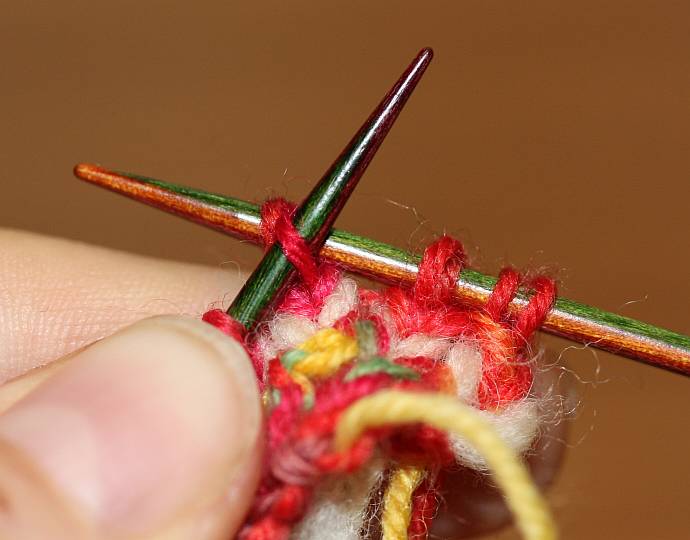
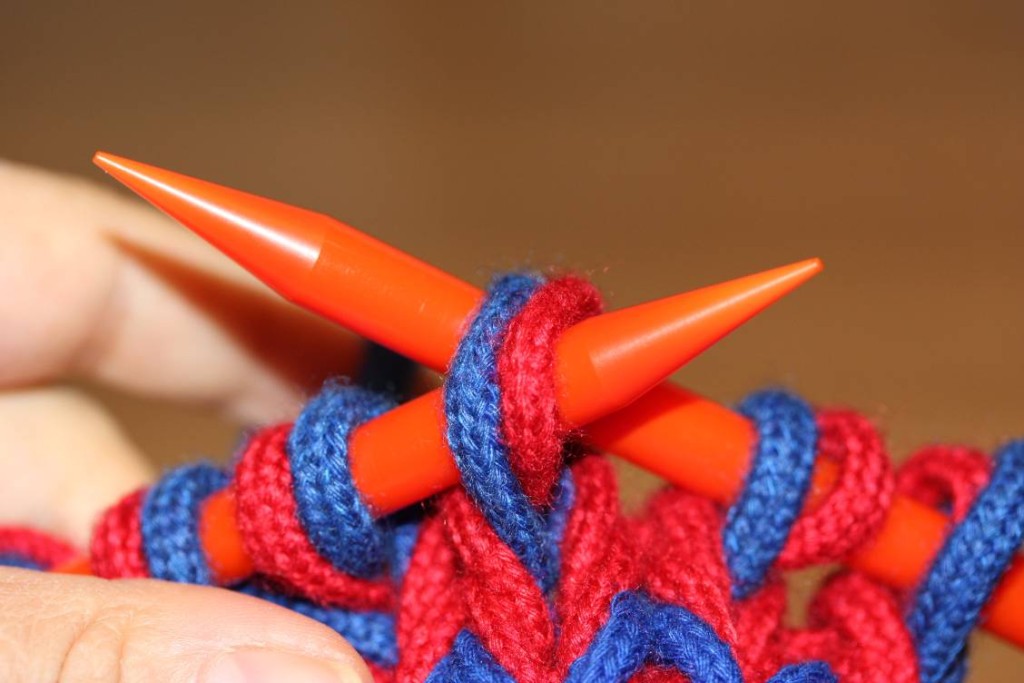 Insert left needle through both stitches on right needle.
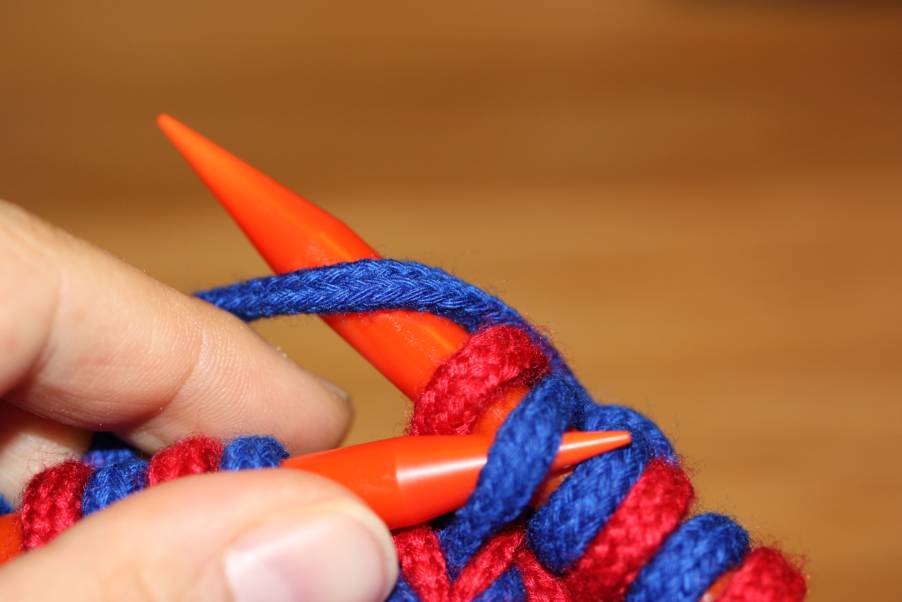
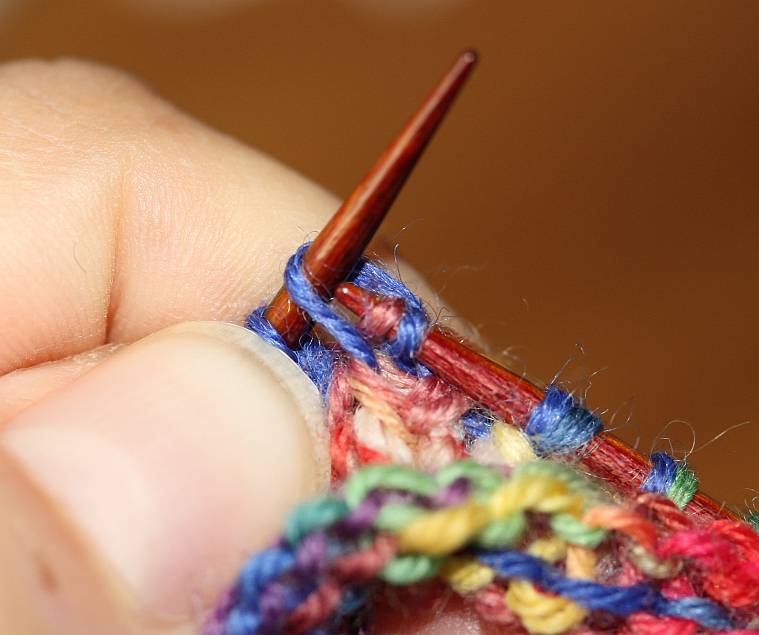
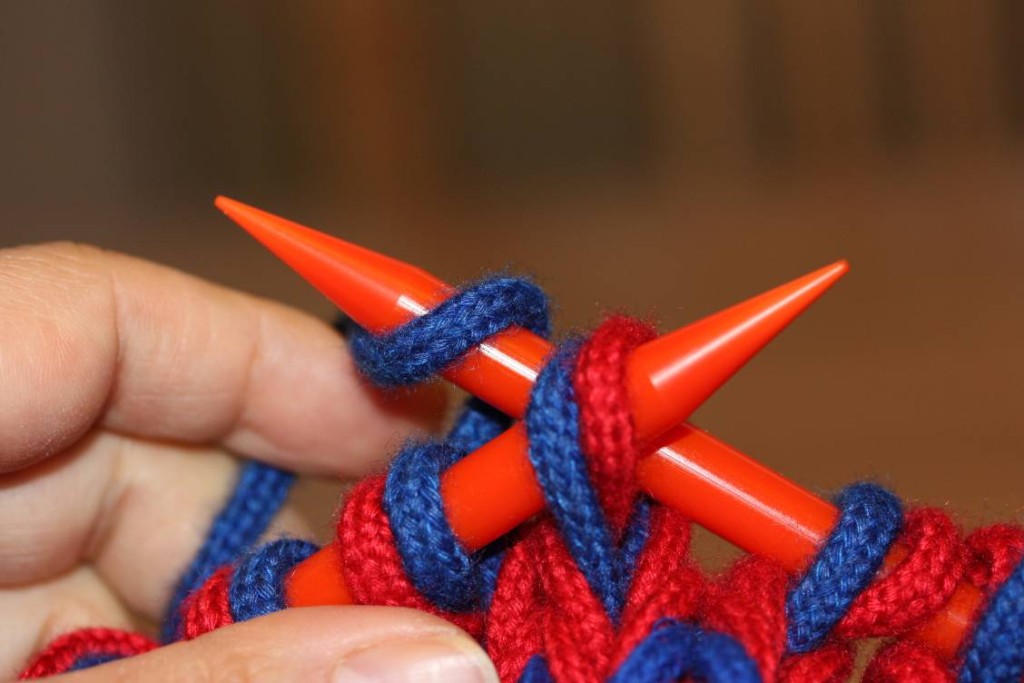 Wrap yarn from back to front around right needle, pull through both stitches...
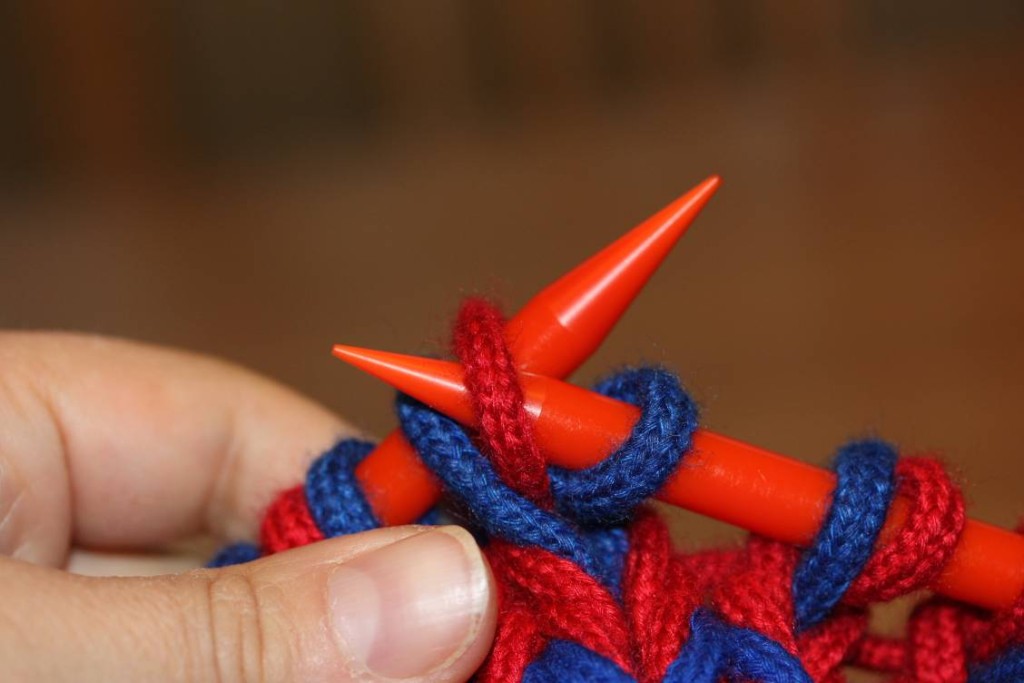 ... and transfer first stitch on left needle to right, dropping the second stitch off the needles.
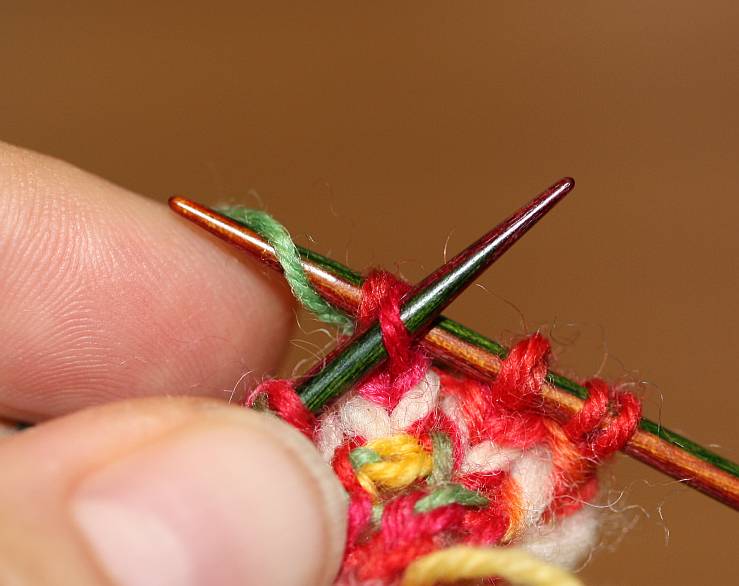
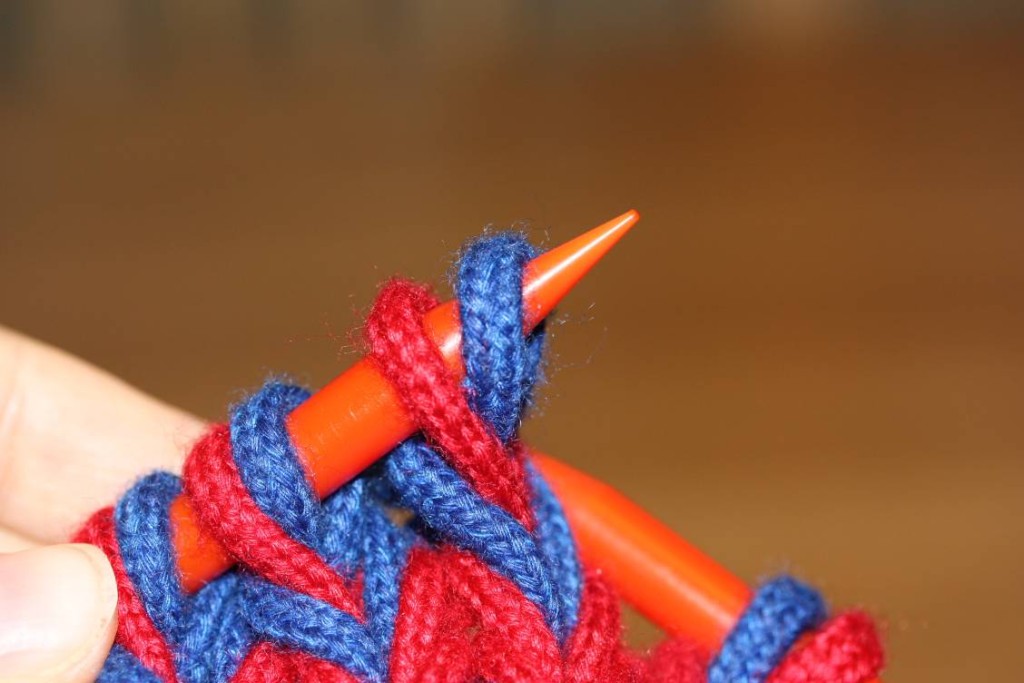 Then transfer both stitches to the left needle.
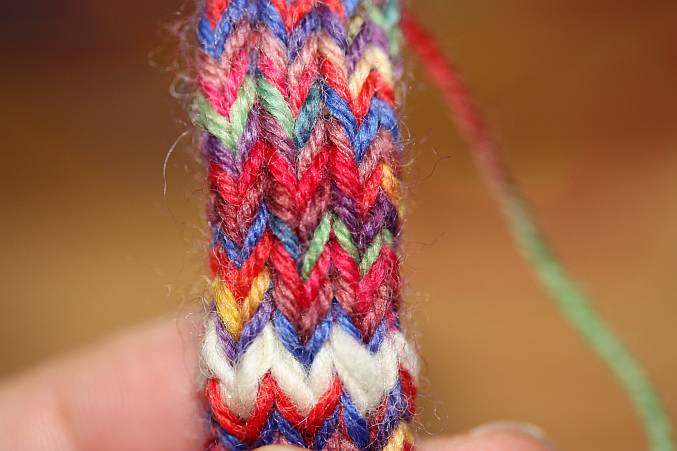
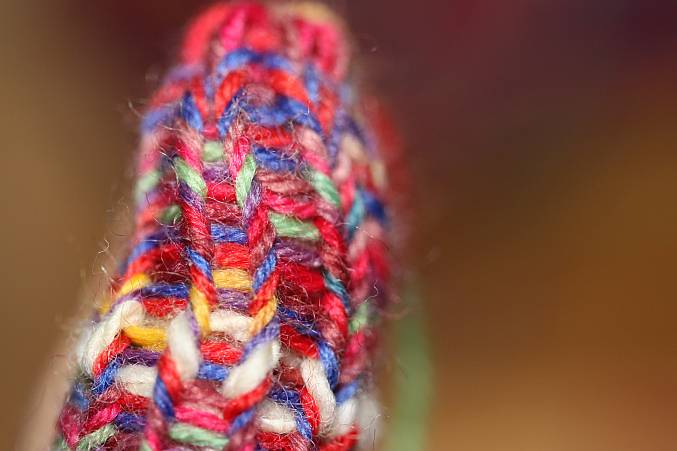
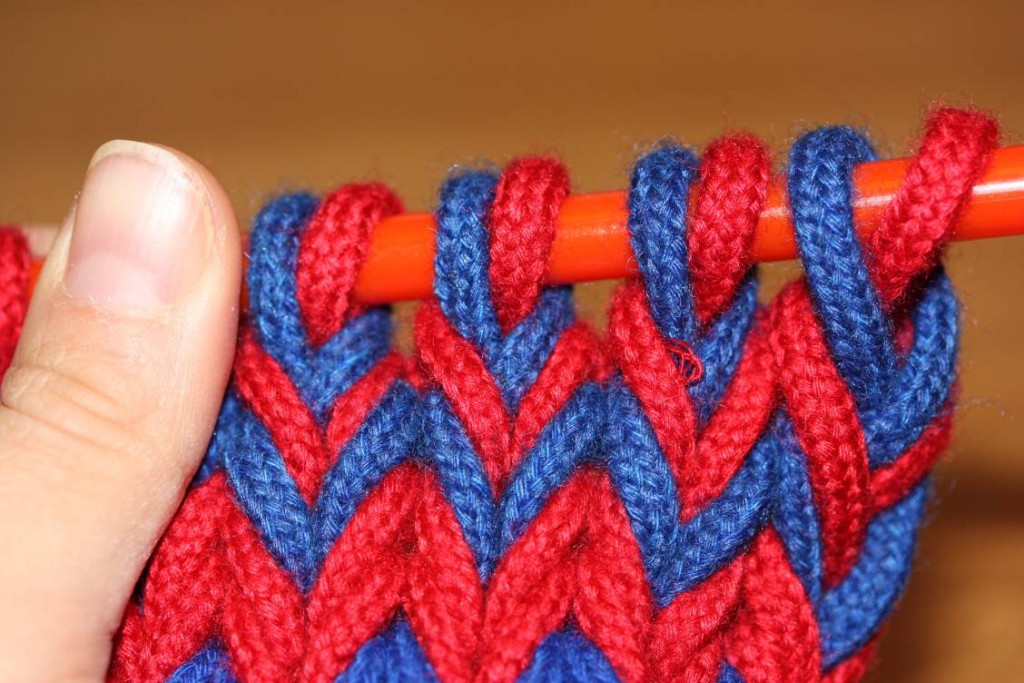 The result after one more regular row: after the return row, the stitches that were worked in the return row are twisted...