Latest Comments

Guest - Aislinn Dyestuff Citizen Science.
09. Oktober 2026
This is a great project. I look forward to the results. Thanks for letting us know.
Guest - Aislinn Time for...
09. Oktober 2026
Looks delicious!
Guest - Katrin Sprang Discussion
18. September 2026
Hi Rachel, I have looked for more photos of you, but that was not very successful. I found a link on...
Guest - Beatrix Sprang Discussion
15. September 2026
That lozenge pattern element is not a photograph, but a scan. So it should be to scale. But I pinned...
Guest - Katrin Sprang Discussion
15. September 2026
I was not referring to Rachel's reconstruction (is the reconstruction you refer to the one photograp...
FEB.
20
2

More Sprang Stuff.

I have been dabbling a bit more with the Lengberg cap sprang - on and off, though mostly off in the last months, and now it's more on again. (I am on row 48 or so of almost 200, and I realised that I will need the frame for the Sprang workshop in June, which gave me a nice bit of extra motivation to finish before then.)

While I did make the pattern for the hands-on piece for an exhibition about women's networks by marriage, due to start in May, the piece was done with slightly thicker threads and ran much longer than the original for the same amount of rows. Our solution was for me to make fewer rows - it's enough so you can still get a nice impression of the pattern, but it also was a good compromise for the museum budget. In this case, being a bit "off" from the original was thus not really bad.

It still irked me a little, especially after taking more looks at images of the original and realising how incredibly dense it was. So I made another set-up (with probably way too long threads, but I wanted to have room to manipulate at the end still), with slightly thinner threads, and made it my main task to get the fabric really, really, really, really dense.

By now I am far enough to see how well it worked - and I am actually not too far off the original this time!

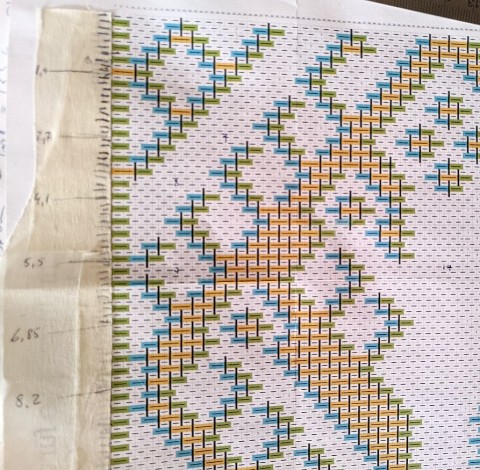
This image shows you part of the pattern chart written by Carol James, with my marks of "done" rows and, more importantly, small numbers giving the length in centimeters at that place on the original, calculated from the amount of overall rows and the full length of the original piece. It's a guideline, thus, nothing more - but I find it very helpful.

As you can see (more or less well), I should be at about 6.85 cm of length now. I am at... 
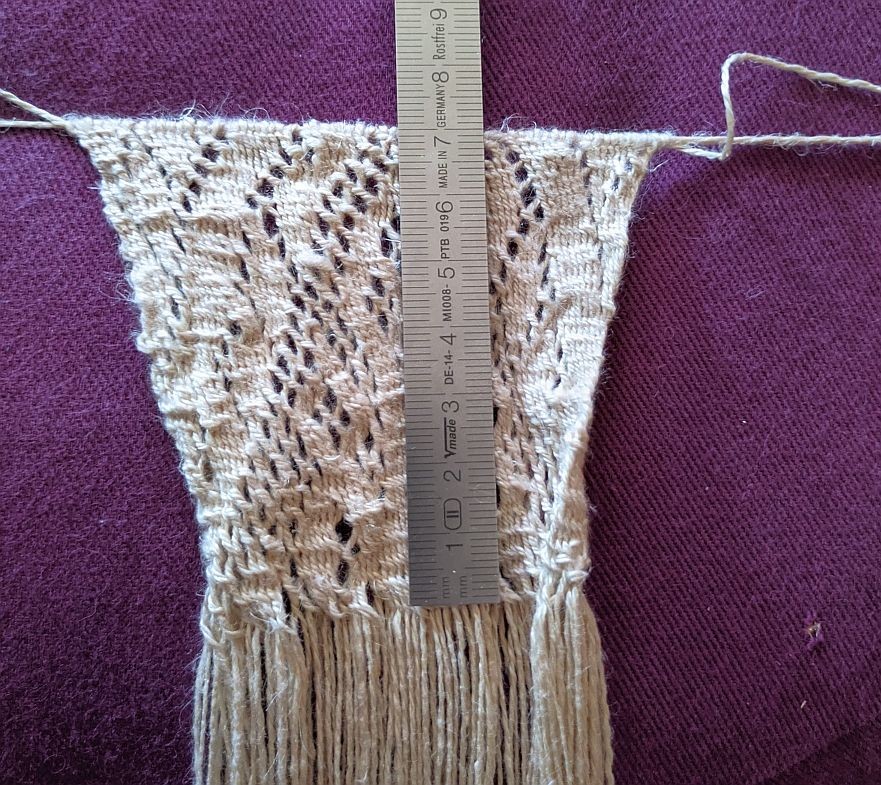
...about 7 cm. That is not too bad! The bottom piece is a little more irregular, and I measure something between 7 and 7.3 cm there, but I still have hope that it might even out again some more.  

The trick to getting there was, apart from having the right thickness of threads, working with very little tension and pressing the new row in very, very, very hard. That includes pulling the threads against the weaving sword in small bunches, and repeating it across the width several times. It doesn't take quite as long as the braiding row itself, but it feels almost like it!

So this is how the frame looks, and yes, that is my working "tension".
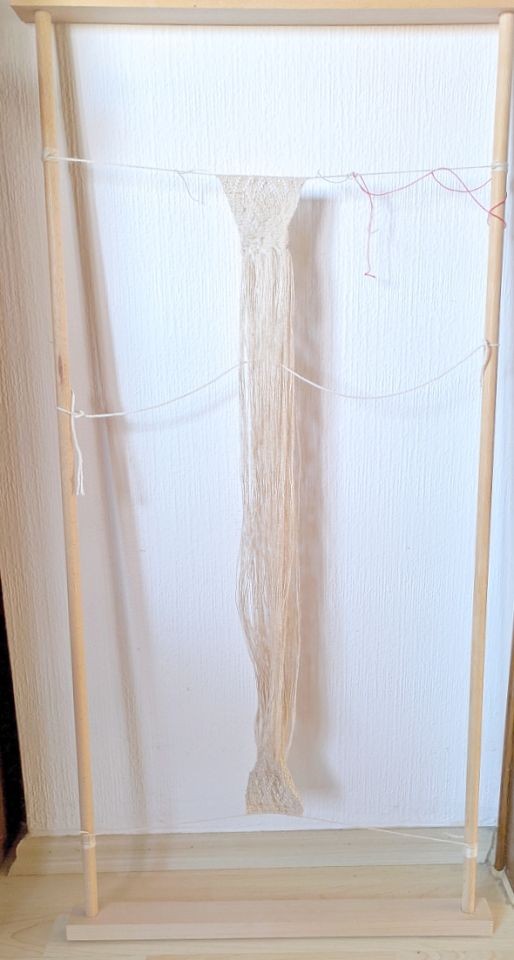
It does work, though! And I can have a little more working tension when doing the manipulation, too, as I am working close to the top fell. Now only about 150 rows to go, and I will be done! 
0
JAN.
30
0

Sprang Workshop!

In connection with the sprang cap I made for a museum exhibition, there will also be a sprang workshop - at Burg Trausnitz near Landshut, on June 27. The day starts with a guided tour through the exhibition, and then there's a lunch break, and then there's the workshop. I'm already looking forward to this, it's far too rarely that I get to teach sprang... and maybe I can manage to get the for-fun piece that I currently have on the frame done until then.

(Actually, I should, as it's on one of the workshop frames...)

If you are interested, you can go here to find out more about the (German language) workshop! 

0
JAN.
27
0

ICE hat.

I'm torn, these days, between keeping caught up on the news and finding a nice big rock to live under. Preferably with some nice, warm sands (because the German idiom is to stick one's head into the sand). But it's not helpful, and I know that, so I try to stay up to date at least more or less - on that fine line between knowing too little and knowing too much, or between blissful ignorance and total despair. Because, well, I probably don't need to tell you, it doesn't look so good in many corners of this world. 

In case you have red yarn and a few dollars left over, and would like to do some political knitting, you could knit yourself a Melt the ICE hat. The pattern is available in that wonderful time sink for knitters called Ravelry, and - in case you don't do Ravelry - also via payhip. All proceeds from sales of the hat go to immigrant aid organisations, and will benefit the victims of ICE.

And let me join in, even though I'm pretty far away from the happenings: Fuck ICE. Fuck the political climate that allows this to happen. Fuck the general human incompetence to learn from history in order to avoid repeat performances of shit (brown, obviously) hitting the proverbial fan.

Wherever you are, I hope that you are as safe as can be, and that you are doing your part to keep this world a sane and livable one. Because we need every little bit of that right now.

0
JAN.
26
0

Pins!

While it's snowing hard outside (still - we've had 27 to 30 cm since yesterday evening, and it's still building up) I spent some cozy time fiddling with pins. Or, to be more precise, making new ones.

This time, I used a different method for grinding the tips into shape, and it was much nicer to work and got better results, so I'm very happy with the new process. They're already marked as back in stock, and waiting to go to new homes and new adventures.

Now the only thing I need to tweak is how to wind the spiral for the heads, as there's still a rather large chance that the start will slip out of its holding place, and then everything turns around the core instead of adding new bits. 

0
JAN.
19
0

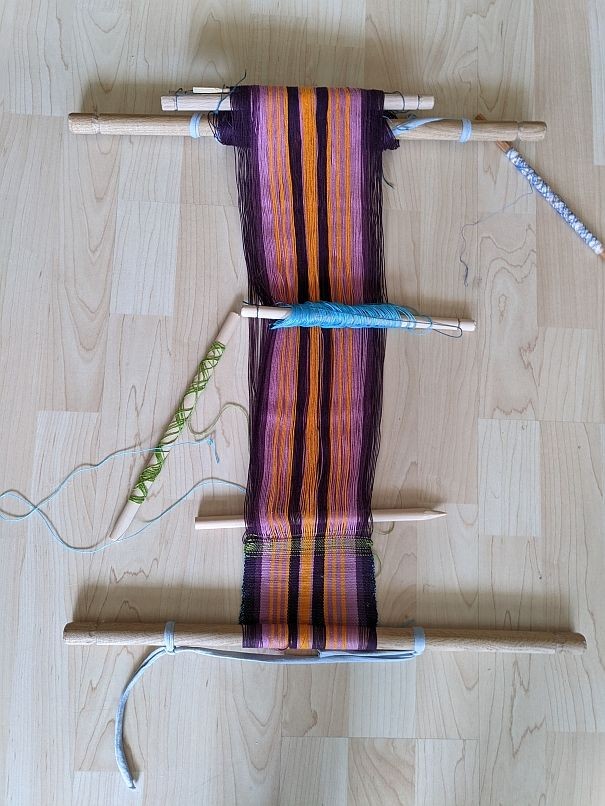
Back to the backstrap.

I've finally gotten around to taking out the backstrap loom thingie that I set up a few years (already!) ago. There are plenty of mistakes (starting at the very start when all of us in that session just left the warp slung around the sticks instead of sewing them onto the stick... well), and there's a lot of "trying to remember stuff" wonkyness, but I think I have now understood a few of the things I was going after.  

There's a stack of things that fascinate me here. One, it's such a simple setup - basically you need six sticks and a weaving sword, and you're good to go. However, you can still weave beautiful simple fabrics or intricately patterned ones. The basic sequence, even with a pattern weft, is very simple as well, but there's still plenty of possibilities to mess up. It will also teach you about symmetry (one of my selvedges is always much worse than the other, and I'm still working on finding out exactly what I am doing differently), about how much of an influence practice has, and about the difficulties of counting (when picking out the threads for the pattern part). Well, maybe the counting thing is a special "me" issue, but still. I'm also still working on a better understanding on when to let up on the tension, and when to up it a little, but I think that's something that might be for later.

The six sticks, by the way, are three for the ends of the warp (two at each end, a third one for the transfer when stitching the warp to a free one, and later for rolling up the fabric as you progress); one for the natural shed; one to hold the heddles; and one to serve as a stick shuttle. If you do patterns, you might want to add two additional sticks, one to sort out the extras in the natural shed and one to sort out the extras for the heddle shed. (That, by the way, is what was the thing I was puzzling about, and where I managed to miscount several times. In the number range from zero to four.) 

Tomorrow, though, and the day after, I will not be weaving - I will be off to learn more about making goldbeater's skin. Consequently, there will be no blogging the next two days!

0
DEZ.
03
0

Weft Carriers.

When you start to dabble into weaving today, one of the standard things that comes up as "important tool" is... a shuttle. And with "shuttle" I mean that iconic piece of wood (or other material, but more rarely) which looks like a little board with two deep indentations at each end. A little like a comic drawing bone, but with less bulk at the ends. I'm pretty sure you know what I mean - it's part of every "learn how to weave" children's loom, after all.

Some are curved a bit, some have a different shape, some are more like netting needles, but - with the exception of the loom shuttles for wider fabric looms or specialised mechanised band-weaving looms - they are everywhere where you are looking for weaving tools.

Unfortunately for those of us who both like this type of shuttle and want to do historical weaving, there's about next to no evidence for this type in medieval artworks. When this form of shuttle is so well known today, it is rather safe to assume that an archaeologist looking at a wood find could identify it correctly. But do we have such finds? Well... nope. With a little nope cherry on top. (At least that's my current knowledge - if you know of any of these "classic" shuttles in the archaeological record, especially the medieval one, please do let me know.)

The thing is, though - as far as I remember reading somewhere, that type of shuttle - the long, narrow board with two indentations at the narrow ends to help hold the weft - is a rather recent (as in 19th century) development. Unfortunately I am still looking to find that source again, but this would explain very easily the lack of this tool-type in the medieval finds.

It's also, if you ask me, rather... impractical in a lot of cases. If it's short, you can easily handle it, but if you want to weave something a little wider, it gets weird - because if you want to have some more weft, you are always getting one full shuttle length worth of weft thread. No more, no less. That might work okay if you have a shuttle about the same length as your weave is wide, but if your shuttle happens to be a good bit longer than your weaving width, it's extra awkward. (Disclaimer: I never liked these shuttle types much, and so I have avoided working with them as much as possible, with the result of being not very practiced in how to handle them, which might make stuff more difficult than necessary.)

And there's so many other ways to carry your weft. You can just have a length of thread that you flick through, and place a new length fairly often. You can do a butterfly (works very well if you have good butterfly-making technique). Or you can use a stick. I am very fond of the general idea of the stick shuttle, as you can unwind as much or as little as you'd like. (I also like to use a reed spool for some instances, especially when I will have the weft dangling from the weave because I have need for both of my hands at other spots, and the reed is lightweigt plus will allow me to cut a notch in it where I can secure my weft. So it, you know, dangles and doesn't fall to the floor. Because that is annoying.)

The Swedish inkle looms, which are made for the rapid home production of bands, are a very nice example where a kind of small stick shuttle is used:

0
NOV.
20
0

Hah. The Heddle is here.

One of my favourite ways of getting new things into the shop is when someone approaches me with the need (or desire, I do not care) for some replicated tool.  

In this case, one of my lovely colleagues had done research about Roman-time rigid heddles, made from bone, and was especially interested in one specific piece, which was found (fragmented, unfortunately) in a man's grave. 

So I got asked the question on whether it would be possible to have reconstructions of this... and to both our delight, yes, it was!

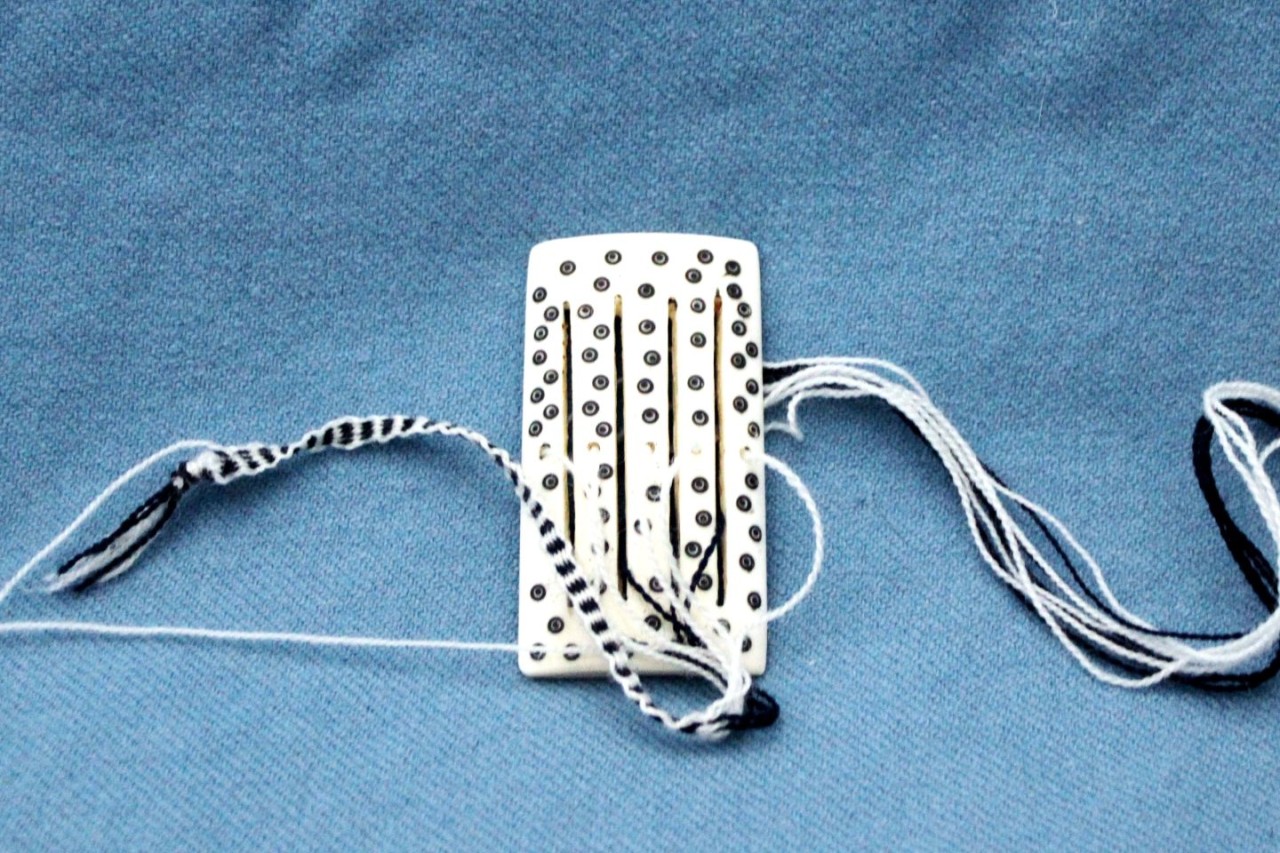
It's small but very, very pretty - and with four slits and five holes, that would be enough to make a slim lace, some narrow band for whatever use, or maybe a starting border for a loom. And of course I could not resist to give one of them a little try with a bit of dark and light wool yarn.

The thing is freshly listed in my shop now - you can have a closer look at it here.

0

By accepting you will be accessing a service provided by a third-party external to https://pallia.net/

Kontakt