Latest Comments

Guest - Aislinn Dyestuff Citizen Science.
09. Oktober 2026
This is a great project. I look forward to the results. Thanks for letting us know.
Guest - Aislinn Time for...
09. Oktober 2026
Looks delicious!
Guest - Katrin Sprang Discussion
18. September 2026
Hi Rachel, I have looked for more photos of you, but that was not very successful. I found a link on...
Guest - Beatrix Sprang Discussion
15. September 2026
That lozenge pattern element is not a photograph, but a scan. So it should be to scale. But I pinned...
Guest - Katrin Sprang Discussion
15. September 2026
I was not referring to Rachel's reconstruction (is the reconstruction you refer to the one photograp...
JULI
21
2

Current Knitting.

I sometimes complain that my knitting projects all take ages and ages - though I know very well that this is not due to my knitting really slowly. My actual knitting speed is more of a medium speed, but I tend to not knit most of the time. And if you let that half-finished pair of socks languish on the needles for half a year... well, then it will take more than half a year to make a pair of socks.

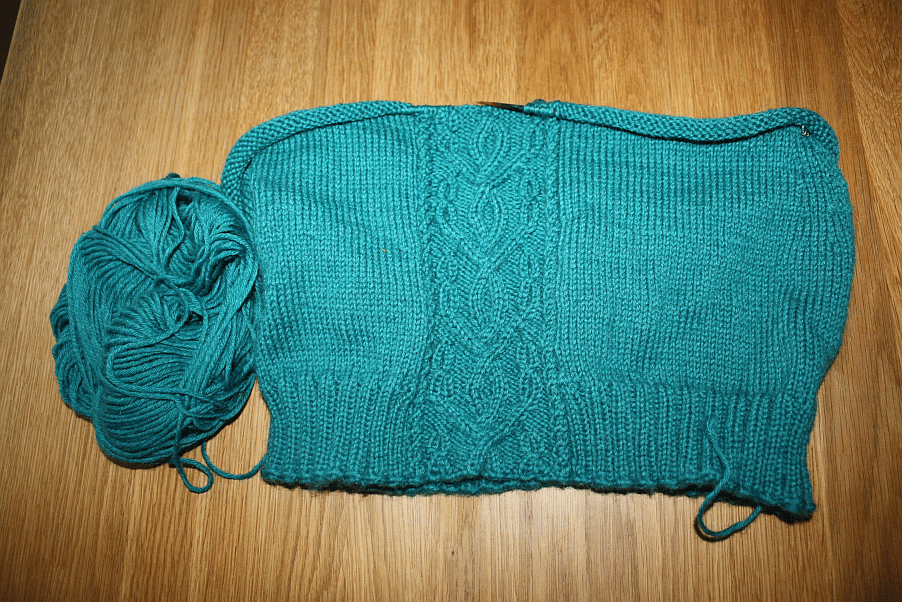
Anyway, current knitting is more or less progressing, for a change - though in the case of this sweater, the wool has already sat around for a long time, so maybe the languishing is all dealt with and I can finish this (astounding thought!) without too much downtime:

moyenage_waist
It's the Moyen Age sweater, and I really like the cable motif (though I have no clue why it has the name it has). It hits a nice balance for me between mind-numbingly plain stockinette (booooring!) and excitement and fingerwrestling with the cables (tight knitting has its downsides), so I'm happy to knit on it, and I'm already past the waist decreases and starting to increase again.

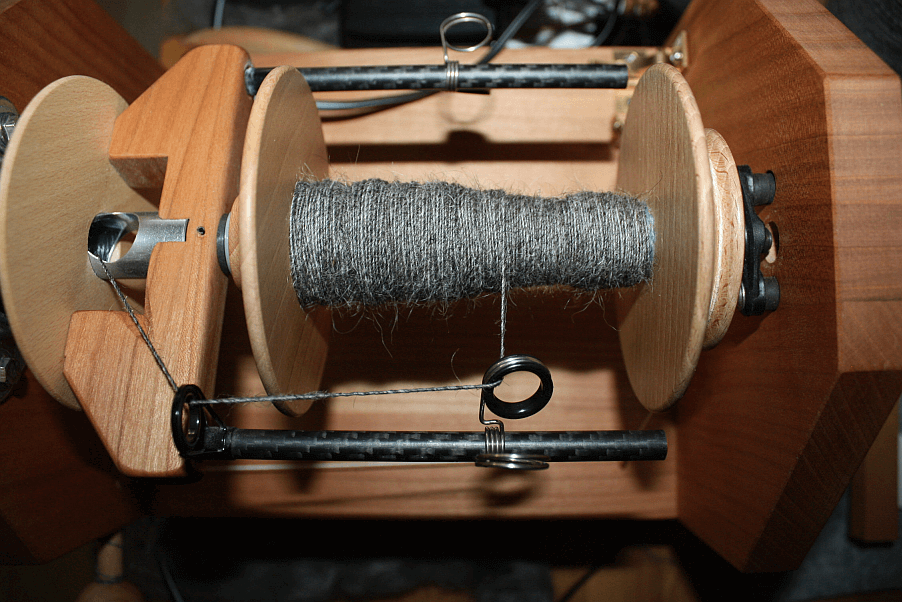
The other knitting-related thing is not progressed much - the first bobbin of grey Gotland yarn is finished, but the second still is in this sad state:

halfspun
I haven't gotten around to sit and spin in the evenings these last days (or weeks? Time flies), but it's on my list, and some day, it will be full, and then it will be plied, and then there's a gauge swatch in the future, and figuring out how to combine that yarn with the half-Gotland-half-colourful yarn. And then, eventually, a garment.

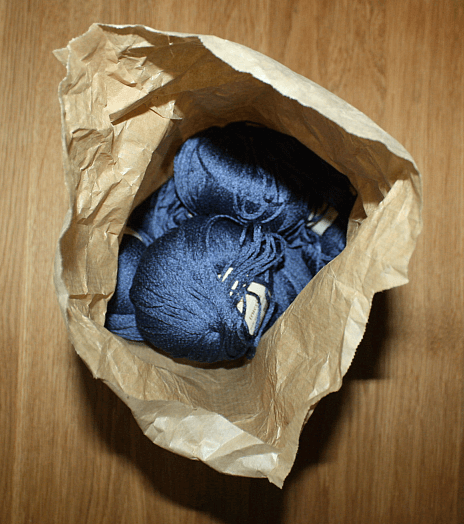
Just in case the sweater is finished before the spinning is, though, there's something else hanging out here in the stash. I was accosted by this yarn a few days ago - it sat in the "really really has to go so is really really reduced"-bin in a yarn store I happened to pass. Well, what can I say - it's silk, it's blue, and it was cheap. And obviously, it's now mine.

truesilk
Also... it should be sufficient for a small jacket. For summer chill. (Next summer, obviously!)
0
JULI
07
4

Workshop Planning - final stage: done.

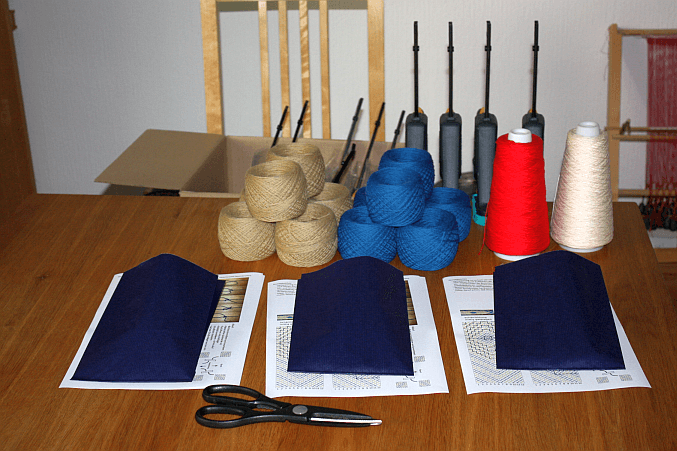
The workshop planning for the tablet-weaving is finally, finally finished. I've done a testrun on Wednesday, with three lovely ladies volunteering to be my guinea pigs for trying out the concept and the materials - and it was a good thing, and a fun afternoon to boot.

[caption id="attachment_3229" align="alignnone" width="677"]All ready for the testrun! All ready for the testrun!


The good news (for me, at least): the materials, setup things, and general concept are all sound, and they all did work as I had hoped them to. The timeframe of about 4 hours, a little more if necessary, also works.

Of course, though, there were a few issues. "No battle plan survives contact with the enemy", right? They were, however, mostly small, and to my relief, all of them can be fixed easily. One of the small issues was a sort of back-firing effect from handing out pattern sheets - they were intended to help with visualising the patterns, and as a reminder on how they are done for after the course at home. They turned out to be rather distracting, as they were either not understood easily or, in one case, were understood well enough to be used to tick off the wefts that were already done. Which is, of course, a perfectly valid method to approach one's tablet weaving - getting or writing a pattern, then following it - but exactly the opposite of what I want to teach, which is knowing what kind of pattern you want to do, looking at the band, and then seeing what needs to be done in order to get the pattern you want. This, admittedly, is a bit more of a brain exercise than reading a written pattern and following it step by step - but it does give you the possibility to weave without a pattern, and the flexibility to change things on the go without getting (too) confused.

Well, this is easy to remedy - I just won't hand out patterns. Saves paper, too...

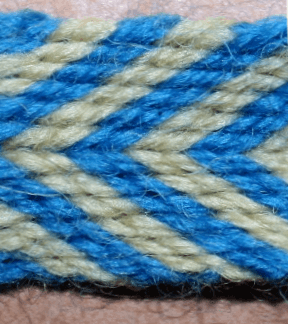
The biggest issue was my intended approach to teaching the 3/1 twill structure. Tabletwoven twill is basically a doubleface with staggered colour sequence - when you turn all tablets into the same direction, you get diagonal stripes. When I learned how to twill, I got taught with the band set up to make a chevron pattern when all tablets turn forward, so you get V-shaped stripes.

[caption id="attachment_3230" align="alignnone" width="218"]Band with chevron stripes. This will still be done in the workshop - but not as the basic setup for the twill part. Band with chevron stripes. This will still be done in the workshop - but not as the basic setup for the twill part.


This has the advantage of having a mirror-image in your band, so if you mess up on one side, the other side can help you in correcting your mistake. The problem for teaching a group with this method? You need a broader than feasible band in order to clearly see the twill structure, and get into the twill rhythm. When I did my concept and test-weaving, this didn't occur to me - I've done enough of the twill stuff to see the pattern emerge almost instantly, and with it the rhythm. With time, it becomes totally natural how the tablets move, and what you expect from them - and that is good and necessary, as twill patternwork will tend to twist your brain, so everything that is automatically done following a strict rule is one thing you don't need to pay attention to. (This is also why I have firm procedures when weaving and firm rules in how to set up the band - I need to know what direction of turning gets which diagonal, or my brain busts.) For the course, though, and beginners in twill, the areas worked in twill and in regular structure in this setup are too small, and things are following too closely on each other, and thus it gets too confusing.

Fortunately, this is also easy to remedy - with a different setup, and slightly different explanation with a different emphasis on what to look for. Which, with a few small changes to the handout, settles all my remaining problems with the course concept. Yay!

So now my script is updated, the handout has been changed, my list has been checked and amended with a few details, and the course is ready to take off. First instance, according to current plans, will be at the Nähtreffen (there's still spaces left, if you'd like to join us). And then - who knows? With about 4 hours, the course is fairly long to offer it at events like the Ravelry Meetup, but it's not completely out of question. And of course, it's always possible to book the course for a group of like-minded folks, either taking place here or where the group is based.
0
JULI
04
2

Crocheted snails, knitting spies.

Textile craft stuff just is so versatile, and here's two examples of it. First of all, a really nice article about knitting spies and knitted secret messages - though I'm rather convinced it's not a dropped stitch that actually happened, but something like a yarnover.

Knitting codes is definitely fun - the most patient husband of them all knit yoga socks that morse code spell out "Yoga socks", and he had a lot of fun with that. I've yet to do something similarly geeky, but it is on my list. (Though not very far up the list, I'll admit.)

The second link is not knitting, but crocheting: the clinic in Hannover is giving hand-crafted cuddly snails to children getting cochlea implants (German site). These children are born deaf, and they are getting the implant operation at a very young age - usually still a little less than a year old - which is of course quite exciting and frightening for them and their parents. So the staff of the clinic in Hannover has started a project back in 2015 where each of the about 100 children getting the implant each year gets a hand-crocheted snail to cuddle. It's intended not only as an emotional uplifter for the children, but also as a token of appreciation for this very big step in their lives.

In case you have itchy fingers now, the (German) pdf instructions on how to crochet the snails are linked from their site. And if you love the idea of the snails getting handed to children - all snails are crocheted by volunteers, and the clinic is always looking for snail donations, which are much appreciated.
0
JUNI
30
2

Course Prepping.

I had a lot of fun yesterday preparing for a tablet weaving workshop testrun - which, unsurprisingly, proves to be a lot of work. I last posted about this almost one and a half years ago, so it's been stewing for a really, really long time now. That is mostly due to logistics problems. One of the large stumbling blocks for me were the questions "How do you enable up to eight people to warp simultaneously?" and "How do you get the warps tensioned?"

The answer to both, in my case: F-clamps. I love those things, especially those single-hand F-clamps, and I've used two tiny ones for years now. I should probably say "abused", though, because, well, they are not intended to be clamped down onto something upside down and then get stuff attached to the stem sticking upwards. There's high-quality ones that will withstand this kind of abuse, though, and cheap ones that will eventually give up and come loose with rather little tension on their stem. Which means the sensible thing is to go for the higher quality tool... with the higher price.

Unfortunately, regarding my two questions, "F-clamps" is not the full answer. The full answer is "a shitload of F-clamps", and it has taken me a while to get to terms with that, bite the bullet, and invest. But I have found a good clamp, they have arrived, and I'm now working on finalising my teaching script, getting the handout (which will be a how-to-make-your-pattern cheat sheet) all done and lined up, and then there will be three nice guinea pig ladies coming over next week to try their hand and my teaching ideas.

It's all quite, quite exciting - and if it all works as planned, the course will cover warping in the "endless" method, the basic system and mechanics underlying all tablet weaving, how to read and write patterns, and how to do 3/1 twill on tablets, including how to work (and design) patterns in this method.

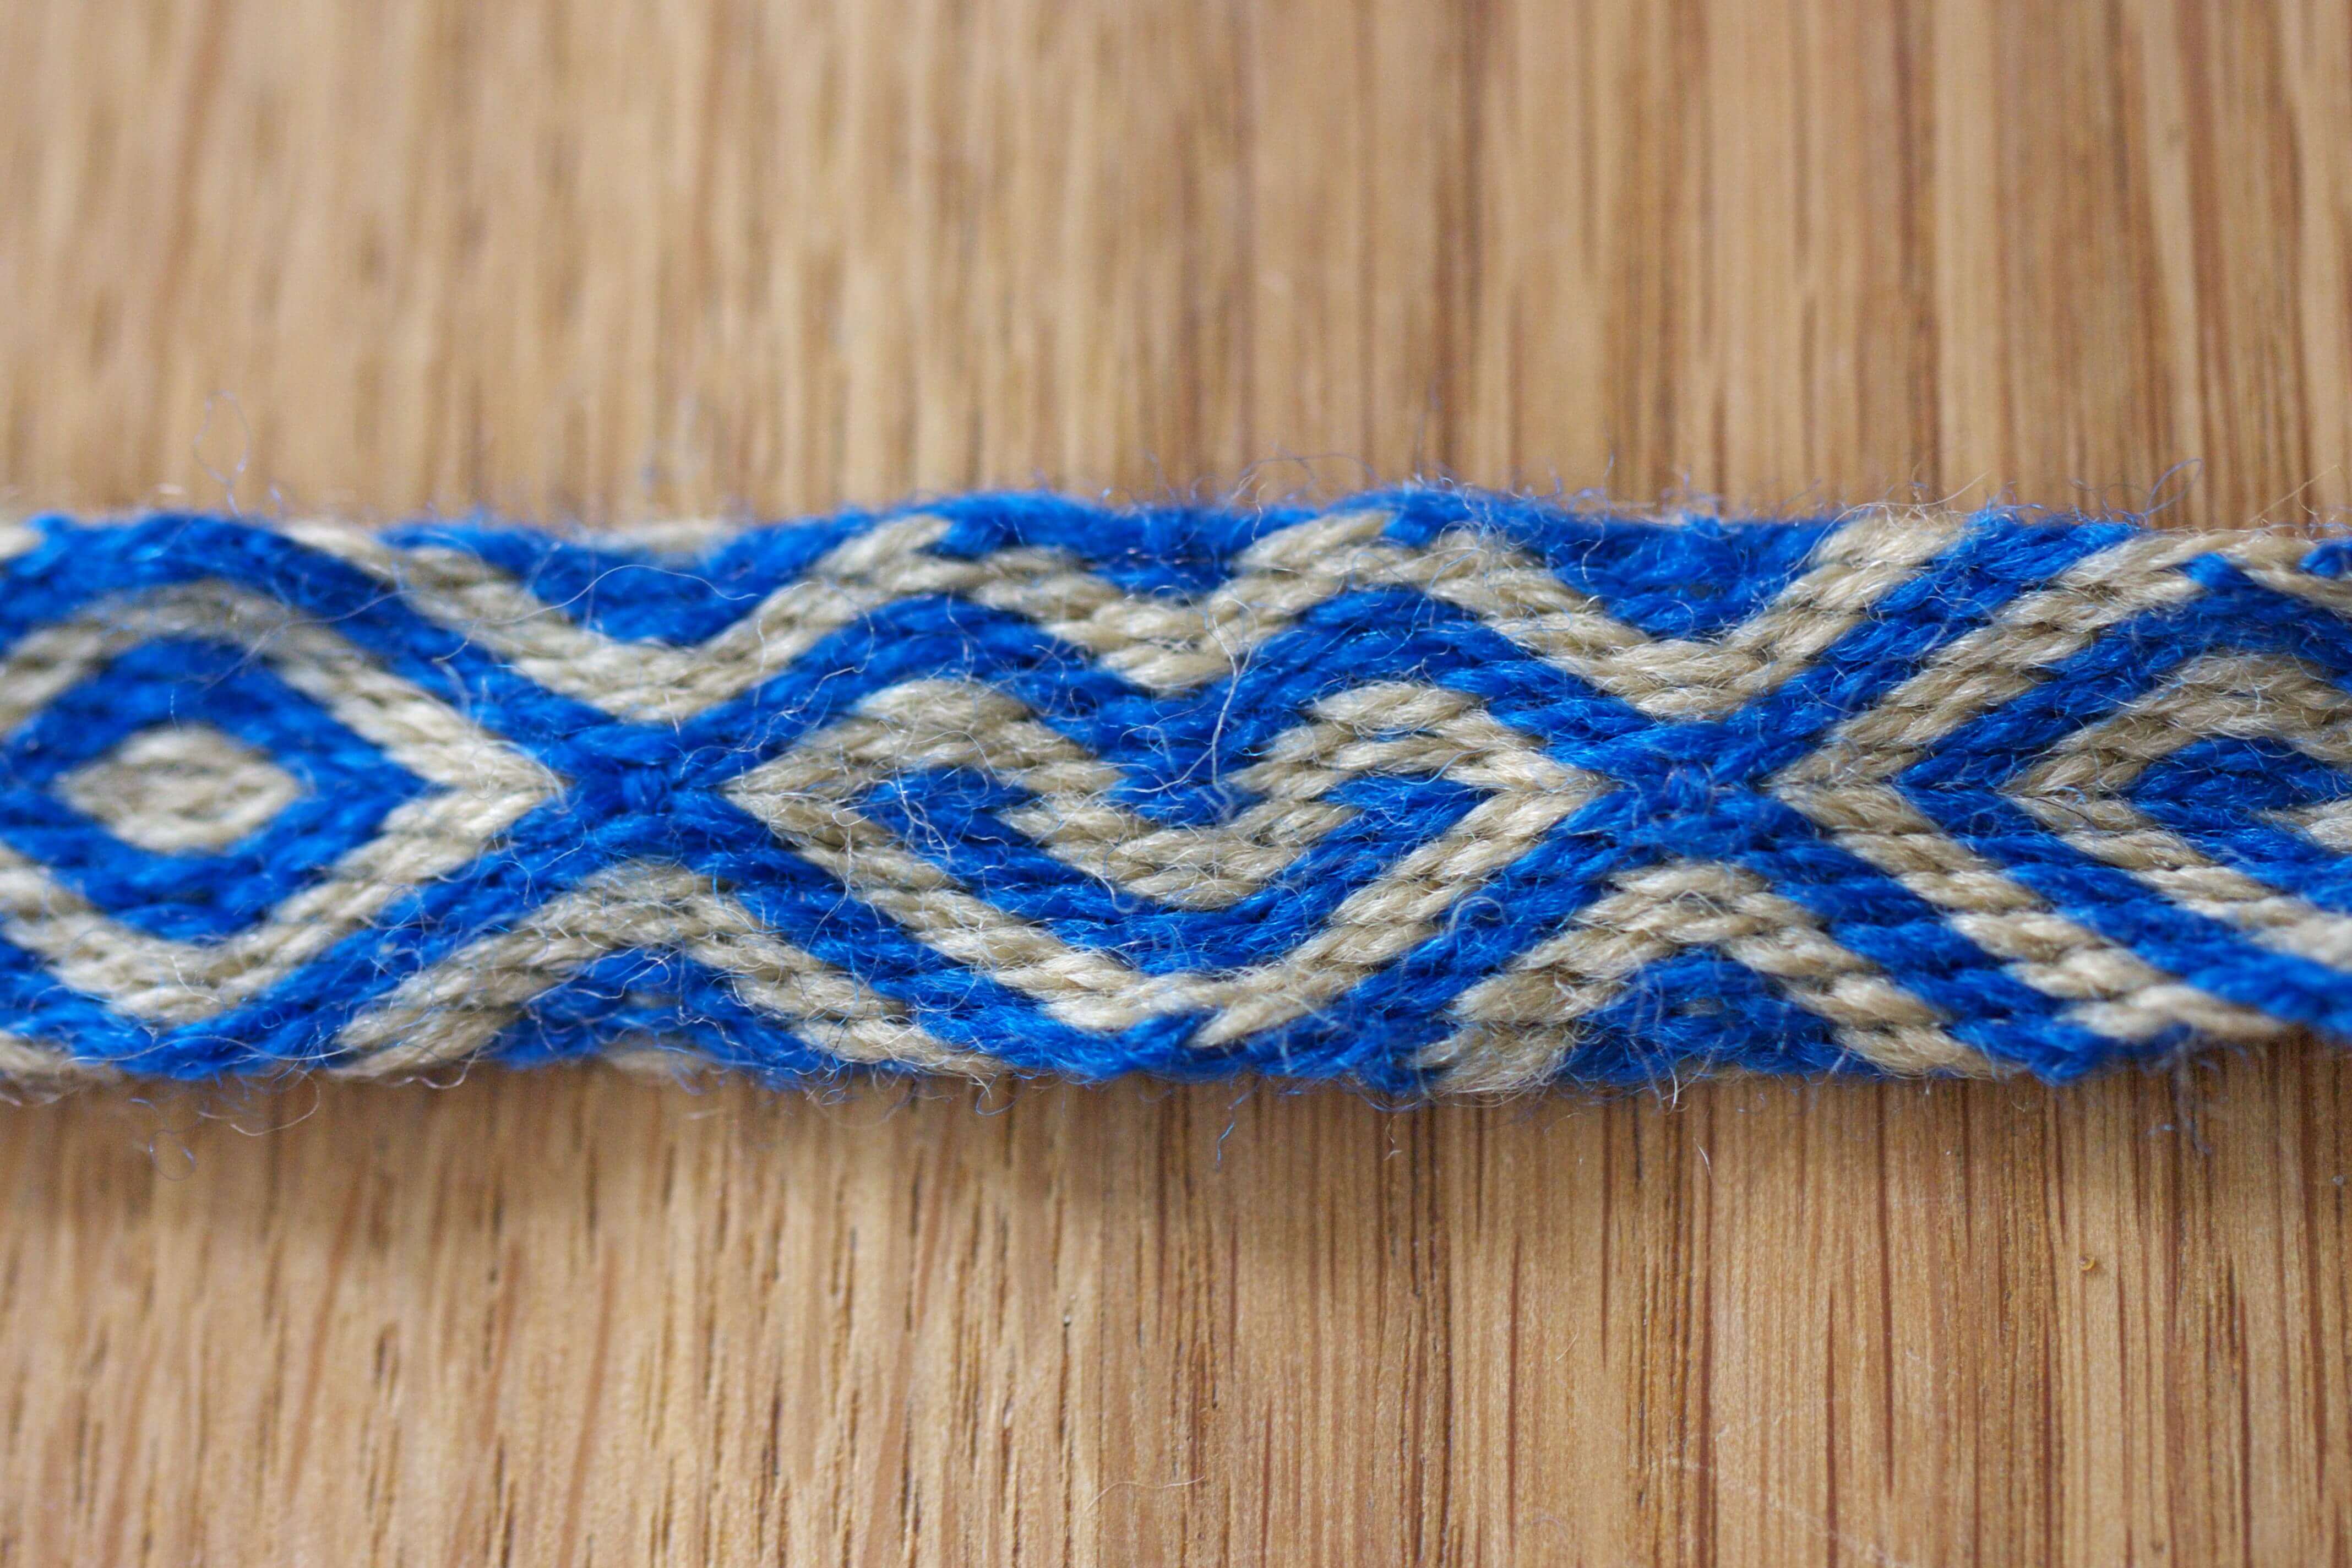
[caption id="attachment_3213" align="alignnone" width="4272"]One of the possible pattern bits that will be part of the workshop - and part of learning how to design swirls and stuff. One of the possible pattern bits that will be part of the workshop - and part of learning how to design swirls and stuff.


The course will then have its first proper appearance at the Nähtreff in October - which right now seems rather far in the future, but with the way time is flying, it will probably be happening before I know it!
0
JUNI
26
0

More from the Mini-Loom, Part 6: Wrap-Up.

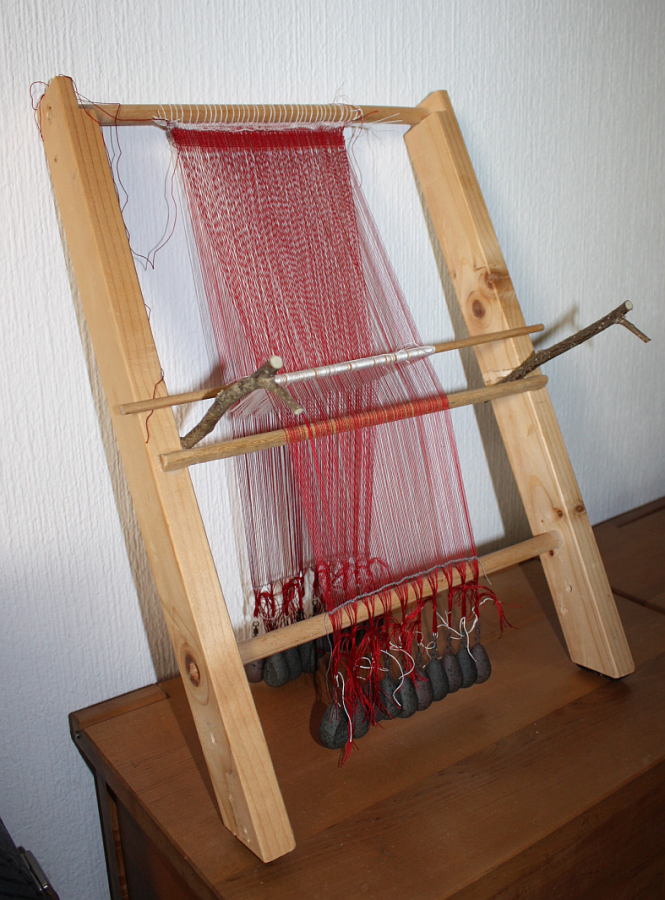
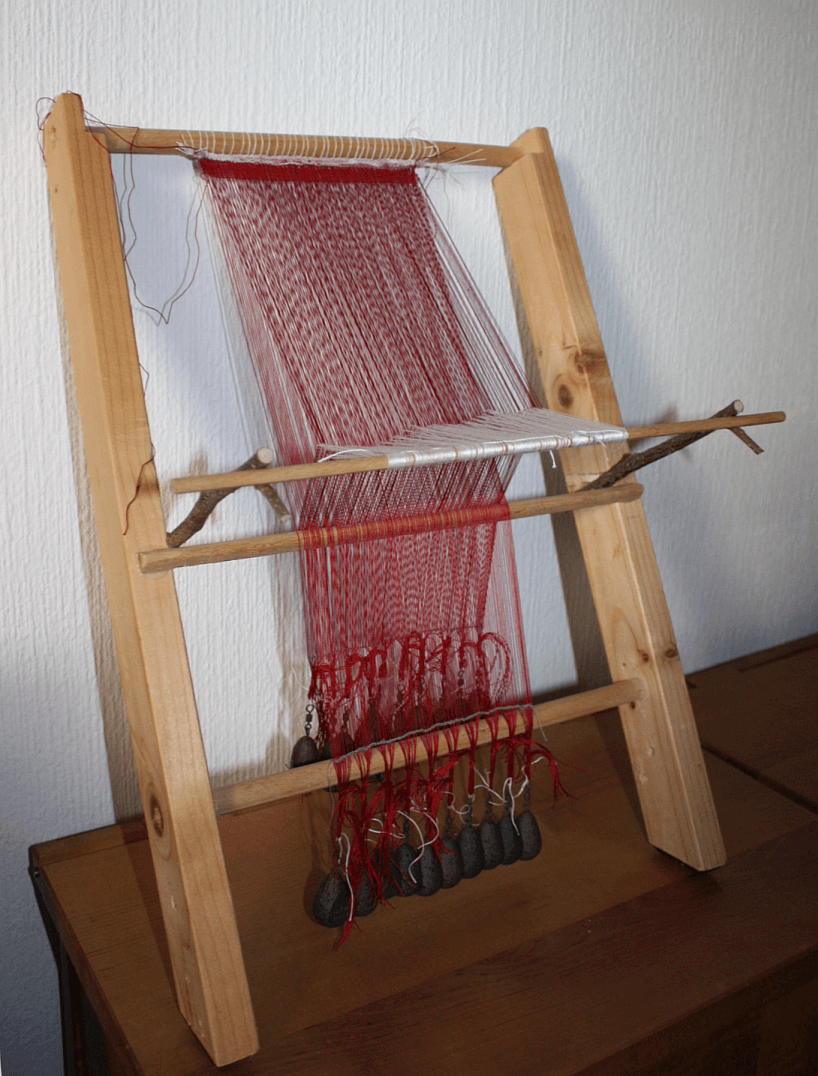
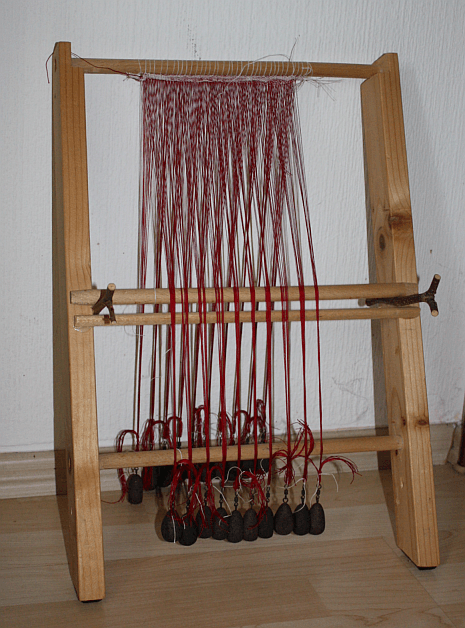
So now the loom model is done, and I'm quite happy with it, and here's picture proof of how it looks with the natural shed open:

loom_1
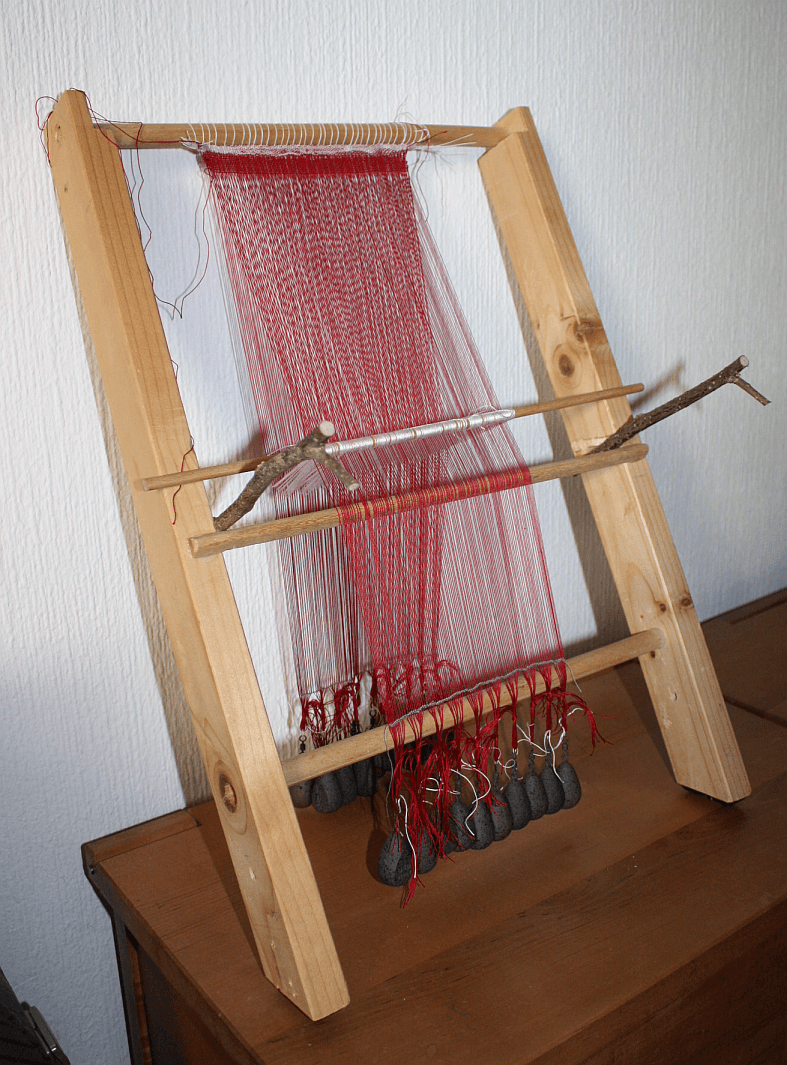
and the artificial shed open:

loom_2
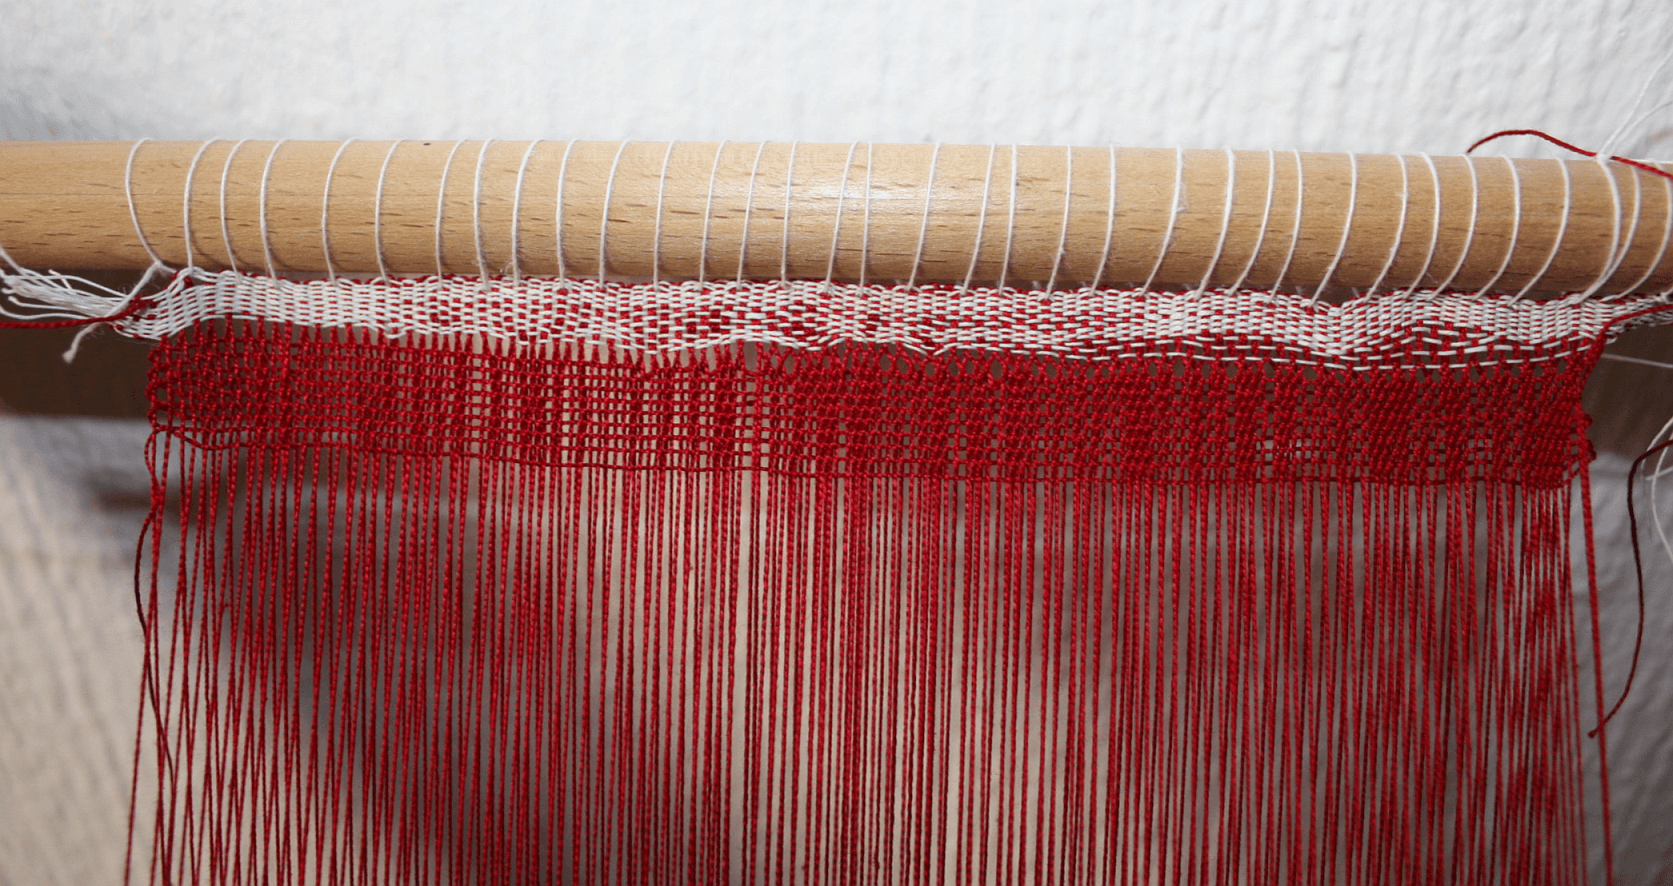
And did I mention that it is ridiculously easy to make mistakes when setting up a loom? Here's picture proof of that, too:

weave
It's not too obvious, but I made a heddling mistake, and there is a double thread in one of the sheds, mucking up the order. You can see that the starting border looks a bit less horrible now that I have tensioned the warp and shoved the side in, though it still has issues on the right-hand side. You can also see that there is a nice crossover of the warp yarns on the left of the fabric, just as it should be, and then there is a different, more obvious crossover of the warp yarns on the right-hand side, after I made that heddling mistake. It was clear to me that there has to be a mistake when I finished heddling, because there were two back layer threads where only one should have been at the end, but I didn't take the time to find the mistake or re-heddle.

And actually, while it is not entirely flattering for me, and is a little awkward to say "hey look, I messed up here, that is how a weaving fault looks", I have decided to leave the loom as it is - because yes, it does give an opportunity to tell people "look, setting up a loom is not as easy as you might think, and making mistakes is easier than you'd suspect, and you can see how one single little mishap leaves its mark right through the whole fabric, and things like this can also help conservators and archaeologists identify an individual fabric or find out how things were cut from one fabric"... so it's a teaching opportunity, and well worth feeling a little awkward for.

Plus it's not bad to be reminded from time to time to be humble in regard to these old techniques, and that the skills and mastery of our ancestors with these seemingly simple tools were really, really incredible.
0
JUNI
23
0

More from the Mini-Loom, Part 5: Spacer Chain.

The next thing that I sort of dreaded: the spacer chain.

For many, many years, I had answered all questions about whether or not I knit with "No, I don't, that is too modern for me!" and the same is true for crocheting, which is even more modern. So I'm very, very far from being a heroine of the hook - and it's just that who would have been needed for that next step.

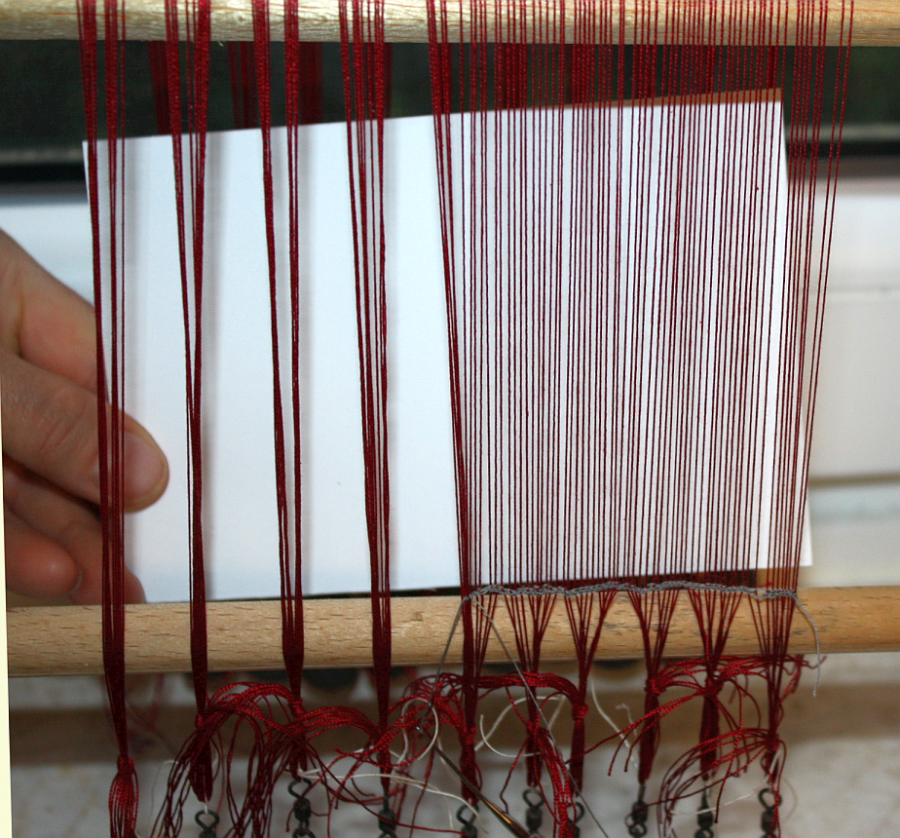
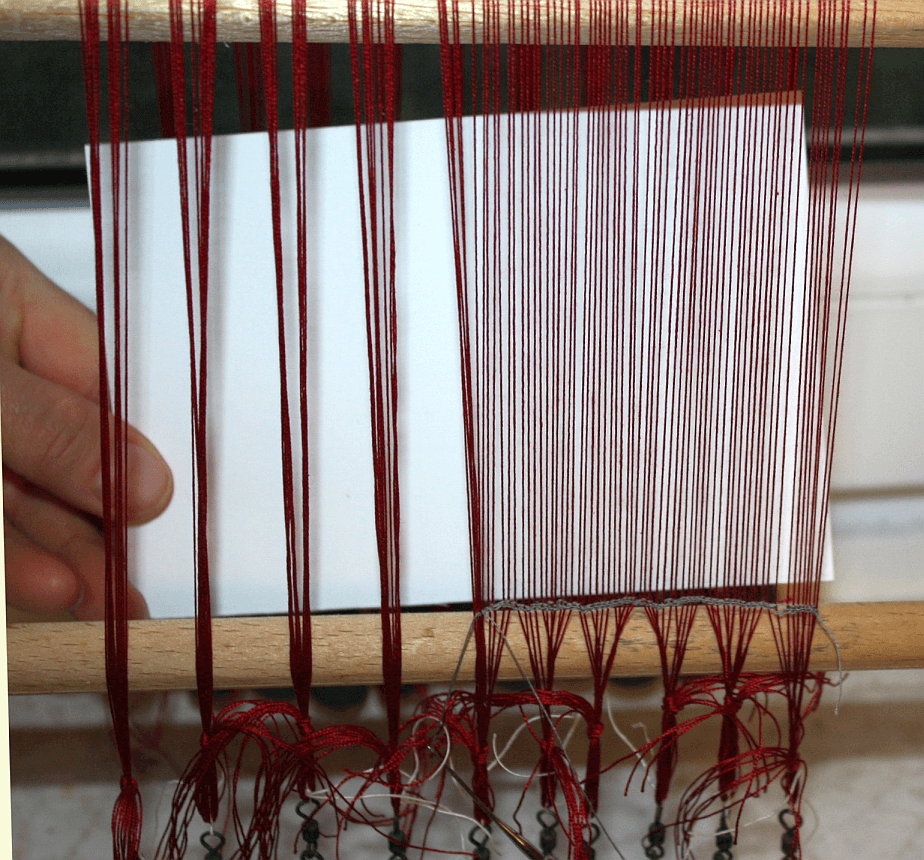
As you have seen on the picture with just the weights on and without the heddles, the threads on the loom tend to lump together. It gets better with the heddles in, but they still run together as they near the weights - something that is made much less obvious by adding a spacer cord to the bottom.

The spacer cord is basically just a chain of chain stitches made around the individual threads of each layer, in order. (Obviously in order.) Making the spacer cord was the job I had most trouble with (see above: Heroine of the Hook, not), and it took me three starts to get it right enough to pass muster.

The first tries were made even harder by using the same thread I had used for the heddles (another cotton thread), which has a tendency to split when handled with a crochet hook. The final chain is made with Gütermann silk, and it does do a nice job at spacing.

You can see the difference this puny little chain makes on the picture:

setup_2
I had hoped, at the start, I might be able to omit the spacer chain - but this picture shows very, very clearly that it would not have been an option. At all.

So, after a lot of cursing and trying a larger and a smaller crochet hook, and finding that no, sometimes it's not the tool but the tool wielder who just needs to practice more at that, dangit, and finding again that it is ridiculously easy to make mistakes, I had finally finished chaining all two layers of their 109 ends each.

Whew.

And with that... the loom is set up completely, and ready to go forth and demonstrate how a warp-weighted loom does work.
0
JUNI
22
2

More from the Mini-Loom, Part 4: Shed Issues.

It's been a while since we had scale issues, right? So it might be time for the next instance of these. And the shed should be a nice place for them...

I already mentioned that the shed might need to be deeper than proper scaling would mean, as I need to fit my fingers through it. While I do have rather small hands, I found that a shed depth of 6 cm would be nice to handle - a rather deep shed for the small loom.

So my heddle length is also 6 cm... which means that to change the shed, I have 6 cm of way for the two layers to match, and then I need to go as much further as my artificial shed has to be deep. Which, in my case, is 4.5 cm. This means rather long holders for the heddle rod, though - 10.5 cm in length in the model.

For this, the hazelnut bush in the garden had to lose two branches, because the holders that were attached before were too short - the artificial shed only opened about 2 cm or so, and that is definitely too narrow for my fingers.

You can see the difference between the holders on the first image and the second one - the new ones are considerably longer.

setup_1loom_2
So now the heddles are done and in proper length, the shed issues are solved, and the loom is ready for the next step: chaining the spacer cord into the bottom edge...
0

By accepting you will be accessing a service provided by a third-party external to https://pallia.net/

Kontakt