Latest Comments

Miriam Griffiths A Little Help...
27 November 2024
Perhaps more "was once kinda good and then someone added AI"? I'm getting very fed up of the amount ...
Natalie A Mysterious Hole...
26 November 2024
Oh my! I cannot tell what the hole's size is, but I expect someone is hungry and may be going for ea...
Katrin Very Old Spindle Whorls?
25 November 2024
Yes, the weight is another thing - though there are some very, very lightweight spindles that were a...
Katrin A Little Help...
25 November 2024
Ah well. I guess that is another case of "sounds too good to be true" then...
Miriam Griffiths Very Old Spindle Whorls?
22 November 2024
Agree with you that it comes under the category of "quite hypothetical". If the finds were from a cu...
NOV
29
0

More Manesse, and barbette-and-fillet thoughts.

Yesterday's post brought up a question in the comments regarding whether the fillet with the pie-crust edge was closed on top or not... good question.

Personally, I tend to see all of the fillets as open on top unless I can clearly see otherwise. That is possibly due just to a personal quirk, but my reasoning is: You don't really need it closed on top for stability (stiff linen holds up just fine even without an inlay of leather, or felt, or whatnot), and it's easier to adjust in size if you don't close it. So you can have a strip of linen that you tack together or even just hold together with a needle in the back, and if your hair changes or your hairstyle changes or you have a thicker barbette... adjusting the size is no big deal. Also it saves material.

There is one non-typical fillet in the codex Manesse that shows, very clearly, a non-closed version:

(fol. 11v, or page 18)

I have also tended to see the little darker area on top of this fillet as the top of the head peeking through:

(fol. 32v)

The only closed headdress find I know is one from Villach-Judendorf; that one has, however, no pie crust and consists instead of gold-brocaded narrow ware. Beautiful - but quite different from the Manesse versions.

Finally, while there is no picture of b-and-f in the Manesse clearly showing the top of the head peeking through, there is also none clearly showing a fabric top. And there are quite a few pictures clearly showing the fillet as just a strip, such as this one:

(pic out of HÄGERMANN, D. (Ed.) (2001) Das Mittelalter. Die Welt der Bauern, Bürger, Ritter und Mönche., RM Buch und Medien.; late 13th c, England).


That's my thoughts about the question hat or band as fillet - I'd be happy to hear your opinion, and the reasons for your arriving there!
0
JAN
21
9

News about Netting!

A good while ago, I ran a series about medieval hairnets and netting, writing about my experiences and results from working netting both as a spiral and based on real rounds. And I wrote this:
I'd say that an unadorned, simple net might well be worked in a spiral, since it will take very hard looking to see that: In the crown section, there's too much thread on too small an area, and the lower end of the net, if stitched to a band or sporting longer loops for closure, will not be easy to read. For any net that will show different size mesh, colour changes or embroidered patterns, spirals are out of the game, because they are just irregular enough to show.
in that post back there.

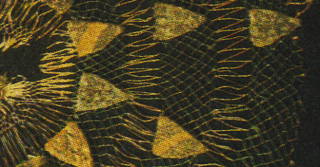
For my suspicions about nets worked in true rounds because of colour changes, different-sized mesh and embroidery, I had a prime example in mind - rolling all those treats into one beautiful hairnet that I had already blogged about by that time - this hairnet:


I was, at that time, convinced that this so amazingly regular-looking hairnet must be made in rounds, not in a spiral.

Well.

I stand corrected, and many thanks to Cynthia, who studied the net much closer than I did. And gave me a heads-up on my error. Proof that I'm wrong (and that looking at the evidence much more closely than I did in that case is always the right thing to do) was before all of our eyes all the time, because even on that blurry picture, you can see that it was netted as a continuous spiral - if you look at the bit at around 3 o'clock:


Can you see it?

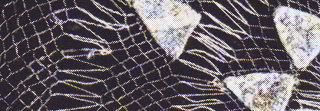
Maybe it's a bit clearer in this picture:


(This comes from HEINEMEYER, ELFRIEDE: "Zwei gotische Frauenhaarnetze." Waffen- und Kostümkunde 1 (1966): 13-22.) There's a jog right beside the upper edge of the little shield motif that is cut by the upper edge of the picture. The one without a partner by its side. And there might even be a single green thread going down from the last green bit to the next green bit, crossing right through the white bit. Which would be totally the thing to do if you couldn't be bothered to cut the green thread just for that little bit of white.

So much for netting in rounds... and I take back what I wrote, and now say:

While you might suspect that netting in the rounds would be more useful for nets with embroidery, different-sized mesh and colour changes, the busy overall pattern of such a net, made in fine threads, distracts the human eye enough from the slight irregularities of the jog that these are only seen when looking very hard or studying a net in detail.

(And now I'll wait for somebody else to prove me wrong again. Bring on your hairnet analysis results - I'm quite in the mood!)
0
JUL
17
4

Hairnet: Finished and Reloaded

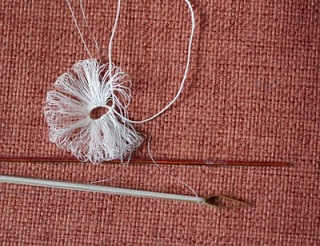
Though I hadn't posted about it anymore, I have obviously continued working on the blue hairnet, since it's finished now. I have sewn it to a drawstring made from birch-leaf-dyed silk (a thin silk ribbon), using one of the handmade steel needles (which worked like a dream).
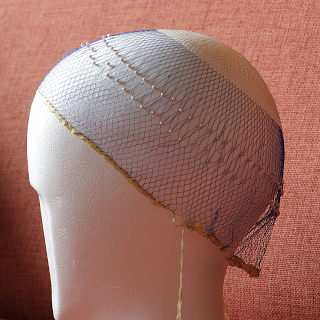
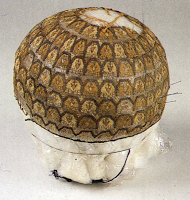
Here it is, already brought into shape on a styrofoam head. That is also the form in which this net will be exhibited at Bad Staffelstein.

It took me about 30 hours to net (again); the large meshes with the pearls in the middle did obviously save some rounds, while fiddling on the pearls took up that time again.
The large mesh is something that has to be worked with utter and extreme care, though, or they will come out slightly uneven, resulting in netting problems further down.
It took me another hour for the finishing works - sewing on and inserting the drawstring and rinsing the net as well as bringing it into form over the styrofoam head. It has about 30 cm diameter; because it is cast on with rather few meshes (only 68), the circumference at the bottom is not too great.


Altogether, I think that the next time around, I'd rather attach the pearls afterwards by sewing them over individual knots of the mesh. I'm not too content with some of the parts of the net, where there are irregularities and where you can see how often the thread broke at places, I guess because of increased friction with the pearls. Overall, I'd say it looks quite nice, though - and my respect for the medieval net-makers is growing and growing!

Because I've grown quite fond of netting as a show-and-tell procedure (as the regular readers here know already), and I want to include netting in the demonstrations at the exhibition vernissage, I have spent yesterday evening doing the cast-on for another net. And this time around it's really close to an original net, found in London and published in Crowfoot et al's "Textiles and Clothing". Ages ago, I had already done some analysis and counting for one of the nets, coming up with 210 loops for cast-on, doubled after about 14 rows of mesh. After misfiring the first cast-on start (the loops grew nastily in length), I have now finished about 210 meshes and their connecting row successfully. I'd love to know how often I have mis-counted during the three hours I needed, but I'm much too lazy to count the loops again. I can however tell you that 210 loops is a lot.


The netting is done in extra-fine silk thread, and with a gauge of 2 mm diameter, resulting in meshes with 3 mm side length. This just fits with the large netting needle - which in turn fits in well with the fact that 3 mm seems to have been a quite common mesh size. If it comes out like the find (read: if I have not mis-counted ages ago when doing the analysis), it will have a lower edge circumference of a whooping 960 mm. That is almost one darn metre to net for about 50 rounds! I'm really curious to see how this net will turn out. And I can promise you that it won't take only 30 hours to complete, this time, since I have about tripled the mesh count...
0
MAY
07
0

The new hairnet

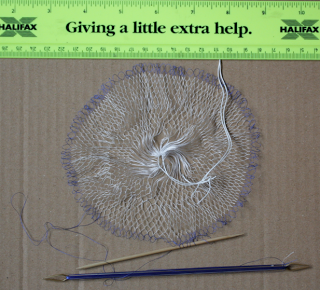
Because the spiralled net was more or less a practice piece (to try out spiralling and to get my fingers back into netting) and because netting really is a surefire way to attract attention to textile works while keeping the mind unoccupied enough to chat with people, I started a new net right away in Freienfels.

It has the same huge 4 mm mesh size, but is worked with much thinner thread, so it's much closer to historical pieces. The thread might still be thinner, and the mesh could be smaller, but I'll take it slowly for a change. Plus it's not so easy to get superthin yet resilient silk thread.

Here you see the new net after nine hours of work. Cast-on went a lot smoother this time, since I stuck to the tried and tested method described by Therèse de Dillmont. Even though, it felt really fiddly due to the thin, fly-away threads (and since I did this out of doors, there actually was some wind to "help" from time to time). I'd say that netting with the fine thread does take a bit longer than with the thicker thread, even with identical mesh size and numbers, because the thin silk likes to crumple or curl up, and I'm a bit more careful with the fine net than with the sturdier one. Hence a little less work speed.


Cast-on loops are about 2 cm long, and cast-on was on a thick linen ply. A second loop of the linen thread serves as holding loop. I have switched completely to working with my new "Nähstein" now that I have finished making it. In case you didn't ever hear of that before, a Nähstein is a weighted pincushion that serves as the third hand to hold netting work or sewing work - and it's so practical! I'll post a picture of the Nähstein in action as soon as I get somebody to take it.

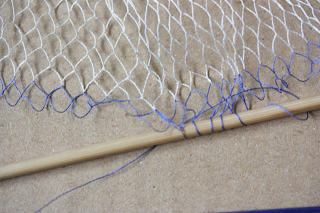
The new net is worked in YLI Silk 100, with the same netting needle and the same mesh stick that I used for the last one (hence the same mesh size). It is worked in the round, and on this picture you can or cannot see the meshes where transition into the next row takes place. Click on the picture to see it larger. Making one full round with the full number of mesh loops takes me about half an hour - so you can go ahead and try to calculate how long the whole thing would take with straightforward netting all through.


I used the hairnet with the embroidered arms as an inspiration - that is why you see the first rounds of blue netting on the pictures. I'm planning to put pearls on the net, in blue sections. The first test of getting a pearl over the mesh was successful, but it will still need some rows before I do it for real. I'm really, really excited to find out whether it works like I planned it!
0
MAY
06
0

Hairnet finished - well, almost...

The red-and-white hairnet that I've been working on is finished apart from the last finishing touches. I put in the last knots during Freienfels, and I started another one right away - same mesh size, but thinner thread. The plan is to put pearls in the mesh of the new net.

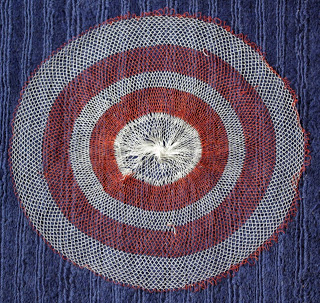
First of all, here's the photo of the finished piece. It turned out with a diameter of a little more than 30 centimetres when laid out flat on a surface, and it took 29 and 3/4 hours to get it to this stage, net working time since I work with a stopwatch. (I miscalculated during the weekend and told people a larger amount of time. I'm not happy about that, since I like to get my numbers right, but I'm still content that I erred on the side of longer work time. And everybody watching could see how long it takes to make the mesh...)
It is still lacking a band that will be attached to the mesh in front of the net and drawn through the longer loops on the back of the net - this allows some width adjustment when wearing the piece. It also still needs the finishing touches: a proper crown closure with silk thread (there's still the pink cotton thread in it that I used as a foundation loop), snipping off the rest of ends, and wetting it down to dry set over a bowl or something similar almost-head-shaped.


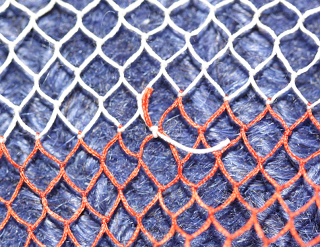
On this closeup, you can see the colour change between red and white, marring the impression that the net is worked in the round.


I'd say that an unadorned, simple net might well be worked in a spiral, since it will take very hard looking to see that: In the crown section, there's too much thread on too small an area, and the lower end of the net, if stitched to a band or sporting longer loops for closure, will not be easy to read. For any net that will show different size mesh, colour changes or embroidered patterns, spirals are out of the game, because they are just irregular enough to show. And according to my experience, netting in the round will not take much longer - there's only one slightly more fiddly point once each round where you transition into the next row; compared to the amount of time needed to complete the round, the slight slow-down there is not even worth mentioning.

Edit Jan 21, 2010: This is not correct - there is evidence that nets with colour changes and different size mesh and what-have-you were also netted in a continuous spiral. Please see update here.
0
APR
24
0

Hairnets, part V

TimeZM4 for a little sequel for the hairnet series - all because we did a little math yesterday...
I met up with the lady who did my netting needle, and I have ordered a really teeny slim one - suitable for making very fine mesh. Think Sint-Truiden: think this net:


It is listed as catalogue nr. 102, made of silk thread in rose and beige and almost fully embroidered with silk in grey, beige and white. Mesh size? The publication states 64 mesh per square centimeter, which translates to very little more than one millimeter mesh size! Now that is tiny.

The little math yesterday I hinted at? We tried to calculate how long making such a net would take. The following number crunchies are probably not accurate, but meant to give me (and now you) an idea about how much of a time-sink something like this piece can be.

The basis for our calculation was the net I have almost finished, with the mesh size of 4 mm. For this net, I can pretty safely state about 30 hours for the net until completion, including wetting and setting the finished net. When calculating the same overall size for the tiny-meshed net, I'd need about 16 times the amount of single meshes for the tiny net (since there would fit 16 meshes into one large mesh). Which means 16 times 30 hours, that is 480 hours just for the base of the hairnet! Add to that the embroidery, which I'd guess takes at least as long (maybe one of the embroidering people can pitch in here) - that would leave you at roughly one thousand hours of work just for a puny hairnet.

For sake of comparison, let's translate this into a modern working schedule, with a five day week, fourty hours work time each week. That means twentyfive weeks of work, full-time, provided you really work for eight hours a day on the net, with no distraction whatsoever. Let's add in a week for all the rub-your-eye breaks, breaking threads, bad hair (netting) days, and tea-and-cookie breaks. That means one skilled textile person will work half a year, full-time, nothing else done, just for the puny hairnet.

And people seeing such a net in medieval times will know what this means. How much work this means - and thus, how much money.

So wearing this puny hairnet is something like putting a Ferrari into your garage. Wearing this little beauty is like really thumping the table with your bag of gold, so to speak.

Source: DECONINCK, E., GEORGE, PH., DE JONGHE, D., Y., VAN STRYDONCK M. J., WOUTERS, J., VYNCKIER, J. und DE BOECK, J.: Stof uit de Kist: De Middeleeuwse Textielschat uit de Abdij van Sint-Truiden. Leuven 1991. Catalog nr. 102.
0
APR
22
0

Dag it, baby, one more time...

As I wrote Tuesday last week, I'm into sealing cut edges with wax now.

Yesterday, my brand new (and infernally sharp) pinking tool arrived. (Well, I call it a pinking tool. It disguises itself, though, as a woodcarving implement and hides in woodworking catalogues. But I found it nonetheless!)

I set to work pinking the dagges on a hood. The cloth is heavy silk, dyed a beautiful purple with natural colours. Pinking dagges is fun, and the tool will bite easily through several layers of the cloth at once, but it sure pays to work carefully. That will save a lot of snipping off missed threads afterwards and re-pinking missed spots.

After doing the dagges, I set to work with the wax. What I want is a nice contour of molten wax along the edge of the cloth, hot enough to go into the fabric a bit (to make sure the edge is conserved) but not so hot that it will actually be visible on the outside of the piece. As you can probably imagine, the margin between "too cold" and "too hot" is very slim - so slim that it makes a huge difference whether the tjanting is full or half-empty, even if it is a very small one. With these low temperatures, flow in the tjanting might become obstructed by cooling wax, so there is also a rather big variation in how much wax comes out, and how quickly. While this method is a lot faster and much more reliable than the molten-wax-on-copper-plate method, it demands full concentration and a good sense for when the whole shedoodle is the right temperature (or lots of testing, which is much easier for the beginning). Maybe there is a better method to do this. Maybe there's even a description on how to do it somewhere out there... if you know of one, please share!

I finished the dagges on the hood cape yesterday, including the waxing, and I finished pinking almost all the dagging for the liripipe, so there's some more waxing on today's agenda. This is how the finished and waxed dagges look:

click for larger view


I rather like the look of it.

Oh, and on an aside: Dyeing the fabric seems to have done something for the shine on the not-so-shiny side of the fabric, and I didn't expect that at all. The photos, of course, don't do the colour justice.
0

Contact