")
")


So let's say you need to have a starting border on a fabric that doesn't have one.
Traditionally, you have the two obvious usual suspects for doing this: rigid heddle weaving or tablet weaving. In both cases for the Bernuthsfeld Project where we were lacking a starting border, the originals had a rigid heddle border.
So for faking a border, you set up the warp of your band just like you would for a normal band - the necessary length plus a bit more for the loss of yarn at start and end. Then you take the edge of your finished fabric and make sure that there is a warp fringe long enough to go through the width of your band twice, plus a little extra to grab. How much of a little extra you need depends on your fingers and your love of fiddlyness.
You weave a few picks to get a proper start to the band, with a normal weft thread, and then you start using the warp fringe as weft. For this, you pull one warp through the shed so it sticks out of the band at the far side of the fabric, change shed, and go back towards the fabric with the same warp. Into that same shed, you also put the next warp thread in line so that it sticks out at the far side of the fabric. Repeat ad nauseam, or until you reach the other edge of your fabric, and take care not to switch warp threads or miss some. It's not difficult to do, but it is fiddly, and it is time-consuming - as you can see on this video:
You will also have to pay close attention to the growth rate of your band (in length) as compared to the spacing of your warp threads - and here is where the difference between the fake and the real really comes in.
When you make a real starting border, you have two ends going through each shed, as you do with the fake starting border. However, both ends in each shed in the real border are functional warp ends of the main fabric - in contrast to one functional warp end in the faked border, which is accompanied by its colleague going back. So you effectively have to fit double the amount of weft threads into the length of the band if you're doing a fake border.
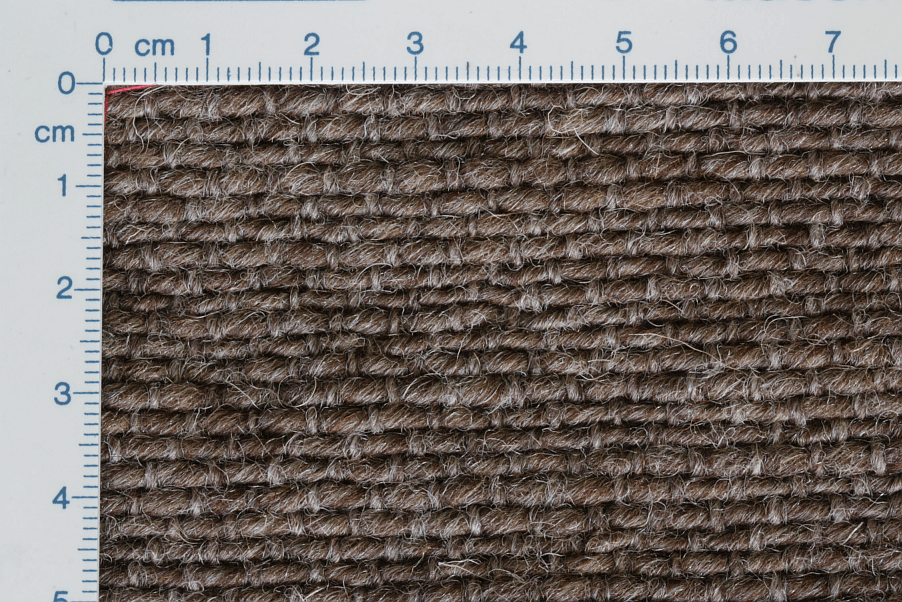
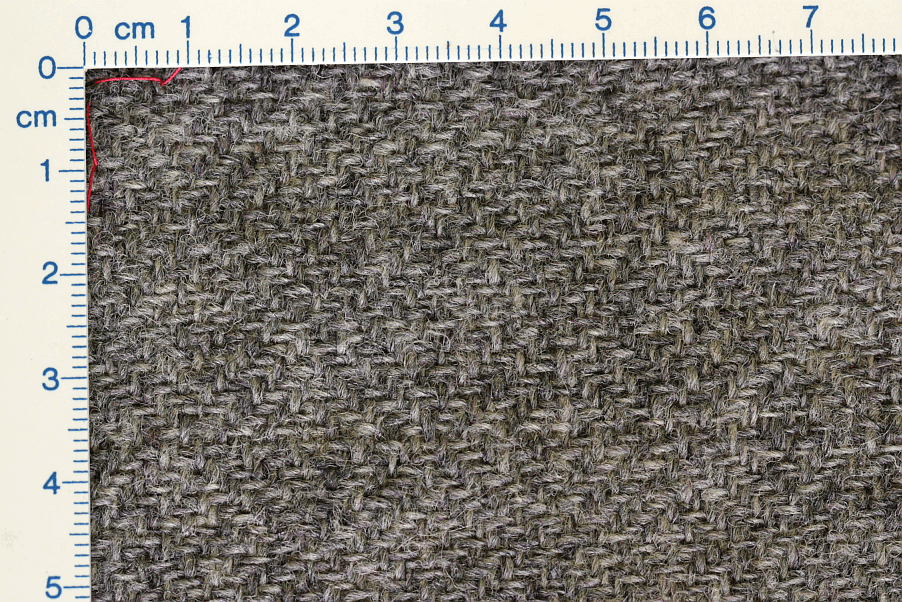
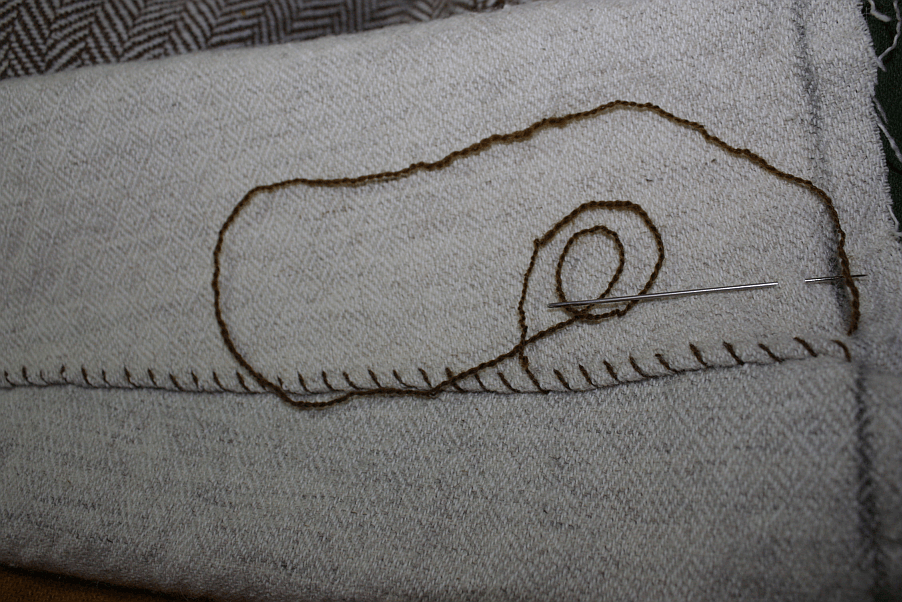
Can you smell the problem already? If you use a band warp yarn that is as thick as the original starting border warp yarn, the distance between your sheds will be large enough to spread the band out way too much in the faked border. You will have to remedy this by occasionally placing two or more live warp ends into a single shed. This is the way I did the starting border for one of the leg wrap edges:

This is not nice to weave, and the slightly too high spread is still visible. You can also see a tiny hint of the trimmed fringe that is left underneath the border - a telltale sign that it is a faked one.
The alternative is choosing a warp for the starting border that is a lot thinner than it would be in the original. This reduces the distance between sheds along the band, so you can fit all your warp threads one by one into the band. This is the solution I chose for the border faking shown in the video, as the border was much longer. Obviously, using thinner threads also means a narrower border, so you'll have to use more warp ends for the starting border to get it a similar width as the original.
In both cases, you might be able to see a hint of the fringe sticking out of the band. So if you're looking at a replica fabric, or a reconstruction, and it has a starting border - fibre ends sticking out between border and fabric will tell you it's a faked one. If you cannot see fibre ends, look at the thickness of the starting border threads; if they are significantly thinner than the yarn of the main fabric, it's probably also a faked one. It's definitely also fake if the yarns are similar in thickness to the main fabric warp, but there are more than two ends in individual sheds. All that is assuming you can get close enough to the piece, of course!
Traditionally, you have the two obvious usual suspects for doing this: rigid heddle weaving or tablet weaving. In both cases for the Bernuthsfeld Project where we were lacking a starting border, the originals had a rigid heddle border.
So for faking a border, you set up the warp of your band just like you would for a normal band - the necessary length plus a bit more for the loss of yarn at start and end. Then you take the edge of your finished fabric and make sure that there is a warp fringe long enough to go through the width of your band twice, plus a little extra to grab. How much of a little extra you need depends on your fingers and your love of fiddlyness.
You weave a few picks to get a proper start to the band, with a normal weft thread, and then you start using the warp fringe as weft. For this, you pull one warp through the shed so it sticks out of the band at the far side of the fabric, change shed, and go back towards the fabric with the same warp. Into that same shed, you also put the next warp thread in line so that it sticks out at the far side of the fabric. Repeat ad nauseam, or until you reach the other edge of your fabric, and take care not to switch warp threads or miss some. It's not difficult to do, but it is fiddly, and it is time-consuming - as you can see on this video:
Privacy Policy Notification
This site attempts to embed videos from the YouTube web server. Please note that when loading YouTube videos, personal information may be transmitted to YouTube. Do you agree with the loading and playing of Youtube videos? You can find more information HEREYou will also have to pay close attention to the growth rate of your band (in length) as compared to the spacing of your warp threads - and here is where the difference between the fake and the real really comes in.
When you make a real starting border, you have two ends going through each shed, as you do with the fake starting border. However, both ends in each shed in the real border are functional warp ends of the main fabric - in contrast to one functional warp end in the faked border, which is accompanied by its colleague going back. So you effectively have to fit double the amount of weft threads into the length of the band if you're doing a fake border.
Can you smell the problem already? If you use a band warp yarn that is as thick as the original starting border warp yarn, the distance between your sheds will be large enough to spread the band out way too much in the faked border. You will have to remedy this by occasionally placing two or more live warp ends into a single shed. This is the way I did the starting border for one of the leg wrap edges:
This is not nice to weave, and the slightly too high spread is still visible. You can also see a tiny hint of the trimmed fringe that is left underneath the border - a telltale sign that it is a faked one.
The alternative is choosing a warp for the starting border that is a lot thinner than it would be in the original. This reduces the distance between sheds along the band, so you can fit all your warp threads one by one into the band. This is the solution I chose for the border faking shown in the video, as the border was much longer. Obviously, using thinner threads also means a narrower border, so you'll have to use more warp ends for the starting border to get it a similar width as the original.
In both cases, you might be able to see a hint of the fringe sticking out of the band. So if you're looking at a replica fabric, or a reconstruction, and it has a starting border - fibre ends sticking out between border and fabric will tell you it's a faked one. If you cannot see fibre ends, look at the thickness of the starting border threads; if they are significantly thinner than the yarn of the main fabric, it's probably also a faked one. It's definitely also fake if the yarns are similar in thickness to the main fabric warp, but there are more than two ends in individual sheds. All that is assuming you can get close enough to the piece, of course!

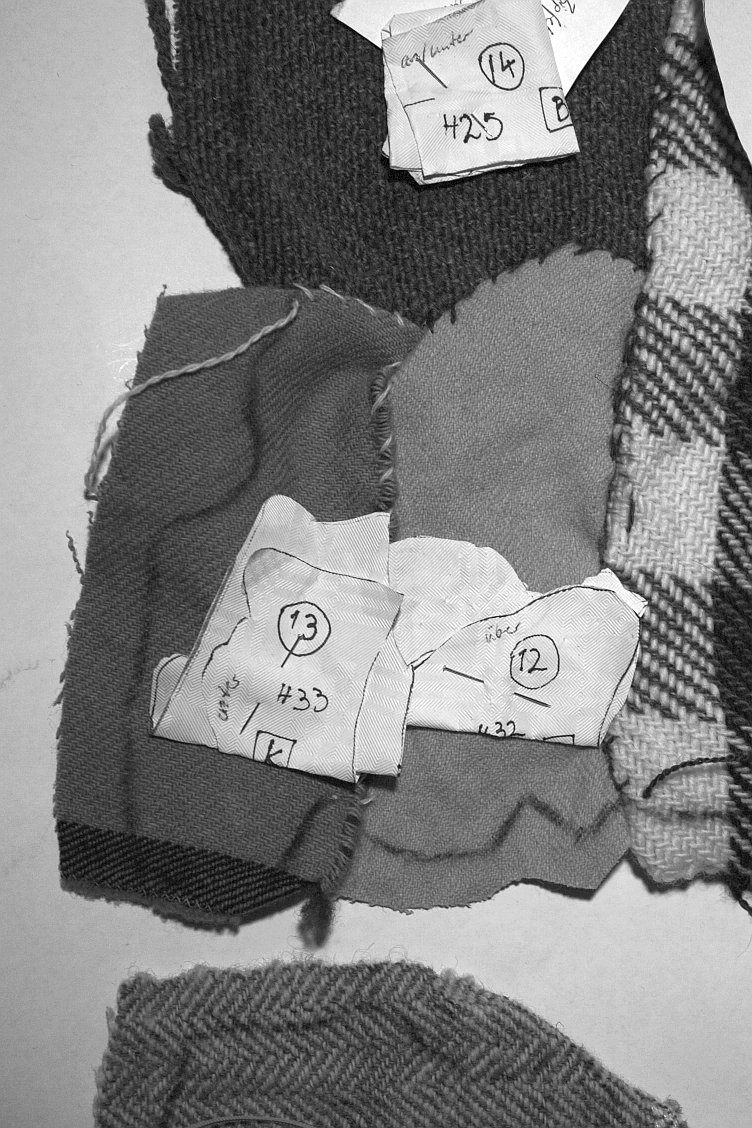

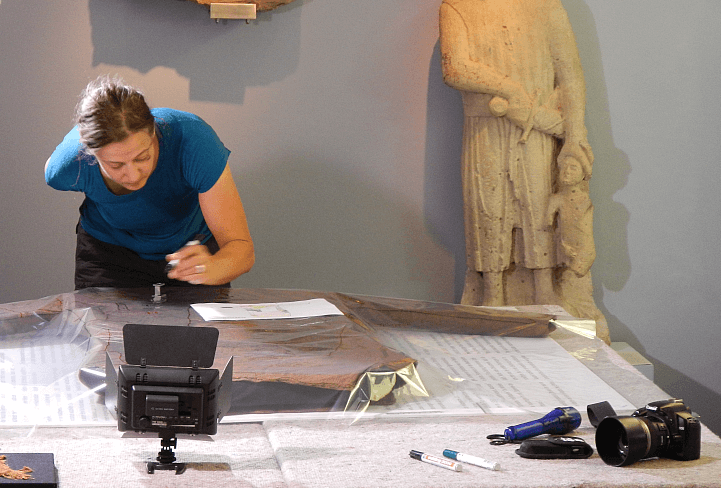 Snapshot of me doing documentation of the patches of the original tunic - which was then turned into a pattern...
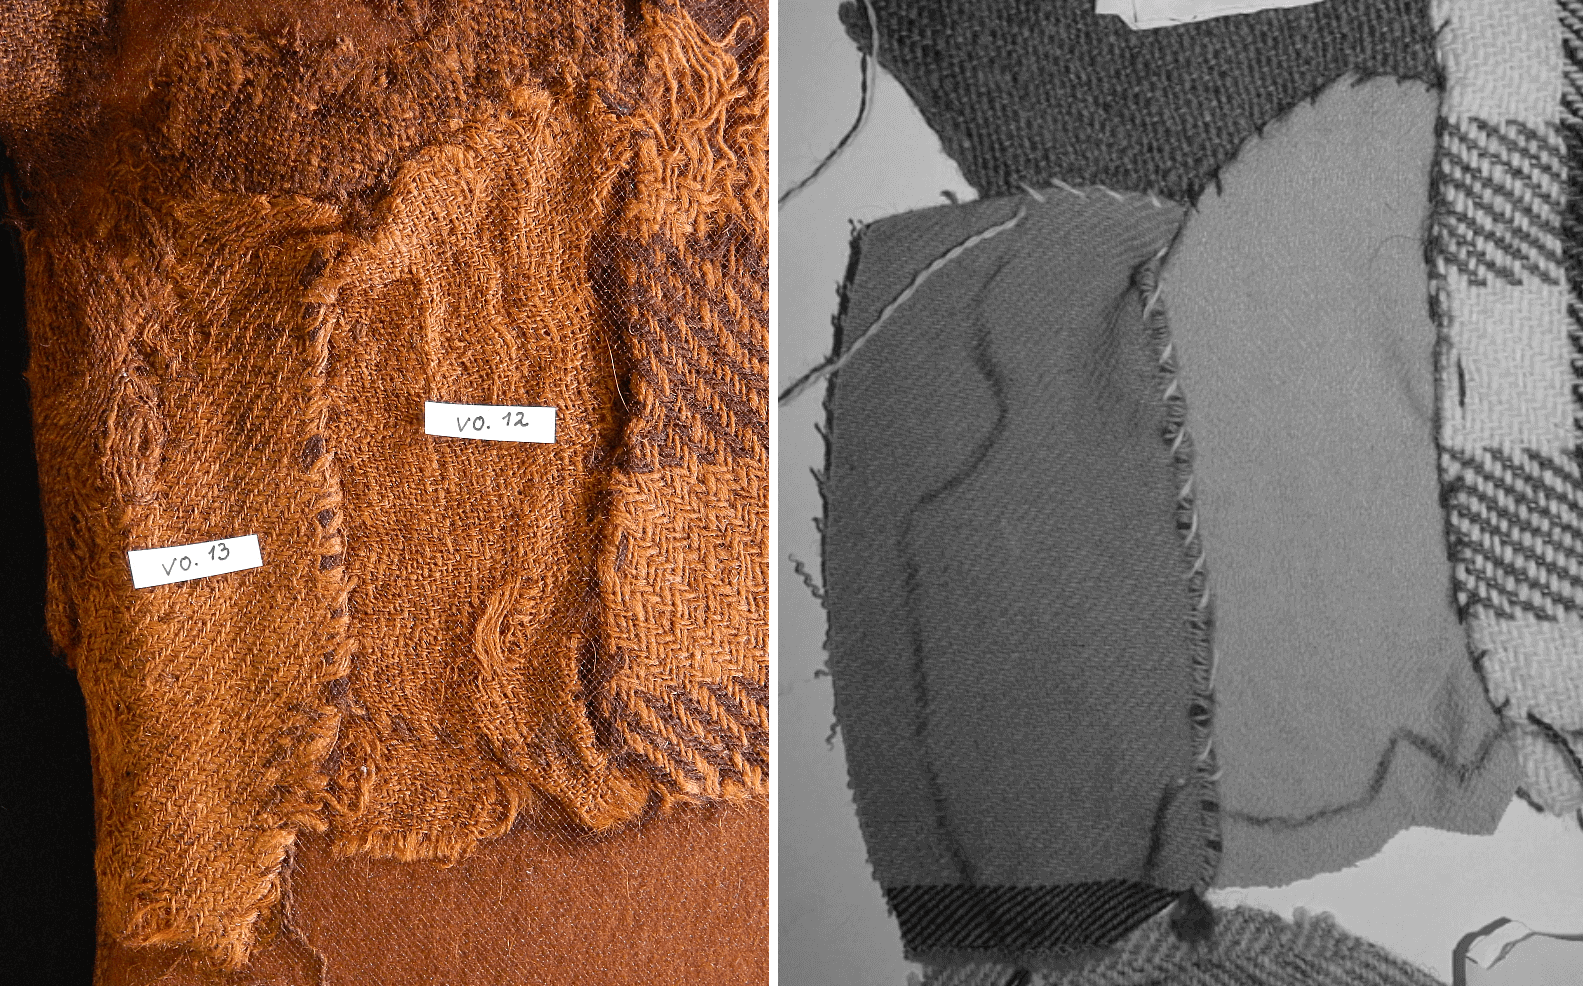