Latest Comments

Miriam Griffiths A Little Help...
27 November 2024
Perhaps more "was once kinda good and then someone added AI"? I'm getting very fed up of the amount ...
Natalie A Mysterious Hole...
26 November 2024
Oh my! I cannot tell what the hole's size is, but I expect someone is hungry and may be going for ea...
Katrin Very Old Spindle Whorls?
25 November 2024
Yes, the weight is another thing - though there are some very, very lightweight spindles that were a...
Katrin A Little Help...
25 November 2024
Ah well. I guess that is another case of "sounds too good to be true" then...
Miriam Griffiths Very Old Spindle Whorls?
22 November 2024
Agree with you that it comes under the category of "quite hypothetical". If the finds were from a cu...
JUL
01
0

Someone is always bound to notice.

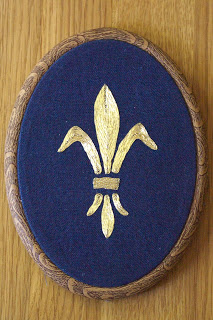
Yesterday, I posted the picture of the finished fleur-de-lis embroidery on Facebook - and promptly got a reply that the form of the fleur is not corresponding to the typical medieval form.

The side petals on the historic versions are much wider, much more curved, and they go out more to the sides. Does that explanation even make sense? Here, let me show you:
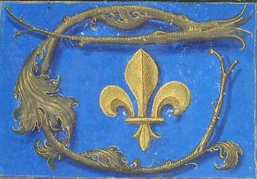


British Library Royal 16 F II, f. 137, detail.
Netherlands, around 1500. 


This should make it pretty clear what the differences are. If you search the British Library database for fleur de lis, you'll get some more hits, some of them shapes that are very far from what a modern eye would expect.

So why have I opted for something so different? Part of the differences are due to the medium. The motif is much clearer if you have gaps inbetween the individual petals, as my first tries did show - so running the individual parts together as in the 1500s version would not work just as well. Partly the decision is also due to the shape of the frame - a taller, more slender version fits better with the oval frame shape than the more squat version.

Finally, my personal experience is that motifs with the pronounced changes between slender and fat (as in the leaves of the medieval version) are harder to embroider for a beginner than shapes with only gentle changes in thickness.

The whole embroidery kit is a hybrid of medieval and modern things. Gold thread and silk thread? Medieval. Basic technique? Medieval. However, a medieval gold embroidery on linen fabric would usually cover all the ground fabric, not only a little bit of it - so having the ground fabric dyed blue with indigo, and only embroidering the lily, is a compromise as well (because embroidering everything with blue silk... that's lots of work, and quite a bit of material too).

The frame itself, with its rubber rim and plastic inner rim, and its oval shape, and the hanger so it can serve as a picture frame is very, very modern as well. So are the needles that I will supply with the kit.

It's a hybrid, a compromise to offer a chance to do gold embroidery without investing insane amounts of time and money in trying it. A compromise between appealing to today's embroiderers and offering the experience of working with historically correct materials. A compromise that results in a piece with a lot of decorative value without the need to mount it into a proper frame first.

I've put a lot of thought into this, and I hope that it will turn out to be a good compromise. Let me know what you think, please?
0
JUN
30
3

Things are coming together.

There's a couple of things running in the background that are finally coming together - I will be getting different kinds of needles in addition to the ones already in the shop, sort-of-soonish (these things tend to take a while). Other things are in the pipeline, but not in a stage where I can blog about it - yet. But I'm having hopes to post exciting new things here this autumn.

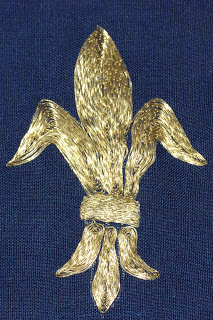
Also scheduled for this autumn, but something that I can already blog about: The Fleur de Lis Gold Embroidery Kit. Here's the finished prototype, finally:

It does look much nicer in real life.

I did the last stitches yesterday in the evening, when the light was already dimming down, but it was still rather light. That minimises the sparkle of the gold thread, which makes the work hard to see.

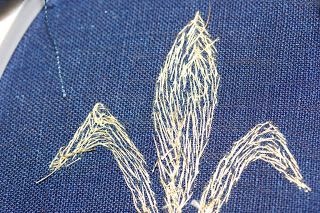
Speaking of hard - gold embroidery is really, really hard to photograph. Especially if you are in kind of a hurry, which I was this morning (and that usually leads to a bad photo day). The trick is to take the picture with underexposure, and with no direct light to avoid any sparkles. Then it can still be tricky to get the thing in proper focus, as the autofocus often has trouble with the sparkly bits; or to get the exposure right because of strong contrasts between the gold and the dark background.

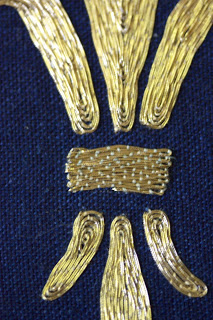
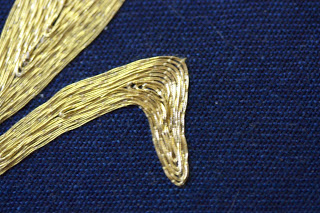
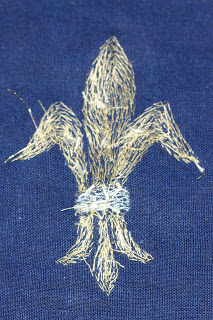
So you're not getting the world's best piccies of the finished prototype yet, but I had the strong urge to share with you. Including these bad closeups:


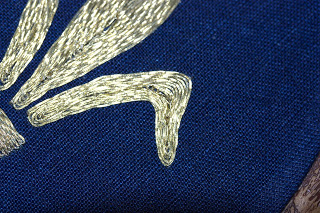
This, by the way, is how it looks if you take a picture with flash:


Hint: Flash is not helpful...

I had such a bad photo day that I even botched the pictures of the back of the embroidery, which technically should be no problem to take a picture of. So you're getting only this bad detail shot this time (you know, because of the law).


I'm really happy to have this finished, though. The template stencil for the final version is done as well, and looks very much like the prototype here, with only a few tiny changes. The fabric for the final version is off to be dyed already, and as soon as it arrives back here, I'll cut it into pieces... and then I will gild the lily once again, a third and final time, taking photos of the individual steps for the instruction booklet.

(And those photos? I'll take them in a softbox, with the camera on a stand, and with plenty of time planned for that shoot...)
0
JUN
10
0

Still testing.


There are things that we see, or use, that look easy. Easy as pie, and they are convenient and quickly picked up or quickly used, and nobody ever thinks about how much work has gone into them.

Take a book, for instance. It has contents (hopefully!) and a cover and a price, and there is writing and cover artwork and editing and layouting and printing going on before you can pick it up and settle down for a nice read. Or a film - even if you know that there will me much, much more that is filmed before the cuts reduce it, it's still something different to experience it yourself.

The same is true for something like an embroidery kit. Which tells you that I am still working on it - this iteration, there is tweaking and testing of the pre-drawing, taking still more notes about what needs to go into the instructions, and testing of how well the frame works for all this. I'm also testing the needles that will be included in the kit and making exact notes of how much thread is used for which of the parts. Meanwhile, the fabric for the final version has been sent off to be dyed, and I want to have finished this second prototype by the time it gets back here.


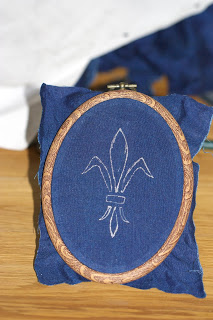
It's not the final pre-drawing, but pretty close to how it will be, both regarding shape, size and placement. The frame on a closer look (and especially upon touch) is obviously not real wood, but it looks very nice in combination with the dark blue fabric. As I want the kit to be so complete that you can get started right away and end with something that can be used as decoration without further ado, this frame is the perfect solution even though it's very modern.

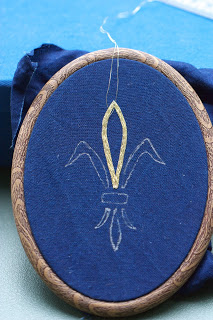
And this is how the embroidery looks at the moment:


As you can see, I have not progressed so very far. I hope to find a bit of time this evening, though, so that I can at least finish the middle leaf!

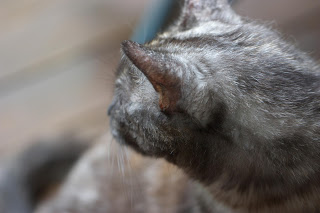
The cat, meanwhile, is thoroughly un-impressed:


0
JUN
01
0

Gold Embroidery Kit - next stage.

The prototype of the gold embroidery kit I'm currently working on is finished. I documented the amounts of thread needed (though not how long I worked on it), and I made notes for the instruction sheet that will go with the embroidery kit.


It took a little less than ten metres of the gold thread, and the couching thread was used in two different colours, which is much more visible in the original than in the picture. It looks a little wonky in the picture because I digressed from the pre-drawn pattern during the embroidering, and it's much harder to do a straight line if there is no leading line on the fabric. Why did I digress?
I made one single drawing, but you can see that I tested two different possiblilities - one was letting the three leaves run together close to the band (as can be seen in the upper left part), the other leaving a gap between the leaves. Same applies to the leaves where they touch the band - bottom with a gap, top without. I like the gaps between the parts better than the run-together look, so the final version will have a gap between the single elements.

And here's how the backside of the embroidery looks:


You can see the different colours of the couching thread much better here - though the rest, obviously, is by far not as spectacular...
0
OCT
24
3

More Open Access stuff. And a bleg.

The OA week has provoked some more blogging, not only here. Doug has posted a longish article about OA publishing concepts that sound a lot more reasonable than the ones I ridiculed yesterday. And one before that, with a lot more information about free or affordably-priced OA journals, and links to said journals. Go read it here.

In other news, I'm still busy editing (the Beast is losing words - it's like a book diet!) and also preparing for the Textile Forum. Additionally, I am thinking about offering an embroidery set for doing a small medieval motif, about 4 cm in diameter. I would like to offer that as a complete package with cloth (that has the pre-inked design), naturally dyed silk thread, maybe gold thread, short instructions and possibly also a small (non-medieval, but affordable) embroidery frame. Suggestions as to motifs would be greatly appreciated!
0
AUG
31
0

Embroidery workshop!

In case you are interested in trying medieval embroidery, I will be giving a course in Erlangen on the 27th of October and the 28th of October 2012. The first day will be dedicated to counted-work techniques (canevas), while the second day covers the techniques with free pattern design. The two days are bookable separately in case only one of the two variations is of interest for you, and the course fee includes materials (a piece of linen fabric suitable for the work and the silk (and partly gold) threads). Course language will be German (of course).

You can book both workshops, counted work and pattern embroidery via my new online shop. Workshop places are limited, of course, so that the group does not get too large.

Embroidery workshops are great fun, and I'm already looking forward to this!
0
OCT
26
0

Oh lovely colours!

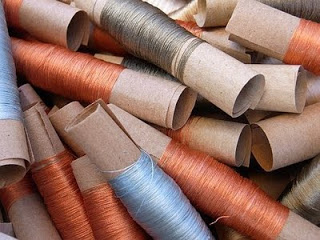
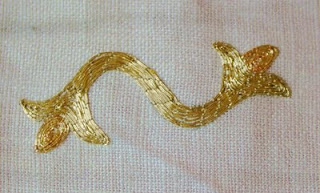
Some time ago, Sabine and I decided to go on another mad venture and include nice, really thin, naturally dyed silk threads for embroidery in our assortment of goods. So Sabine had a lot of good opportunity for cursing when she dyed them, and I had a lot of good opportunity for cursing when I reeled the threads off on little spools. But it turned out that these threads are absolutely fabulous for couching gold threads - and even if they resist getting dyed and spooled with all their might (which is impressive), I feel that it's well worth the struggle when the final result looks like this:

Photo taken by Anja Klein - thank you, Anja!

The colours are red (madder), blue (indigo) and golden yellow and olive green (birch leaf); you can only see a tiny bit of the gold-coloured thread right on the top of the picture, about in the middle.

These threads are wonderful for couched work, used like in this photo - though the picture doesn't do the colours justice, and I find goldwork enormously hard to photograph...

0

Contact