Latest Comments

Guest - Katrin Sprang Discussion
18 September 2026
Hi Rachel, I have looked for more photos of you, but that was not very successful. I found a link on...
Guest - Beatrix Sprang Discussion
15 September 2026
That lozenge pattern element is not a photograph, but a scan. So it should be to scale. But I pinned...
Guest - Katrin Sprang Discussion
15 September 2026
I was not referring to Rachel's reconstruction (is the reconstruction you refer to the one photograp...
Guest - Beatrix Sprang Discussion
14 September 2026
There is something Rachel did not mention. She told me: "Well, I worked with the measurements we too...
Guest - Katrin Sprang Discussion
14 September 2026
Well, this is certainly developing into an interesting discussion. Firstly, going from that lovely l...
JAN
10
1

Sprang springing up.

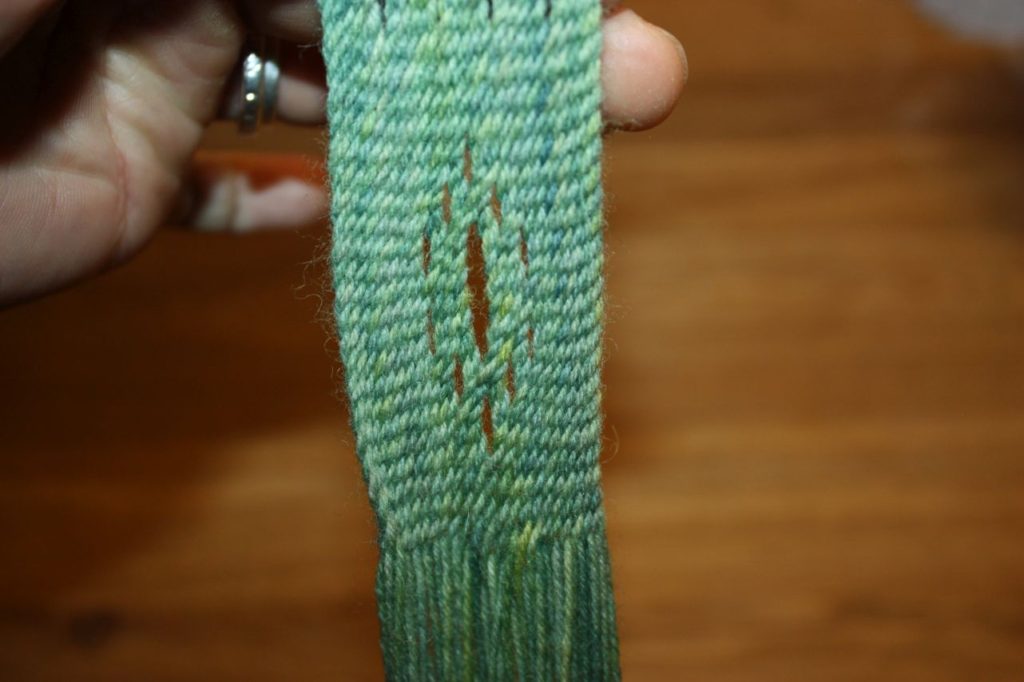
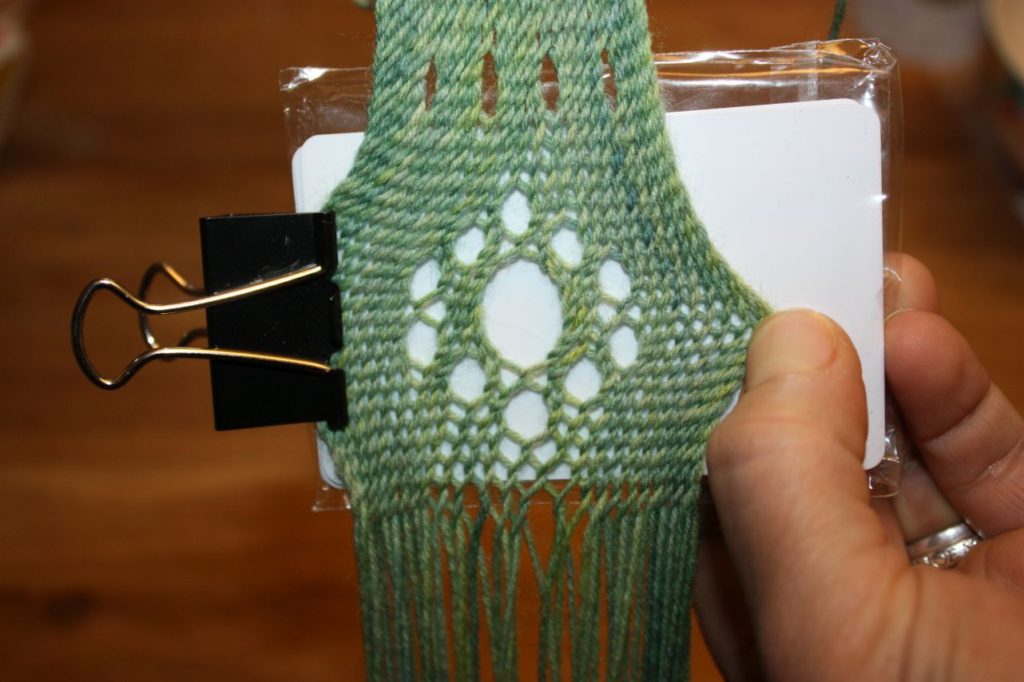
I also mentioned... sprang, right? There has been some spranging going on, both in preparation for the workshop I'll give (where there will be a little flower made as a pattern)...

[caption id="attachment_4223" align="alignnone" width="640"] The flower motif - almost invisible on the collapsed sprang...


[caption id="attachment_4222" align="alignnone" width="640"] ...but very much visible when it is stretched out a bit!

...and, as a sideline collateral, some spranging on a project of mine that has been in hibernation for several years. (I believe things like that happen to all of us.) It is basically a very simple thing - a circular (and thus "endless" warp), worked in simple, boring, basic interlinking... to the point where about as much is left over as would make a good bag handle.

The plan, you see, was to make this a bag, which would stretch to almost any form and size, within the (generous) limits that sprang fabric gives. I wanted a nice, long strap as a handle or carrier strap, though, and that is supposed to be a bit slimmer than the rest. The first thing I tried was just taking double threads as working elements, but that did not give enough of a slimming effect, and using 4 or 6 as single elements messes up the nice colour effect. So... double-layered sprang to the rescue!

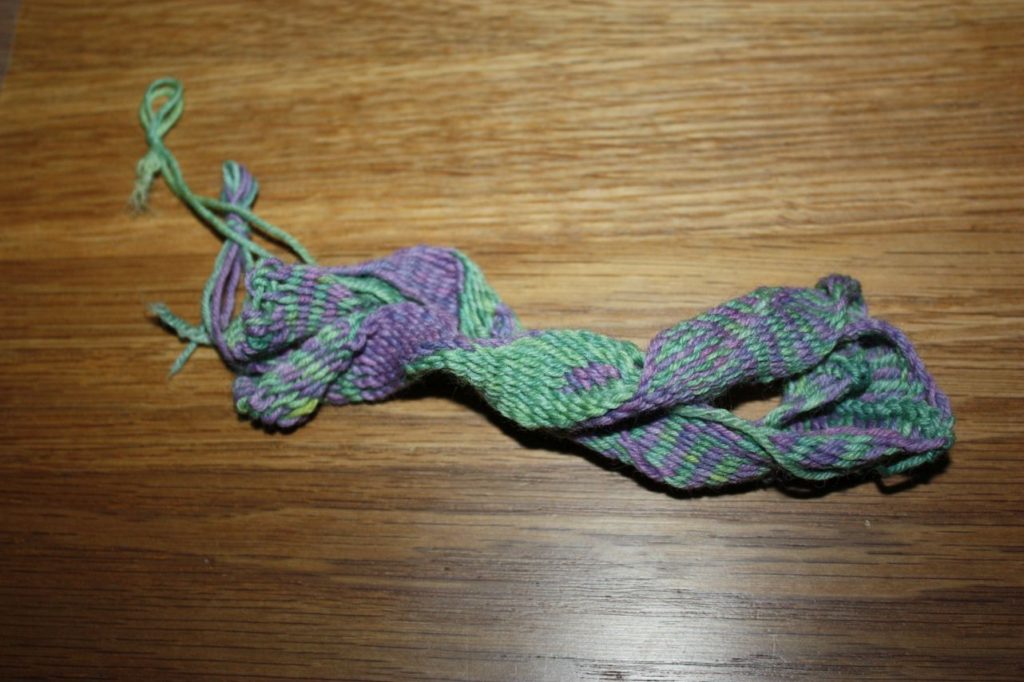
I did a little test piece in green and purple, to make it easier for me to figure out how things are done...

[caption id="attachment_4224" align="alignnone" width="640"] Thanks to this twisting up on itself, you can see the striped beginning (purple and green following each other) and then, in the middle, the double-layer sprang (where I even did a tiny bit of colour changing).

...and then I started double-layering my strap.
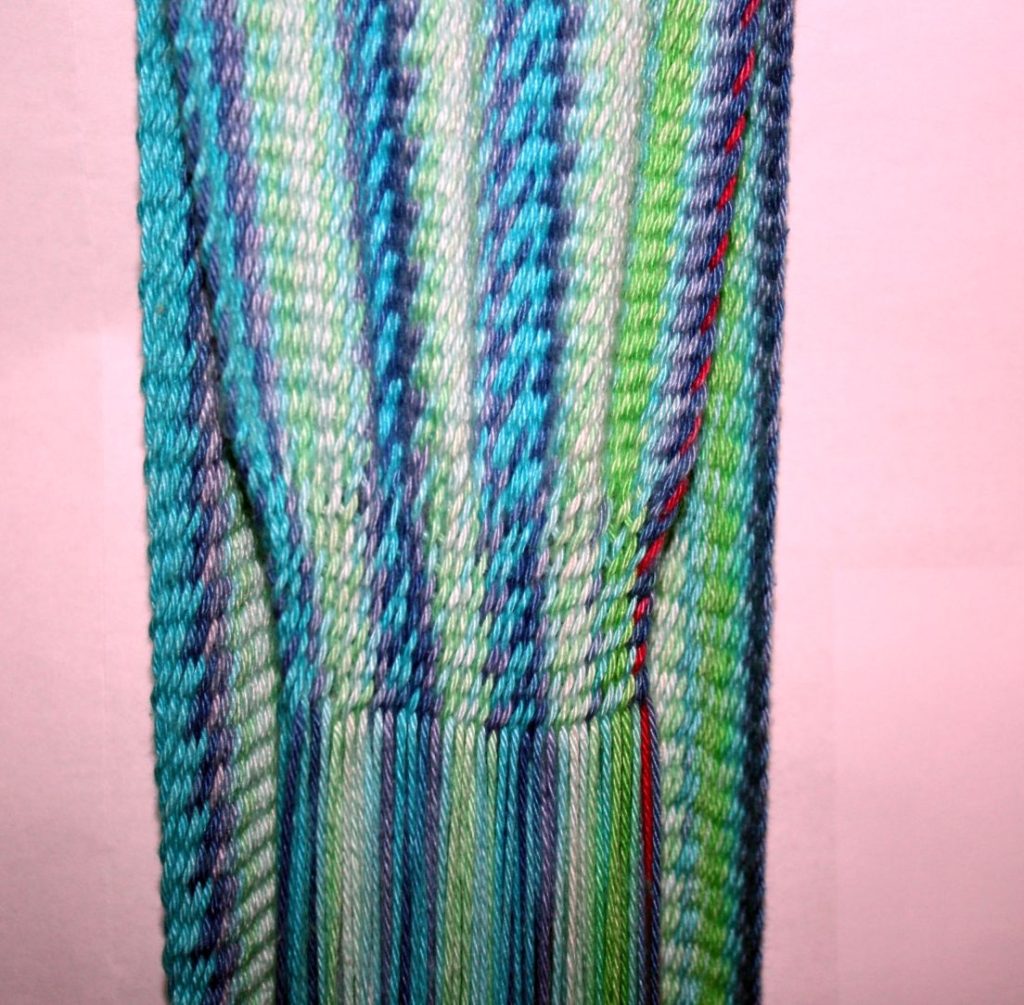


You can see how it narrows down, and changes a bit in structure, but the colours stay similar. It's a little fiddlier than regular sprang, and I am still in the stages where I brain-mumble the mantra of "front layer, back layer, front layer, back layer" all the time (plus I already made one small mistake near one edge), but it does work quite nicely.

Now all that's left to do is a generous amount of double-layer spranging, and then, in the very end, doing double-layer sprang with knitting needles instead of fingers (which will be... exciting!) and finishing it up by securing the final shed (which I will do by weaving in a few threads, to have a firm, stable ending).

And then, eventually, I might have a bag...

0
NOV
20
0

Weekend Workshop: Understanding Tablet Weaving

Sometimes, things just line up, and then exciting things happen. Such as a weekend workshop on tablet weaving that I will give, on January 18-20 2019 - in a stunningly beautiful house in Méry, Belgium. I am utterly, utterly thrilled by this - and maybe you are too?

The house is the Merveille de Méry, a 19th century country house, lovingly restored and beautifully situated in woody grounds. It's near Liège, which means it is easy to reach by train (and there will be a shuttle service to the house).


My workshop will run from Friday late afternoon to Sunday afternoon, and we will explore in depth the structures of tablet weaving. The aim is to give you a deep understanding of how patterning in tablet weaving works:

- the differences in s- or z-warping
- their relation to patterns and turn directions
- how to tell where you are in a pattern
- how to see which thread colours will appear next in your band
- how to fix mistakes
- how to transition from threaded-in patterns with two colours to doublefaced weaves

These things are taught as part of a system, starting with making a continuous warp. The deep understanding of how tablet weaving works, together with this system, will enable you to:

- analyse, understand, and copy bands that you see
- draft your own patterns with two or more colours
- weave patterned bands without any pattern draft, similar to how bands have been woven in the past.

This workshop may even take you to the basics of weaving 3/1 broken twill - the type of patterning used in the most complex of medieval tablet woven bands.

Workshop start is Friday, January 18, 6 pm; you can arrive at the house from 2 pm. The workshop ends on Sunday, January 20, at 4 pm. If you are travelling by train, a shuttle service from Liège to Méry on Friday and back on Sunday is possible.

I'm so delighted to be able to offer this - I've been wanting to do a larger tablet weaving workshop for a while now, and to have the opportunity to do it in such a stunning house, where we will have one room dedicated to our weaving and the rest of the house to relax between sessions, this is just awesome.

If you are interested, you can book your spot - including food and drink! - via my shop. If you book before December 10, you get the Early Bird Special Price of 395 €; after this, the regular fee is 425 €.

I'm already looking forward to this so much!
0
NOV
02
2

Sprang Test Runs.

In 2017, Anja got together with me to organise a weekend meet-up for sewing, chatting, and having some workshops with me, called "Historisches Nähtreffen", and that was such a success that we decided to do it again.

So we asked people if they would like a second one (they did!) and what kind of workshops they would like, and in the end, we decided on the basics of sewing and on how to spin with distaff and spindle, just like last year, and two new kids on the block: medieval embroidery and an introduction to sprang.

Which means I've been sitting down doing some sprang in the last weeks, too - to find out about possible frame solutions for the workshop, to test materials and, of course, to make a plan for the actual workshop. As in "what to teach and in what sequence".

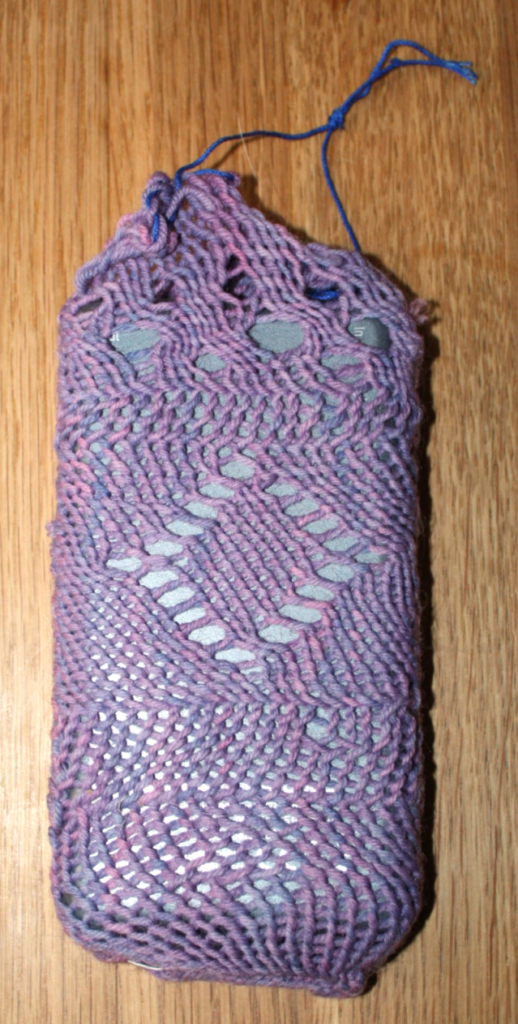
The result? This:


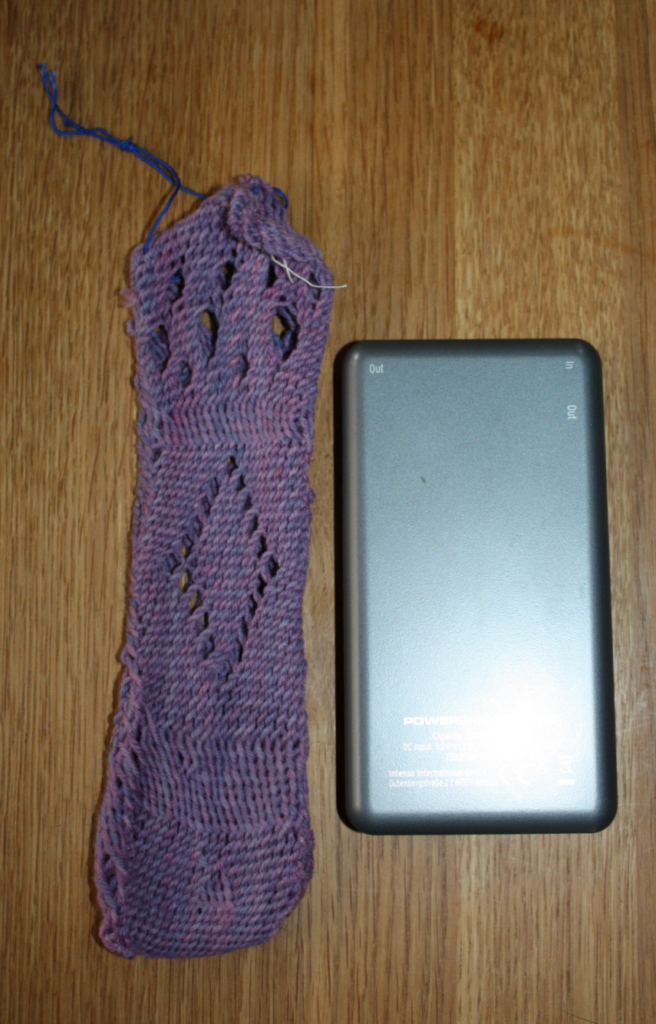
That's the preliminary test run, and there will be more tests - but I really like how this came out, and that it is actually large enough to fit a phone (or a powerbank, in this case). I'm also amazed, as usual, how stretchy this is. When it came off the frame, it was really long and really narrow, and I had my doubts that it would actually fit. It still gets longer and narrower when taken off:


Sprang. Fascinating.
0
OCT
26
0

What goes into a Workshop.

Since I've been talking about needing guinea pigs, I thought I might give you a little bit of background on the development of my workshops in general.

I love giving workshops, or courses, or lessons, or whatever you want to call it. I really enjoy being able to pass on knowledge - theoretical and practical - and see how people start to become friends with a new technique. No matter whether it's braiding, knitting, weaving, or any other craft, every single person has his or her own, personal pattern of movements, and preferences on how to do things, or handle elements and tools. It's always fascinating for me to see this unique, personal finger dance develop, and it makes one part of why I like teaching so much.

Just like with many other things, though, a lesson does not spring from nothing to full perfection - it needs an astounding lot of work and preparation to develop a workshop or course.

This starts with making a basic concept. What do I want to teach? Are the students adults or children? What do they want and expect from the course? How likely is it that they have previous experience with the technique? How long can I make the course, and how deep into the technique can we go?

Usually, I try to put a lot of information into each workshop, to make sure that everyone goes out with a good, solid understanding of the basics and the tools to develop this further. This means structuring the workshop carefully so that I can set a relatively high pace, while still allowing enough time to try out things and get a bit of practice.

Once the basic concept stands, it's on to test runs and thinking about logistics. I usually do several test runs of the course, working the course programme and babbling to myself. I'm also checking how long each step takes me (and then, obviously, extra time gets factored in for having several people doing this the first time ever), and trying to find the best sequence of tasks. For some workshops, I've also done "live test runs" with a few willing people, testing out if things all work like they are supposed to do.

Logistics are another thing that needs consideration. How much space do I need per person? Table space and floor space can both be an issue depending on the venue. How many tools do I need? What are the materials necessary? How much extras need to be available in case of calamities? Will participants want to bring (maybe to test) their own tools as well?

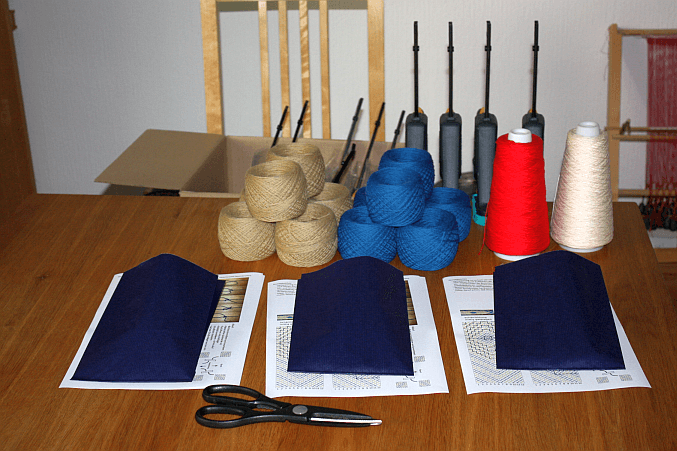
Keeping in mind that there are several persons who need to do something at the same time, tool count can rack up quickly. One of the reasons why it took me so long to develop the tablet-weaving course range was that I had to bite the bullet and buy a freakishly large amount of clamps. To fit up to 8 people into the course, I need four clamps each for the warping method I use - and that means 32 clamps. These have to be bought (and it is worth it to get good quality ones, as they are gently but consistently abused), transported, and stored. Similar things are true for other crafts. I need to have enough netting needles for a course - these, at least, are lightweight and easy to store, though having them made is an investment as well. Sprang courses require having a frame available for each participant, plus some large demonstration frame to show the whole class the movements and what happens with the threads. These, too, need to be designed, made, paid for, and stored.

Once all this is done, I can sit down and write the final workshop script that will keep me on track while I'm teaching, and make sure I don't forget mentioning a crucial detail when it is necessary to do so (because these crucial details often get so ingrained if you have done the craft for a while that you are not aware of them anymore).

And then, finally, I can work on the course description and set the price. So if you've ever wondered what goes behind a workshop I give, and why I charge as much for it as I do - there you are.
0
OCT
23
13

Guinea Pigs needed.

I need some guinea pigs. Or, as the Germans call it, "Versuchskarnickel".

I have mentioned I was planning to make a video workshop on the pattern-free tablet weaving method, right?

Well, the "planning to" has progressed to "I have a script, and a camera, and I am getting started". Which is nice. However, since this is the first thing in that line of work, and since I want to make sure that what I am doing is going to work for those who will be watching the videos, I need some guinea pigs to give me feedback on the test runs of the lessons.

What does that mean? It means I will send you download links to the videos I have made, taking you through the course from start to finish, with probably some wait times inbetween as things get into the way or I get sidetracked or have technical issues. You will be getting test run videos that are probably badly cut (I will not invest oodles of hours into the test run) and contain the occasional verbal blunder. Some of them will not be made with the final materials.

Your task, if you are joining the merry band of furry victims, will be to watch the videos, follow the instructions, and tell me everything that was not good, not clear, not helpful, or otherwise shitty. (And yes, I fully expect to hear a lot of "this was shitty" - after all, it's first steps in many regards for me.) That starts with the instructions themselves, obviously, but goes on to camera work and camera angle, lighting, or maybe just the fact you find that my beheaded upper body is twitching too much while holding shears and bits of yarn into the camera. (I will also ask you to provide your full contact data, and sign an agreement form that you will not pass on or publicise the videos or parts of them in any way.) I'm not keen on hearing that I am doing a lot of things badly, but I much prefer hearing about them from a band of testers with minds steeled against weird takes than from the paying customers later on.

What do you need to join in? Basically, just the will to do it, and enough time for doing the tablet weaving according to the instructions. It will eat some hours, as it is a slow task, but if you are interested in this, you will probably find it fun and not tedious. You do not need to be an expert in tablet weaving - in fact, I'd be happy to have one or two absolute beginners in the group, and you will be able to follow along just as well, as we're doing the system from scratch.

You will also, apart from your general willingness, a way to watch the downloaded videos, and the time to do stuff and then give me feedback, need 30 tablets plus yarn to weave with... and two points to tie your warp to. There will be a video bit about tools and materials, so you'll be informed properly. (Or so I hope.)

I am aiming for about a dozen folks. So... if you are interested, let me know via mail, or contact form, or through the comments here - preferably with a short summary of your previous tablet weaving experience, so I can get a basic idea, and I'll get back to you with further info!
0
OCT
20
2

Workshops! Shenanigans!

I'm off to teach a full weekend's worth of workshops - spinning, tablet weaving, loopbraiding, and sewing techniques, and I'm all excitement.

Especially about the tablet weaving course. It's been so long in the "I would like to do this" stage, followed by a very long planning stage, and then, a while ago, the test run. Then some more smoothing of rough edges and planning and updating the plan and the printouts... and now it's going to get its first run out in the wild. Proof of this? A huge stack of stuff sitting in the car, waiting to be ferried off. This is by far the most material-intensive course that I teach, because I use clamps to set up the warps (mimicking the medieval tablet-weaving stands).

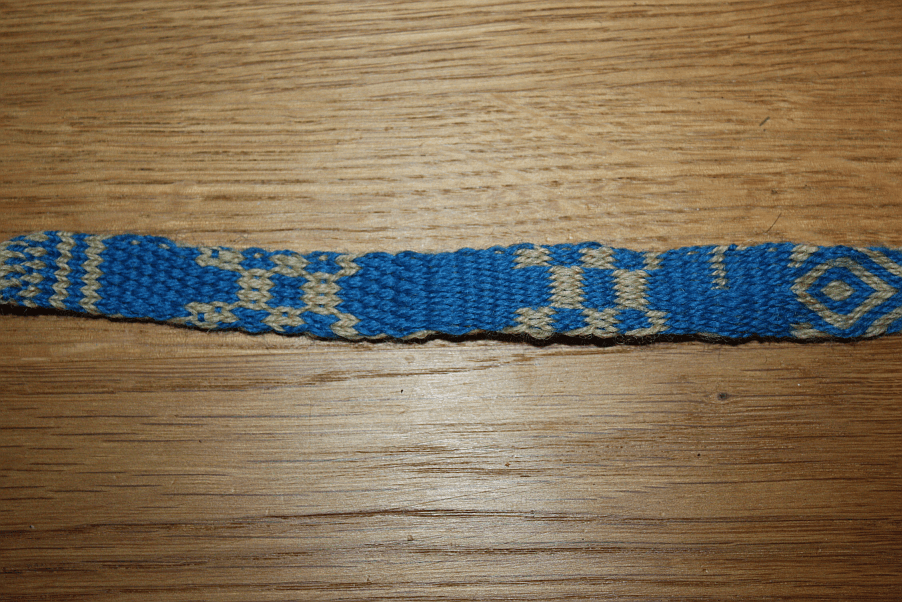
[caption id="attachment_3447" align="alignnone" width="902"]Starting off easy - a few straight lines, a bit of doubleface, getting an understanding of how things work. Starting off easy - a few straight lines, a bit of doubleface, getting an understanding of how things work.


Since I'm currently also doing brain-bending exercises with free patterning, it's an especially nice feeling for me to be teaching a method that will allow the new weavers to do their own on-the-fly patterning, from a deep understanding on how these things work. At least that is my cunning plan - and the system I teach is quite robust in regard to mistakes, too.

Well. Let me put that a bit more into perspective. If you make a mistake, the system allows you to unweave the bad bits, then re-sort the tablets into their two packs as you un-weave the last correct pick that you made, then do the last pick again and work your way forward once more, hopefully correctly. You will not need a drawing or pattern draft to re-align tablets. You will need, however, patience and an adequate assortment of sighs, curses, or motivational beverages of choice, depending on your character. As always, the best thing is not to make the mistake in the first place...

[caption id="attachment_3446" align="alignnone" width="403"]Speaking of the brain-bender, here's the current status. As you can see, I have done my best to try out how to deal with mistakes. Those, by the way, are mostly due to my weaving in the evening at the moment, when I'm already a bit tired... as a robust system should be up to a tired weaver, right? Speaking of the brain-bender, here's the current status. As you can see, I have done my best to try out how to deal with mistakes. Those, by the way, are mostly due to my weaving in the evening at the moment, when I'm already a bit tired... as a robust system should be up to a tired weaver, right?

By the way, there will be a similar-ish workshop on patterning at the European Textile Forum, and due to last-minute cancellations, there are two spaces left once more...
0
JUL
07
4

Workshop Planning - final stage: done.

The workshop planning for the tablet-weaving is finally, finally finished. I've done a testrun on Wednesday, with three lovely ladies volunteering to be my guinea pigs for trying out the concept and the materials - and it was a good thing, and a fun afternoon to boot.

[caption id="attachment_3229" align="alignnone" width="677"]All ready for the testrun! All ready for the testrun!


The good news (for me, at least): the materials, setup things, and general concept are all sound, and they all did work as I had hoped them to. The timeframe of about 4 hours, a little more if necessary, also works.

Of course, though, there were a few issues. "No battle plan survives contact with the enemy", right? They were, however, mostly small, and to my relief, all of them can be fixed easily. One of the small issues was a sort of back-firing effect from handing out pattern sheets - they were intended to help with visualising the patterns, and as a reminder on how they are done for after the course at home. They turned out to be rather distracting, as they were either not understood easily or, in one case, were understood well enough to be used to tick off the wefts that were already done. Which is, of course, a perfectly valid method to approach one's tablet weaving - getting or writing a pattern, then following it - but exactly the opposite of what I want to teach, which is knowing what kind of pattern you want to do, looking at the band, and then seeing what needs to be done in order to get the pattern you want. This, admittedly, is a bit more of a brain exercise than reading a written pattern and following it step by step - but it does give you the possibility to weave without a pattern, and the flexibility to change things on the go without getting (too) confused.

Well, this is easy to remedy - I just won't hand out patterns. Saves paper, too...

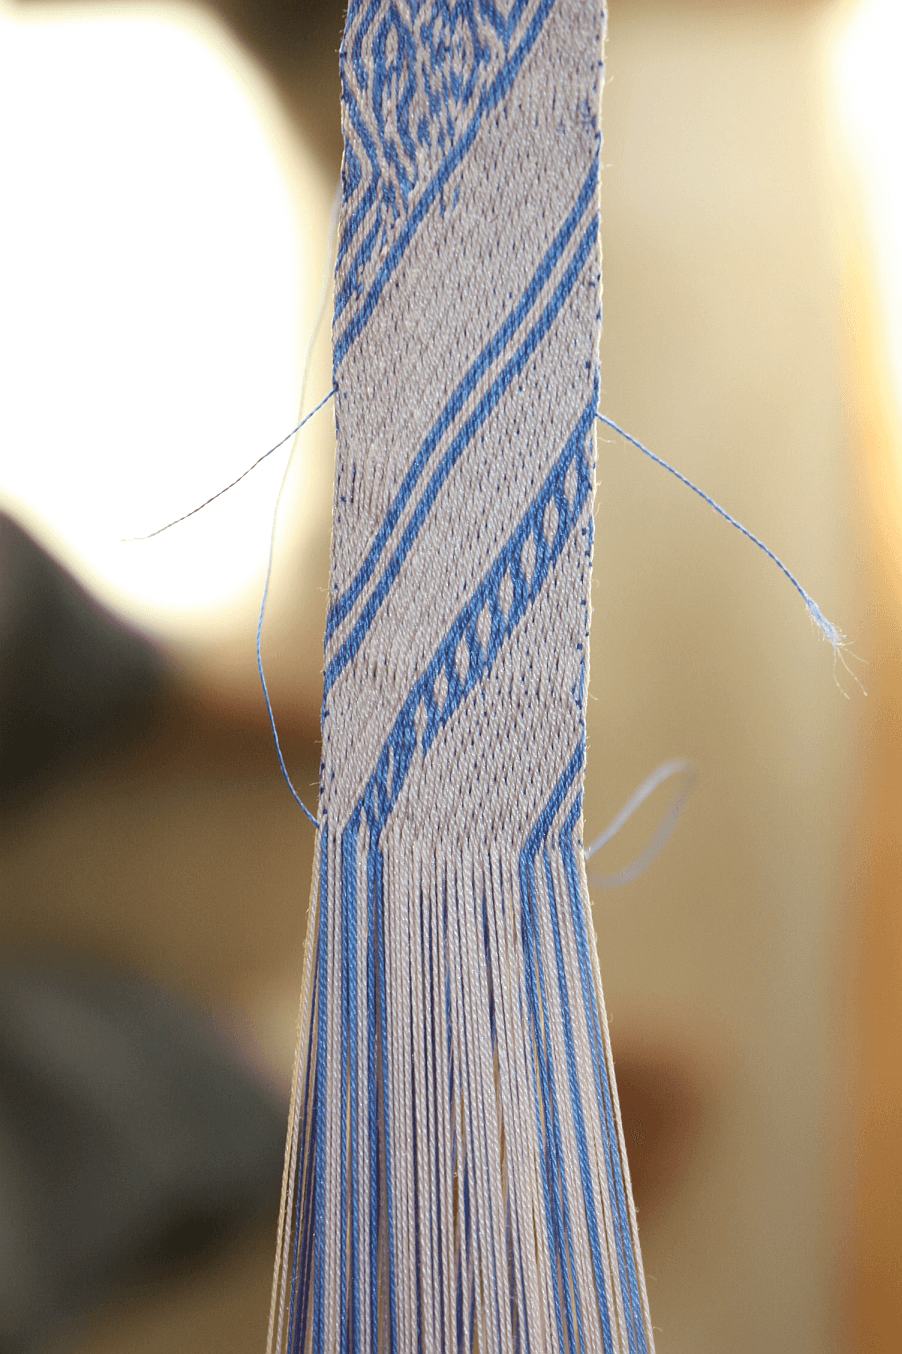
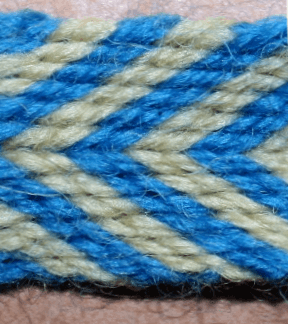
The biggest issue was my intended approach to teaching the 3/1 twill structure. Tabletwoven twill is basically a doubleface with staggered colour sequence - when you turn all tablets into the same direction, you get diagonal stripes. When I learned how to twill, I got taught with the band set up to make a chevron pattern when all tablets turn forward, so you get V-shaped stripes.

[caption id="attachment_3230" align="alignnone" width="218"]Band with chevron stripes. This will still be done in the workshop - but not as the basic setup for the twill part. Band with chevron stripes. This will still be done in the workshop - but not as the basic setup for the twill part.


This has the advantage of having a mirror-image in your band, so if you mess up on one side, the other side can help you in correcting your mistake. The problem for teaching a group with this method? You need a broader than feasible band in order to clearly see the twill structure, and get into the twill rhythm. When I did my concept and test-weaving, this didn't occur to me - I've done enough of the twill stuff to see the pattern emerge almost instantly, and with it the rhythm. With time, it becomes totally natural how the tablets move, and what you expect from them - and that is good and necessary, as twill patternwork will tend to twist your brain, so everything that is automatically done following a strict rule is one thing you don't need to pay attention to. (This is also why I have firm procedures when weaving and firm rules in how to set up the band - I need to know what direction of turning gets which diagonal, or my brain busts.) For the course, though, and beginners in twill, the areas worked in twill and in regular structure in this setup are too small, and things are following too closely on each other, and thus it gets too confusing.

Fortunately, this is also easy to remedy - with a different setup, and slightly different explanation with a different emphasis on what to look for. Which, with a few small changes to the handout, settles all my remaining problems with the course concept. Yay!

So now my script is updated, the handout has been changed, my list has been checked and amended with a few details, and the course is ready to take off. First instance, according to current plans, will be at the Nähtreffen (there's still spaces left, if you'd like to join us). And then - who knows? With about 4 hours, the course is fairly long to offer it at events like the Ravelry Meetup, but it's not completely out of question. And of course, it's always possible to book the course for a group of like-minded folks, either taking place here or where the group is based.
0

By accepting you will be accessing a service provided by a third-party external to https://pallia.net/

Contact