



Search the Blog






Latest Comments
More Sprang Stuff.
I have been dabbling a bit more with the Lengberg cap sprang - on and off, though mostly off in the last months, and now it's more on again. (I am on row 48 or so of almost 200, and I realised that I will need the frame for the Sprang workshop in June, which gave me a nice bit of extra motivation to finish before then.)
While I did make the pattern for the hands-on piece for an exhibition about women's networks by marriage, due to start in May, the piece was done with slightly thicker threads and ran much longer than the original for the same amount of rows. Our solution was for me to make fewer rows - it's enough so you can still get a nice impression of the pattern, but it also was a good compromise for the museum budget. In this case, being a bit "off" from the original was thus not really bad.
It still irked me a little, especially after taking more looks at images of the original and realising how incredibly dense it was. So I made another set-up (with probably way too long threads, but I wanted to have room to manipulate at the end still), with slightly thinner threads, and made it my main task to get the fabric really, really, really, really dense.
By now I am far enough to see how well it worked - and I am actually not too far off the original this time!
This image shows you part of the pattern chart written by Carol James, with my marks of "done" rows and, more importantly, small numbers giving the length in centimeters at that place on the original, calculated from the amount of overall rows and the full length of the original piece. It's a guideline, thus, nothing more - but I find it very helpful.
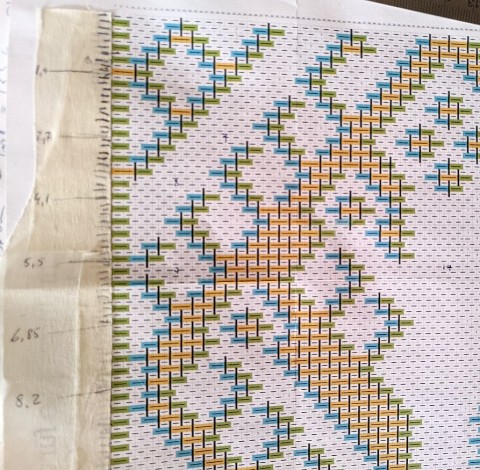
As you can see (more or less well), I should be at about 6.85 cm of length now. I am at...
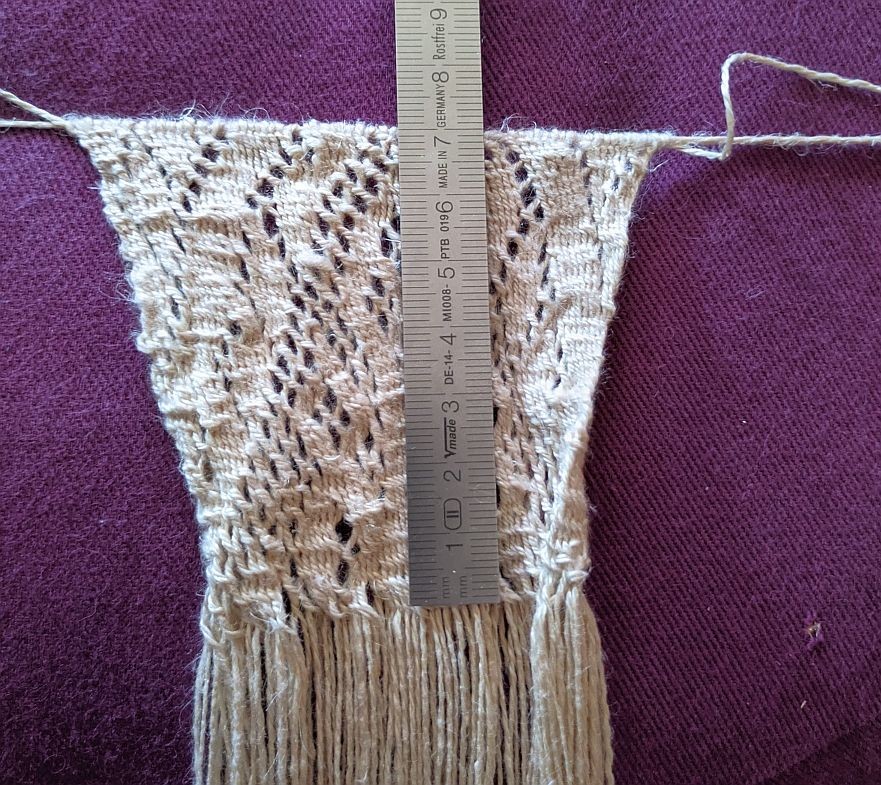
...about 7 cm. That is not too bad! The bottom piece is a little more irregular, and I measure something between 7 and 7.3 cm there, but I still have hope that it might even out again some more.
The trick to getting there was, apart from having the right thickness of threads, working with very little tension and pressing the new row in very, very, very hard. That includes pulling the threads against the weaving sword in small bunches, and repeating it across the width several times. It doesn't take quite as long as the braiding row itself, but it feels almost like it!
So this is how the frame looks, and yes, that is my working "tension".
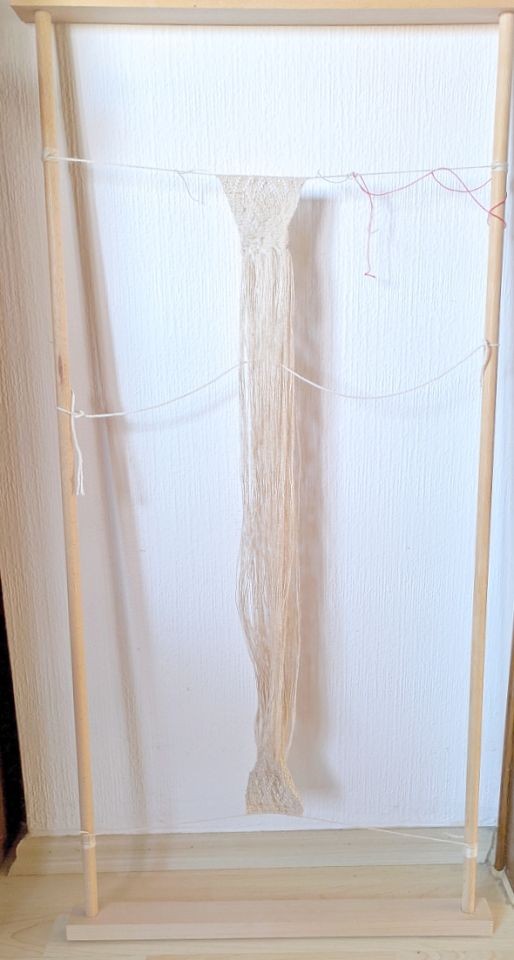
It does work, though! And I can have a little more working tension when doing the manipulation, too, as I am working close to the top fell. Now only about 150 rows to go, and I will be done!
Comments 2

Heh. Yes, calling it "tension" is kind of overinterpreting - it's more a "holding it roughly in place". However, when you are doing the row, if you are working close to the fell it's not so bad. The strings holding the top and bottom are pretty well tensioned, so it is possible to gently pull against them and have a temporarily higher working tension. If you're curious, try it out on a dabbling piece ; )
By accepting you will be accessing a service provided by a third-party external to https://pallia.net/