Latest Comments

Guest - Katrin Sprang Discussion
18 September 2026
Hi Rachel, I have looked for more photos of you, but that was not very successful. I found a link on...
Guest - Beatrix Sprang Discussion
15 September 2026
That lozenge pattern element is not a photograph, but a scan. So it should be to scale. But I pinned...
Guest - Katrin Sprang Discussion
15 September 2026
I was not referring to Rachel's reconstruction (is the reconstruction you refer to the one photograp...
Guest - Beatrix Sprang Discussion
14 September 2026
There is something Rachel did not mention. She told me: "Well, I worked with the measurements we too...
Guest - Katrin Sprang Discussion
14 September 2026
Well, this is certainly developing into an interesting discussion. Firstly, going from that lovely l...
FEB
03
0

More goldwork.

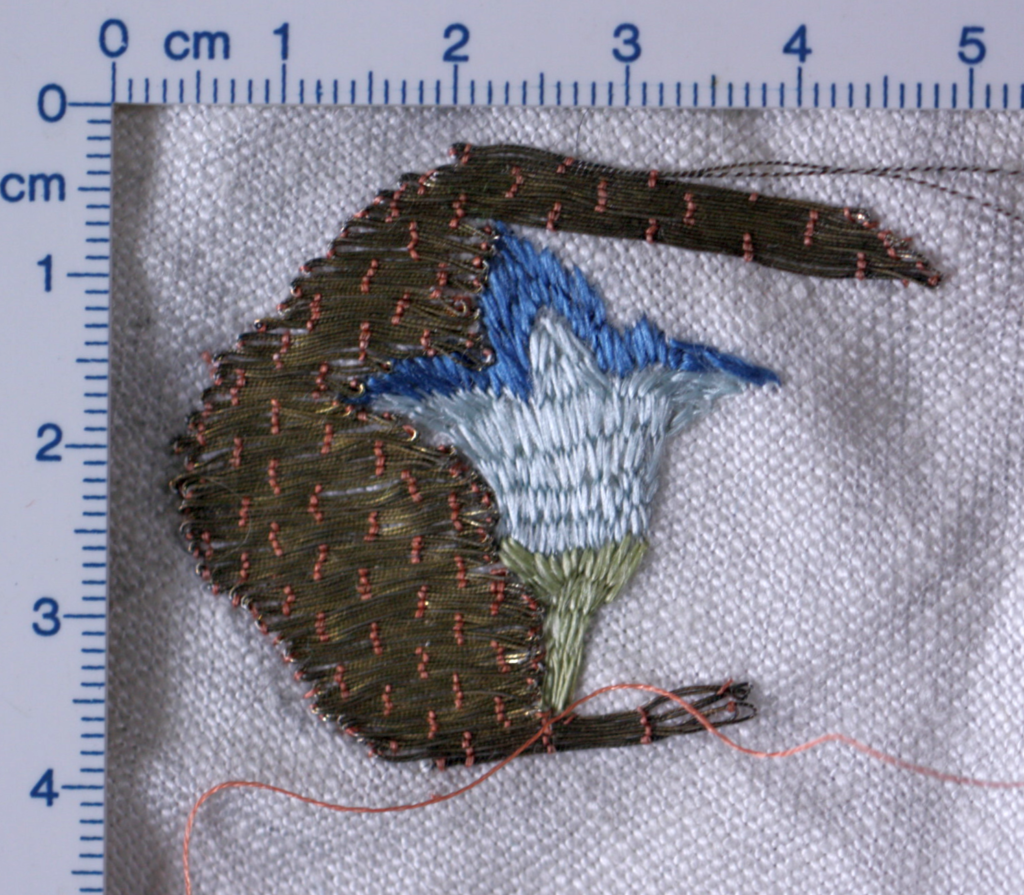
Here's another picture of embroidery featuring gold - this is the sample (unfinished, of course) where I did the counting of how many threads were lying side to side:


The silk parts are worked in split stitch, the gold is couched down with a red silk thread in the same thickness. As you can see, I was not very good at this kind of stitching when I made the sample - which was quite a few years ago! I did this bit mostly to show how the silk and gold would look together, and how split stitch can be used to cover an area. So it was stitched on a rough charcoal drawing as a template, and the gold patch also only outlined with coal, still faintly visible and not very rounded or symmetrical.

Like most of my sample bits, this has been dragged around and stuffed into baskets and boxes and taken out and fingered and then stuffed back in wherever it came from. I've also cleaned (gently washed) all my samples at least once by now. The gold has developed a little bit of a patina due to all this, but it's still pretty and shiny when light falls on it. So - it does hold up quite well!
0
FEB
02
0

Gold Embroidery Maths.

I've been asked recently about how much gold thread to calculate for covering a given area - so I've taken out my samples and took a look, and did some maths, and maybe that's interesting for you, too.

The gold thread that I have in the shop is about 0,2 mm in diameter - so if we assume that it will be couched down perfectly, one thread right beside the next, and there's no significant gap between threads, 50 threads next to each other are needed to cover a width of one centimeter. For a stripe one centimeter wide and ten centimeters long, accordingly 5 metres of thread are needed - plus a little more, since it's necessary to have a little bit of thread to pull to the back of the fabric.

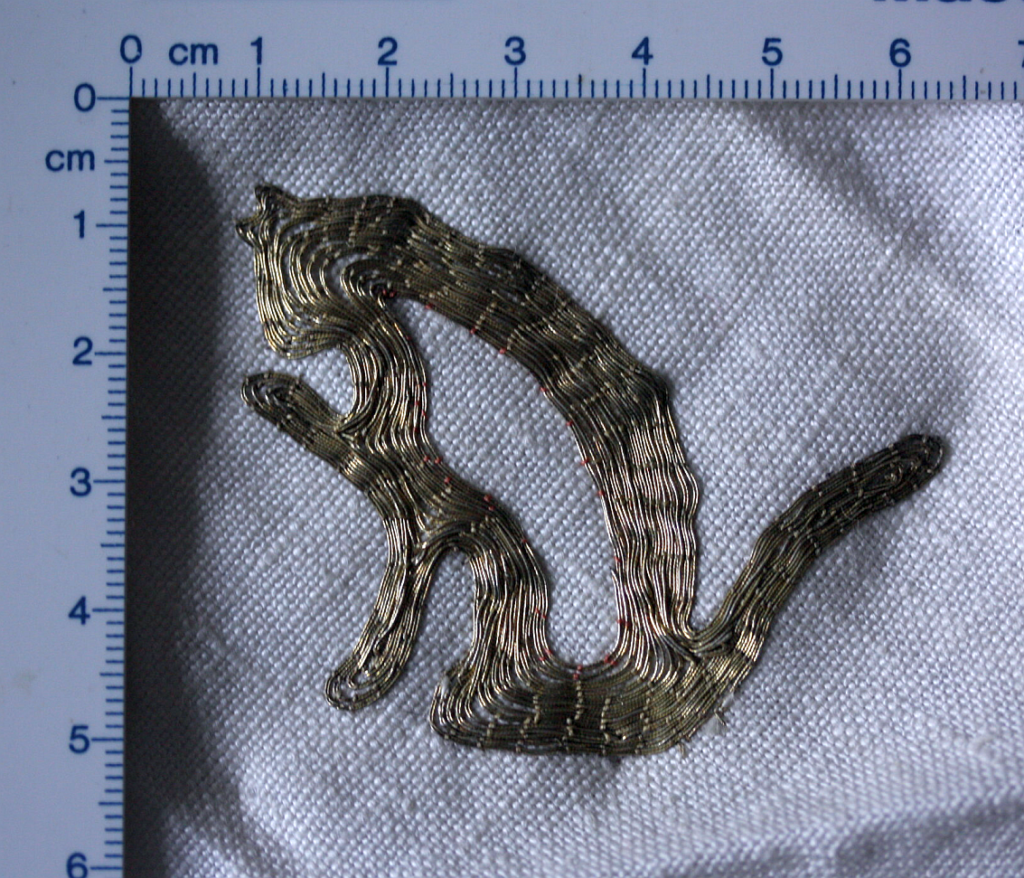
When I had my gold embroidery starter kit fairly new, I found a volunteer to test it for me, and these are the results of stitching with 5 m of gold thread:

[caption id="attachment_5805" align="alignnone" width="640"] This is how much ground you can cover with 5 m of gold thread.


That's roughly in the area of the 10 x 1 cm stripe. As you can see in the picture (hopefully - it's really hard to take a good photo of gold embroideries!) there are areas where the threads overlap a little, and areas where there are narrow gaps, and that can even itself out or, if you tend more towards one or the other, it will reduce or extend your covered area slightly.

As to the number of threads lying beside each other, I did some counting on a piece where I had threads couched all in parallel, and I got about 21 to 23 threads on 5 mm - so about 42 to 46 per centimeter. Which is close to the theoretical 50, but not quite there, just like I would have expected.

For calculating thread needs, thus, 50 cm of thread per square centimeter seems to be a good ballpark number - it should give you enough wiggle room to anchor your thread ends and safely cover that area, even if you have a little bit of overlap here or there.
0
JAN
28
2

The Dye Experiment Card.

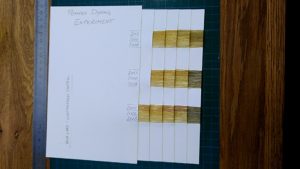
Here are a few more pics from the making of the dyeing experiment card...

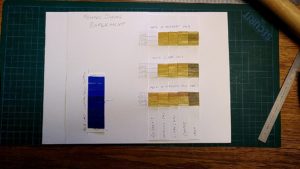
It took me a while of thinking on how to best present the results. I wanted them to be comparable across both the different metals and the different runs of the experiment. Because of the lack of a reference in the add-on 2013, there were exactly three different samples for each data point, which made things nicely line up in the end.


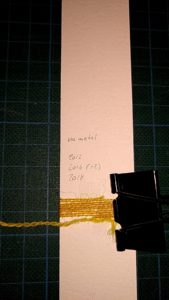
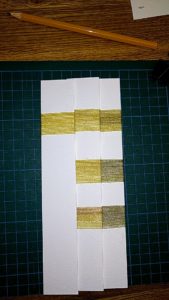
The cardboard strips were labelled on the back, I wound the threads on and fixed them temporarily with sticky tape, then glued them into place with PVA wood glue. I tried to line them up as perfectly as possible, and in the end, there were only very slight variations from the perfect line.


Another thing I pondered for a while: whether I would write the info necessary by hand, or  print it on. I decided, in the end, to do it by hand - there were bits that I would need to do by hand anyways, as I had not printed the metal name on the strips before winding the threads on, and now it was too late. Because I thought it would be weirder to mix than to do it all by hand... well, there you go.

I chose pencil for the writing - because that is very lightfast, and I didn't have a pen that I was sure would be appropriately lightfast. (Yes, I could have used iron gall ink - in theory, but I am not practised at handlettering with that, and, well... perfectionism, anyone?).


As the final thing, I added a blue card - because I could. Because the exhibition and the light exposure of the samples might just as well serve as a fade test; for that, the strips with yarn are layered so they are half exposed and half protected. The blue card is also half exposed and half protected.

I already did a lightfastness test with samples from the last experiment run, in that case fabric samples, but there was none yet with the yarns from that or the previous runs. This will be remedied now! It is, obviously, not a really perfect and proper test as the yarns have seen a few hours (unknown amounts...) of indoor light before in their existence, but it's better than not doing the test at all, or than not adding the bluecard for the reference... so. There you go.

The whole assembly was then glued to another carrier layer of cardboard, and then everything went into a parcel and on its merry way to the exhibition. I hope it will be interesting for the visitors!
0
JAN
22
0

Experimental Archaeology Exhibition...

The MAMUZ, the museum in Asparn/Zaya in Austria, is preparing an exhibition about experimental archaeology (more about it here, in German). The exhibition will then move on as a wandering exhibition, showing objects from archaeological experiments and explaining the objects, and the experiments, in video clips.

So I've been busy doing video stuff, including the cutting and editing, and doing all the other bits and things necessary to prepare. What ate a lot of time - much more than I had expected - was making a colour sample card as the object to go in there to represent the Pompeii Dyeing Experiment.  This started in 2012 with a first run, and there was an add-on made in 2013, followed by two more runs of the experiment in 2016 and 2018. The aim was to find out how a metal kettle would influence the results of the dyeing process, both due to the presence of metal in the mordanting bath, in the dyeing bath, and in both.


For the exhibition, I wound the samples onto strips of cardboard, grouped by kind (mordant, dye, both) and by metal. Nine turns of the thinner wool, used in 12/13 and 2018, and six turns of the thicker wool used in 2016. All neatly in the same position on each strip...


...and it's amazing how much of brain such a simple task can eat.

My personal main takeaway from this experiment, by the way, is the importance of repetition - plus a much higher appreciation of just how much variation natural materials can introduce, and how much of a role sheer luck plays in even the best controlled experiment.

In the 2012 run, we ended up with a reddish colour on the yarn dyed in the copper and the clean lead kettle - which made a kettle made from lead with an oxide layer on the surface the neutral kettle, very close to the actual control dyed in a glass jar with no metal plate added at all. In the following runs, we were never able to reproduce that reddish colour - apart from the iron, our samples all turned out pretty yellow, and much the same across all kettles. If not for that chance aberration in the first run, we would have thought that there is no real difference between the kettle materials, at least not when using madder or birch leaf as a dye.

I'm actually tempted to run the experiment again next time that the Forum will happen (2021, I'm looking at your autumn with a critical eye!), with weld as a dyestuff instead of birch leaf, and see if results are giving us a clear difference there.

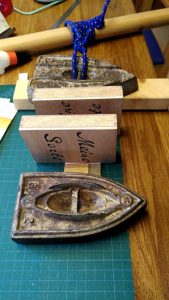
Anyway - the card has been finished, which involved lots of glueing, and the use of some of my bookbinding equipment, and now it will go on its way to Asparn!

[caption id="attachment_5775" align="alignnone" width="169"] Pressing with weights until the glue has set...
0
DEC
15
2

Taking a close look... at linen threads.

You might not guess it, but I have a thing for threads. Which, obviously, includes linen sewing threads.

Linen is a wonderful fibre, and good linen threads are very strong - at least strong in the sense of "can hold a lot of tension". Linen is never strong against abrasion, which is one of the reasons to give the thread a rub with beeswax before using it for sewing.

The best, strongest, and nicest linen threads are those that are wet-spun from long-line flax. Linen fibres are rather smooth, and longer fibres together with appropriate amounts of twist make for stronger yarn than when it's spun from shorter fibre bits. Linen yarns also tend to have a few slubs here and there - much more so than cotton. These can be annoying when using the thread, and having few and relatively small slubs is also a sign of good quality.

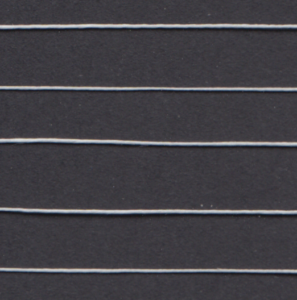
The slight variation within a yarn regarding its thickness is also a reason why three-ply sewing threads are more common these days: They have a rounder cross-section, and the probability of the thickness variation cancelling itself out in a mix of three yarns is higher than with two yarns. That means it's more pleasant and more easy to work with.

Here you can see the difference:

 
[caption id="attachment_5723" align="aligncenter" width="297"] Three-ply linen yarn - that is my extra fine linen sewing thread.

[caption id="attachment_5725" align="aligncenter" width="300"] Two-ply linen yarn, about the same thickness - that is my 60/2 linen sewing thread.
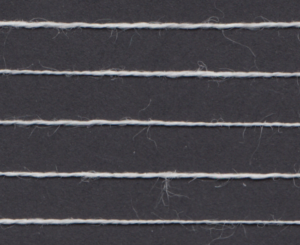

The two-ply also looks more frizzy - that is also an effect of the tighter spinning and the tighter plying the three-ply yarn has.

So what is the better thread for your project? As so often, the answer is: That depends.

If you want to go as historically correct as possible, the two-ply is definitely the way to go, as anything with more plies than two is a HUGE exception for medieval and early modern times.

Why? If you're spinning by hand, it makes quite a difference whether you are making a two-ply yarn or a three-ply yarn: You have to spin the whole length of necessary yarn a third time for the three-ply. Historically, two-ply sewing threads thus were the rule. Only in extremely rare cases can we find a three-ply yarn somewhere before the rise of mechanical spinning and plying - a two-ply will bring all the stability needed for sewing or other techniques where you work with open ends or twist, and is the quickest and easiest ply to make.

Today, though, machine-spinning allows for setting one size of yarn thickness and then easily using a higher number of plies to make a thicker end product. And with three-ply or four-ply yarns having the advantages described above, these kinds are now the rule. Consequently, it is rather hard to find two-ply linen yarns suitable for sewing these days. Which is also the reason why I'm carrying a three-ply thread in my shop, this is stock from the days when I had not found a source for the two-ply yarns yet.

If you're not a total stickler for details, or want to have the bit more smoothness and stability that the three-ply will give you, then you can well go for the more modern thread. And with the fineness this thread has, it will take most people a close look, a magnifying glass and the possibility to un-twist a bit of the thread to be able to tell it's a modern three-ply!
0
NOV
03
0

Things Going On.

Well, here I am. Still doing video stuff... which means that one of the work desk chairs (or, more precisely, a stool) is sitting in the living-room-turned-video-studio. Which means that my old desk chair is back at my desk, and the Most Patient Husband is using his regular chair... and Madam the Cat thus lacks a chair.

Which has been commented upon loudly and verbosely. Cat-verbosely. At least her cat bed is free of stuff (sometimes she doesn't use it for a good while, and I start piling things up on top of it, and then I take them off again and put them away when she expresses interest in sleeping there) so she's using it now. When she's not hanging out over my arm on my desk, that is, during the time that I take care of computer work. Such as blogging.

So currently, I have a very warm right arm; the rest of me is not so warm because I sort of forgot to put on a sweater after the last filming stint, which I started in a t-shirt when it was a good bit warmer a few days ago, and now I'm stuck with that shirt. (Yes, I could change it, but I sort of prefer to look the same, as much as possible, throughout.) And stuck with the level of warmth it provides... it's not too bad, though.

Next step is editing the bits already taken care of, and seeing where that puts me time-wise, and then doing some more video-ing. At least now I have a routine that promises to make some cutting aspects easier - such as holding the clapper into each camera as it starts recording, which should mean I have a written title and take reference for each clip and can line them up more easily. I also have figured out how to align camera 1 (used for the "long shot" and camera 2 (used for the showing-small-things shot) and mount them on their tripods so that hopefully one run through will show all the bits that I need to show. Bonus feature: It's just a lot of fun to use a clapper!

I'll know more soon... after cutting.
0
OCT
27
0

Building Bridges... or at least one!

Bridges are a wonderful piece of architecture. They connect two shores, they make crossing a river so much easier than having to ford the river, or to ferry across. (They also make paddling more interesting, but that is, of course, not their main use.)

They are, however, rather complicated to make - at least if the water that is to be crossed isn't just a slim bit, but has some substantial width. That means they have to have support pillars in the riverbed, and that, in turn, means... some ingenuity, and good technique, is needed for building them.

If you've ever wondered how such a bridge was made in the Middle Ages, here's a little animation video that shows the reconstructed process for building the bridge now called Charles Bridge in Prague:


Isn't that amazing?

And that bridge is huge. HUGE. I've been to Prague a few times (though by far not often enough, it's an utterly beautiful city, and I'm utterly fond of the old and very old buildings there, the amazing textiles in the castle collections, the lovely textile colleagues working there, and of course the Czech food, which brings back memories from my childhood in parts, and is just utterly delightful in the other parts.
Erm. I digress. The bridge is huge. If you have the chance to visit Prague, go see this monster of about 10 m in width and more than 500 metres in length. And maybe buy a trinket from one of the stalls set up on the bridge, like on so many bridges in medieval times, as a souvenir. (I might have done that. Who knows?)
0

By accepting you will be accessing a service provided by a third-party external to https://pallia.net/

Contact