Latest Comments

Guest - Katrin Sprang Discussion
18 September 2026
Hi Rachel, I have looked for more photos of you, but that was not very successful. I found a link on...
Guest - Beatrix Sprang Discussion
15 September 2026
That lozenge pattern element is not a photograph, but a scan. So it should be to scale. But I pinned...
Guest - Katrin Sprang Discussion
15 September 2026
I was not referring to Rachel's reconstruction (is the reconstruction you refer to the one photograp...
Guest - Beatrix Sprang Discussion
14 September 2026
There is something Rachel did not mention. She told me: "Well, I worked with the measurements we too...
Guest - Katrin Sprang Discussion
14 September 2026
Well, this is certainly developing into an interesting discussion. Firstly, going from that lovely l...
MAR
31
0

Riding Slits, Part 1.

My recent crossdressing post has provided some confusion to Kareina - and since it's a really interesting topic, that riding slit thing, I'll try to make things clearer here.

I wrote: 

You need middle gores in the front and back to keep a riding slit closed when not in use (and there are no riding slits without gores in any archaeological find).

In the archaeological record, we have men's tunics both with and without a riding slit. What they have in common is the middle gore set into the front and the back.

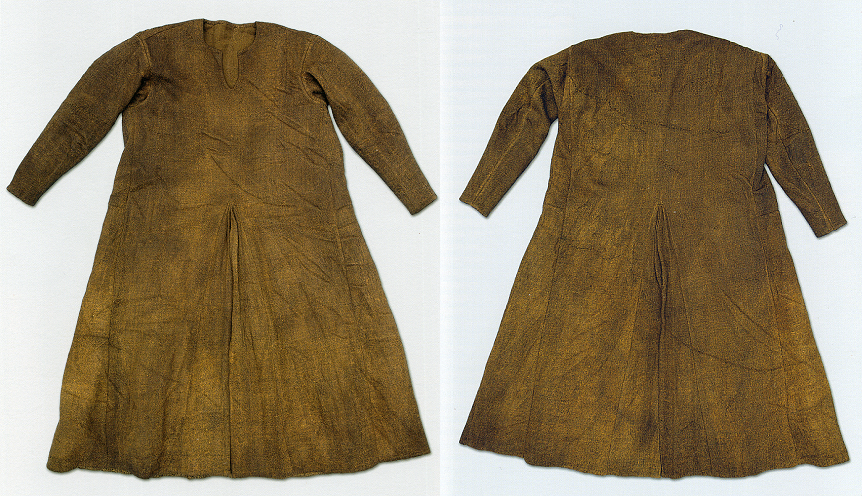
The tunic from Moselund, Denmark, dated to c the 12th century. Image courtesy of the Danish National Museum; find the large images here: https://samlinger.natmus.dk/dmr/asset/217385 and https://samlinger.natmus.dk/dmr/asset/217384

The gore on its own would not provide enough room to sit astride a horse without the fabric riding up the legs, at least not in most cases. The Moselund tunic, for instance, is rather long, so it would have to be very, very wide for that to work. If you look at artwork from the Middle Ages, you will notice that the existence of the slit is made clear, but it's always "closed", as in there is no underwear shown. 
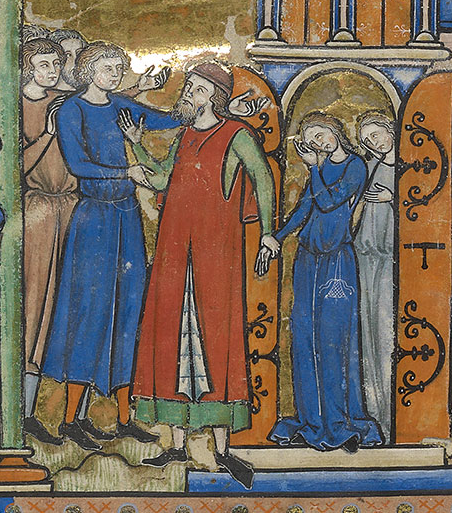
Detail from MS M.638, fol. 3v, The Morgan Library. The Morgan Picture Bible, Paris, France, ca. 1244–1254. Persistent URL: http://ica.themorgan.org/manuscript/page/6/158530

The way we are shown that there is indeed a riding slit is rather ingenious: There is a vertical line, and because that is usually rather inconspicuous, often the edges of the lower part of the slit are shown turned outwards, with the lining of the garment clearly visible contrasting with the outer fabric. This is the case in the image above, where a fur lining is shown. The two men next to this man have simpler slit tunics, but you can also clearly tell they are slitted: the corners at the bottom of the slit overlap, and are slightly mis-aligned. The same goes for the green garment worn underneath the red fur-lined one on Main Guy. 

A riding slit, for it to work properly, also has to be long enough. A lot of the modern interpretations in Living History have a slit cut in, but it does not reach up far enough - it has to come up to about crotch level, front and back, if you want to avoid bunching of the tunic. That, of course, is a problem if you do not have the middle gores set in, because a simple slit will inevitably stay open (especially if you hem the edges, which is the smart thing to do) and thus, if it's cut up far enough, expose your underwear. Which, back in time as today, was not something you'd usually go for.

0
MAR
08
0

Egtved Update. Rings.

You're long overdue an update on the Egtved Project, right? It has slipped into the background a bit with all my writing about the website stuff and issues - though there was work on it going on in the background. Spinning and weaving have both been finished by now, but today, you're getting an update on the corded skirt, and especially my friends the Endless Number Of Rings.

Looking at the cords, it is relatively clear how they were made. There was no such thing as a cord twister back in the Bronze Age, after all, so the possible methods of getting the cords twisted are a) by hand or b) using a stick or something similar to twist them up strongly and then countertwist them together. For the rings, it's not quite as obvious. 

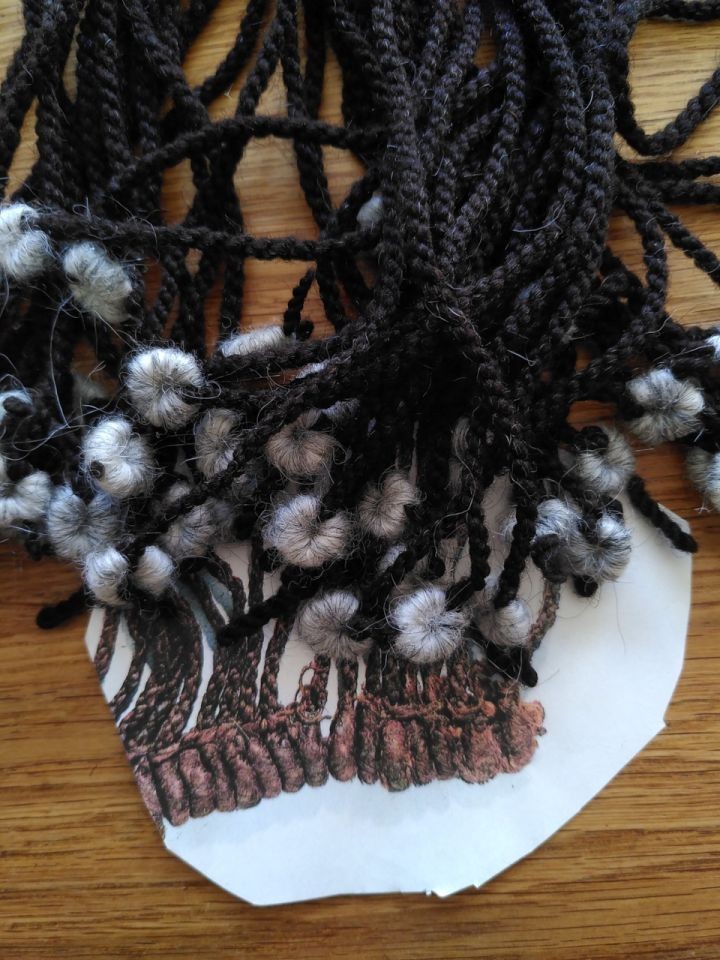
The rings at the bottom are completely covered by wool fibres, wrapped around a core and looking very smooth, tight, and orderly. Similar rings can be found at the bottom of the belt tassels of the Trindhoj and Egtved finds. In Hald's publication about the Egtved skirt, she assumes that there is a knot (a single overhand knot) at the end of the cords, that they are then sort of closed into a ring shape, with the ends touching at the bottom, and this ring is then wrapped with fibre.

I have tried a few different methods to get a nice, tidy, tight ring, and to me it looks like there's quite a number of different ways to achieve this. The method I've settled for now is a two-step process, and I'm not sure how plausible it would be for the Bronze Age, but it's at least not completely out due to not having the tools available in that time.


I'm winding my fibre around a little stick, forming a nice, tidy, tight roll. Not too tight, though, and considerably longer than the actual circumference of the little ring, as that seems to work better than making a thicker, shorter roll. I do make a single overhand knot in the cord as Hald suggests; for me, this mostly serves to make sure the ring will sit at the correct height. Measuring the cord to get it to the length it should have is one of the things that gave me a bit of a headache, by the way - these cords are really stretchy.

I then slide the fibre roll off the stick and pull the cord ends through the roll, in opposite directions. The ends come out at the top, and I go over to the other side and back down into the wool roll with each end, aiming to go about a third to a bit more than a third downwards. I will cut off the remaining cord end later on, and the ring will close up. 

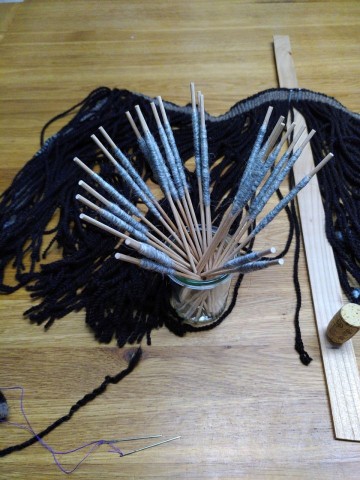
On the picture, you can still see the ends of the cords sticking out of the rings; you can also see the rings hanging out on top of the printed-out Egtved Skirt image that I use as a reference and size guide. Getting the rings the correct size is something that felt, and still feels, like a real challenge, as there's only limited information from the picture. They are only seen sideways, apart from the very last one on the very leftmost end of the skirt, which is sort of half-visible - so I don't know how closed they look, or how their tops really look, or how thick they seem from their front. 

The sides of the rings look a bit squashed up in some places, but after a few hundred years of snuggling up to each other, well, I'd say that can be expected.

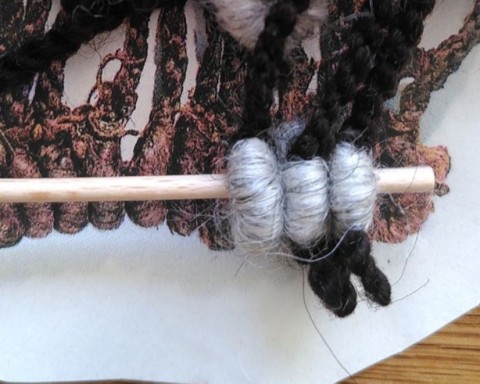
This is how my rings look right now, lined up on a stick for a comparison: 

I'd say that's close enough for all practical purposes. And I'm really looking forward to what it will look, and feel like when everything is strung up properly! 

0
FEB
23
0

The Willow Fence.

About every year around the same time, there's pictures of our willow fence, I think.

I've always liked the idea of a living fence - and even though we have a non-living additional fence around our place, the willow one is the higher one, and the more visible one, and the more exciting one.

It's also planted a little bit too close to the actual border of our garden, which, in retrospective, was not the brightest of all ideas. We had thoroughly underestimated how far the new shoots would branch out over the street, and how many of them there would be. We're handling this now by trying to guide everything as straight up as possible with the help of strings; the trick is to tie those in while the new growth is still green and fresh and very malleable.

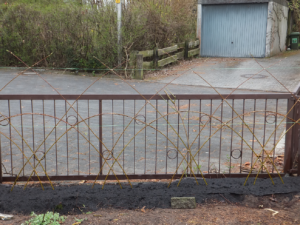
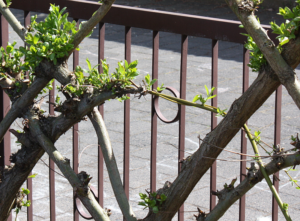
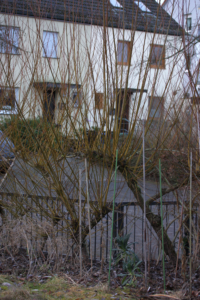
We planted the fence back in April 2012, when it looked like this:


It's a kind of willow suitable for making baskets, which was important to us - after all, if you cut back the new rods every year, it would be sad if they weren't useful in some way.

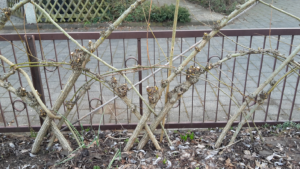
Now it looks like this:


The fence, over the years, has taught me a few things. Among them, first and foremost: Even if willows are bendy, and even if you try to get the shapes all nice and even and just so, they are living things and they will react differently. Some will grow more, some will grow less, some will die off. Nothing will be just as accurate as planned, and planted. And in some places, you'll just have to live with something looking different because of a missing bit.

There's limits to what the trees will accept, and the more horizontal you try to make something grow, the closer you get to this limit. Parts of the tree may go up and die suddenly. The low arches are an issue every year, with plenty of them growing only to about the thirdway point, and then the tree puts everything into the new rods and we end up with a dead part beyond.


Another funny thing is when two trees meld together at their contact point. (That was what I had, in my youthful optimism, planned for all of them to do, by the way.) Sometimes, nothing extraordinary happens. Sometimes, though, the new united tree then decides some part of it is not necessary anymore... and there's another bit of dead wood for us to prune off.

What is really fascinating, though, is the difference between the "before" and the "after" harvesting the rods, and how much biomass this fence puts out every year.

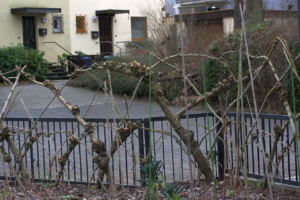
Here's the before look:


And here the after, of approximately the same bit:


Every. Single. Year. Amazing, isn't it?

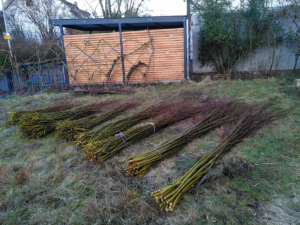
Here's this year's yield, all bundled up. Want to guess how many kilograms of willow?

0
FEB
21
0

Whooosh!

Do you know these days that go "whoooooosh" and they have passed by? Today was one of those. And now it's time to fire off a blog post before I go to the post office, and the little cat has just settled on my arm for some cuddles, so I'm in for a disappointed look in a very short time, when I will get up and leave her all alone on the quiet, empty desk.

She could have come earlier and gotten some more cuddles. While I was taking care of the invoices, or fiddling with the website, or answering emails... but no, then it was much more important to snooze on our bed. (Which had to be made just so before she deigned to lie down on it. Because the duvet has to be placed back onto the bed, not hang on the end of the bed to air out. Because it's just not as nice to lie on the mattress and not the duvet. Except at some times, when the mattress is the only way to sleep on the bed. Because of Cat Logic.)

At least there was a bit of progress on most of the current things to be worked on, including website progress. Including a major design decision that I'm really, really thrilled about. So yay, and we're getting closer! Also, the weekend has seen all our willow fence pruned back, and we now have a stack of willow withies lying in the garden. Some of them will be turned into distaffs, and cutting the appropriate lengths is another thing on my list for the near future. Thankfully that is not a very time-consuming task due to very good, sharp shears.

Now, though, it's time to brave the rain and post the post...
0
FEB
11
2

De-gumming Results.

So, here we are - de-gumming results:

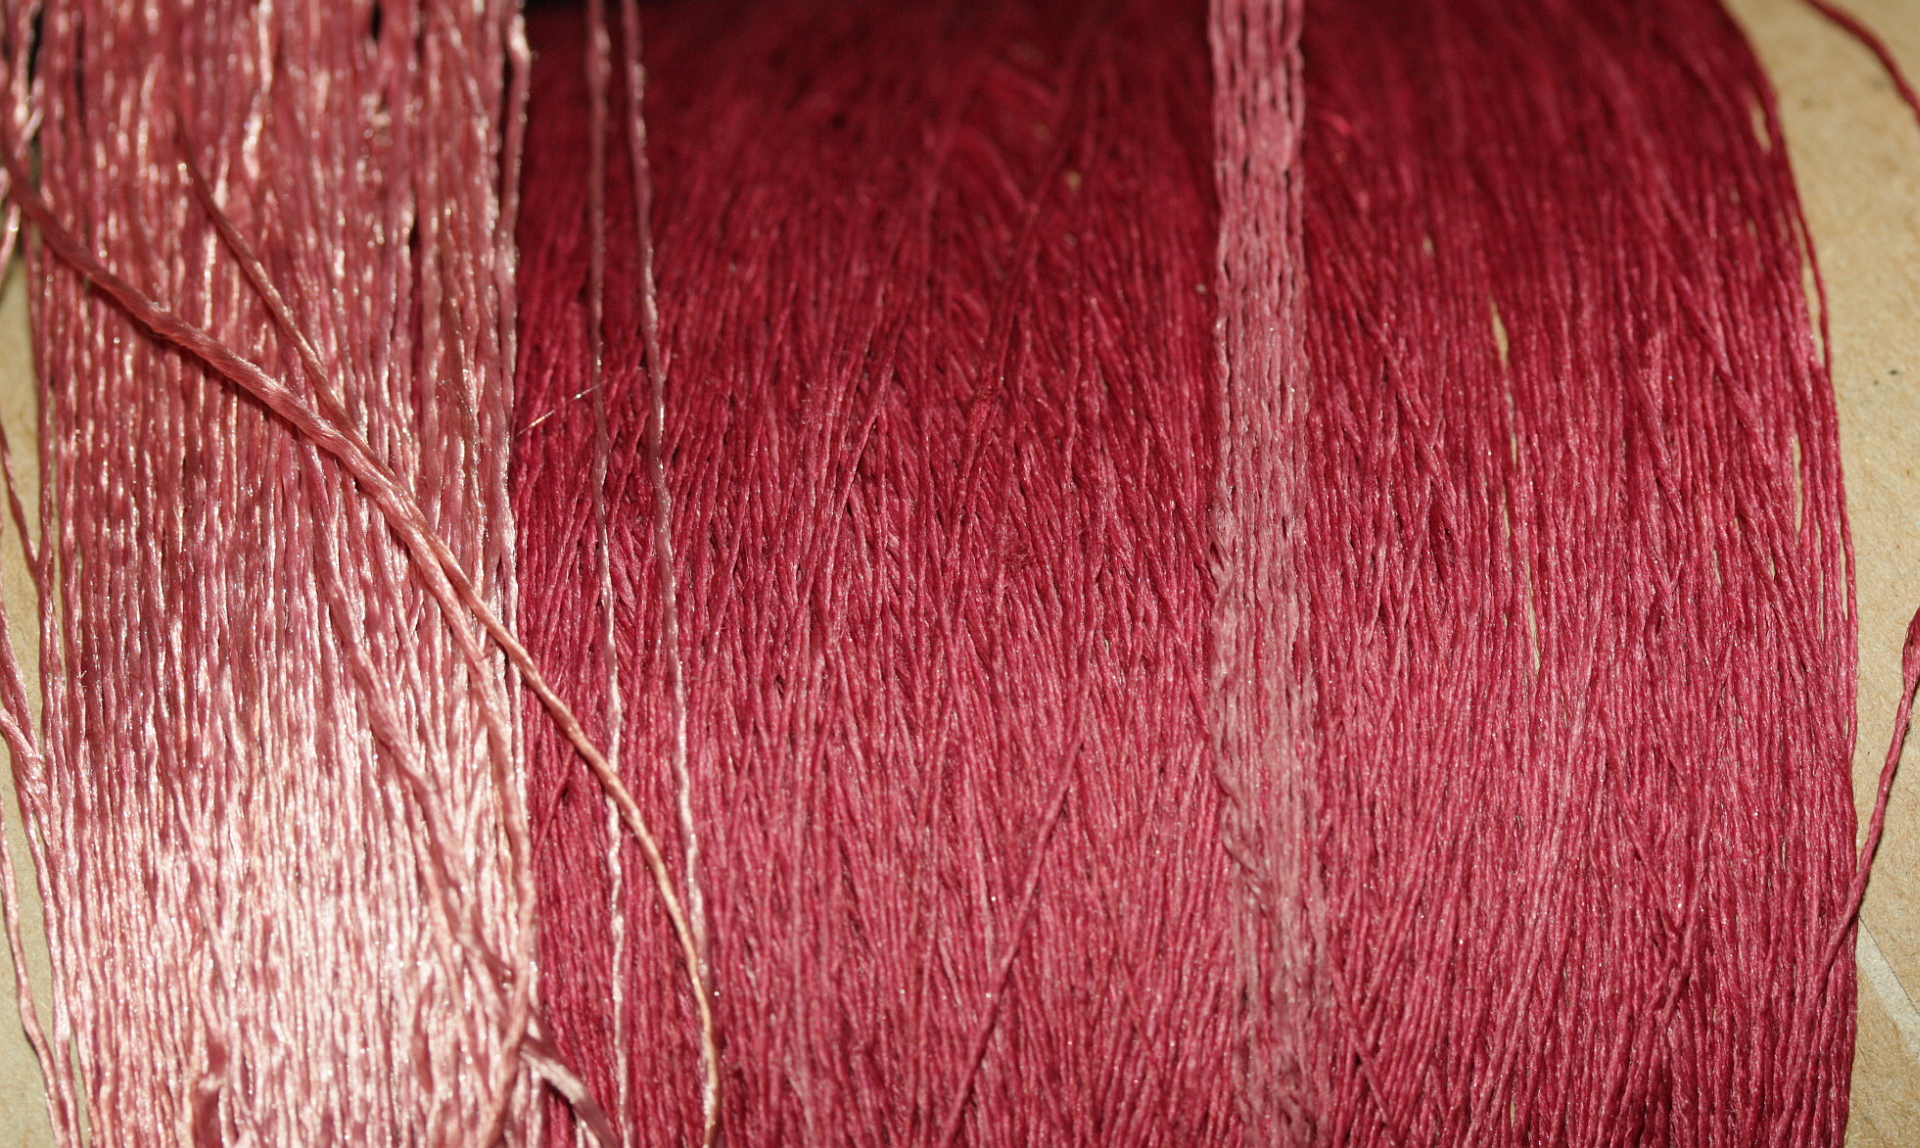
The procedure I did yesterday resulted in colour loss and definitely loss of some, but not all sericin - the silk still has a rather firm hand and is stiffer than I'd expect it to be if completely de-gummed.


You can see the narrow band of lighter silk on the gummy original silk, and the completely de-gummed and then dyed silk on the left side. Maybe I should take another small sample of the gummy silk and try to get all the gum out by boiling it within an inch of its life? See what happens then?

In other news, I've been busy in the background working on the website re-launch. As usual, it eats up all the time it can and then some, and there's other things to take care of and work on (such as the Egtved Project, for which you're also due an update), too, so it's actually feeling a little like a wonder that I have made as much progress as I have. The learning curve is also rather steep - in the past few days, I've successfully dabbled in CSS, altered php scripts (do not leave an extra . in or you will get a lovely error), edited sql tables by adding columns, written an sql update thingummy to replace values in a column (it's called Abfrage in German and I don't know the English term), and used a regular expression for a search-and-replace routine. I've also cursed the inconsistency of things when an installation went wrong and pondered the pros and cons of starting over or not. (Verdict? I'll try, and if it goes wrong, I'll go with the semi-clean install that seems to work okay for now.) At least I cannot complain about lack of challenges in all kinds of fields!

 
0
FEB
10
2

Gummy Silk - The Adventure Goes On.

Well, I definitely got your attention with the gummy silk thing yesterday!

First of all, here's a better picture of the two silks side by side:


Now to the answers to all the comments yesterday...

Jessica's comment was:

That's really interesting! And it probably explains the deep colours we see in medieval embroidery. And how they were able to do couching over padding with a relatively thin thread and still being able to force the gold threads into place and keep them there. How does this partly gummed silk compare to modern Chinese flat silk? That's my go-to silk for medieval projects as it produces embroidery with a slight wavey texture as seen in medieval embroidery.
The gummy silk is quite a bit stiffer than the de-gummed one. The flat silk that I know is much more prone to snagging on anything that looks like it might be rough, but I haven't been able to do a proper comparison with similar silks yet. The gummy sample was a bit of the Texel stocking silk, which is a four-ply silk with slightly twisted singles, the de-gummed was flat silk (my embroidery silk). I have flat gummy silk here, but it's much thinner than the embroidery silk. On my list is trying to make a thicker thread from it, similar in size to the embroidery silk, and see how that compares. That will involve some winding first, though, and fortunately-unfortunately I'm a bit too swamped with other things right now to sit down and do that.
My guess would be that the textures the gummy silk will result in will be a bit different from the degummed one, but how much? That would need some investigation...
Beatrix wrote:

I wrote an article a while ago where I came upon twisted medieval silk. This is from my article:
Lisa Monnas and Roberta Orsi Landini wrote on S-twisted silk threads: ´fourteenth-century velvets usually have Z-spun main ends…but from the late 1420s their [i.e. Italian velvets] main warp threads were generally S-twisted. In contrast Ottoman velvets of the late 15th and 16th centuries generally have Z-twisted main warp threads´ (Monnas 2012, 15); ‘the finest silk thread was used for the warp: strong shiny silk organzine, generally made up of 2 S-twisted ends’ (Orsi Landini 2017, 15-16).
Monnas, L. (2012) Renaissance velvets. London: V&A Publishing.
Orsi Landini, R. (2017) The velvets in the collection of the Costume Gallery in Florence / I velluti nella collezione della Galleria del costume di Firenze. Riggisberg and Florence: Edizioni Polistampa.
So even reeled silk seems to have been twisted - at least a bit.
There's definitely silk with twist - sorry if my post sounded like there was only the untwisted version. Organzine, which is a 2-ply from more or less twisted singles, is also still used today as fine silk for weaving. It's much less prone to snagging than untwisted single, and still has a very nice shine to it.
The silk with very little or almost no twist is an exception, usually there's at least a bit of twist in there. Some is already added (or can be added) when reeling it off the cocoons. Usually, that small amount of twist makes no difference whatsoever - unless you're doing something like the Albecunde belt, where there will be an optical difference between the two tablet turn directions. That belt only works as wonderfully well as it does. Embroideries also usually seem to use really flat silk with no appreciable twist, though a little bit of twist there will not have too much of an impact, at least according to my experiences - plus you can always twist the needle to add or remove twist if it does.

Finally, Florence asked:
How does one de-gum silk?
There's several different ways to do it; you can read more about how the process works here (where different methods used in the industry are given).

The classical method is to boil it off with soap, typically Marseille soap, which is based on olive oil. Which is also what I used for the de-gumming test I did today with a bit of the Texel silk.

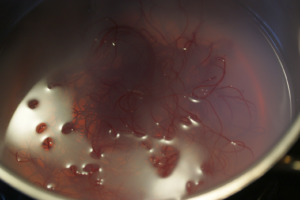
[caption id="attachment_6739" align="alignnone" width="300"] During the de-gumming process - it's starting to lose some of the colour to the soap soup.
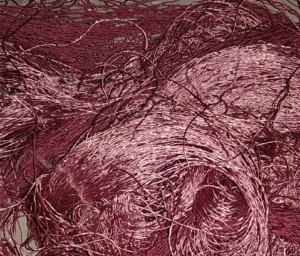

It's hanging out to dry right now, so proper colour comparison may only come later. I'm just as curious as you are!

0
FEB
09
11

Gummy or Not Gummy...

Sometimes, some detail in research pops up, and then it keeps haunting you, and occupying you, just a tiny bit. It's not growing into a big project, but it is always there, and occasionally, things touch it and then you try and fit the new thoughts into the current theories.

Well, that was probably a bit cryptic. So. Let me explain. About... silk.

As you probably know, most silk used in the Middle Ages was reeled, not spun - the long filaments from several cocoons wound off said cocoons together to get you a thread of silk. The more cocoons, the thicker your thread.

When the silkworm makes the cocoons, they're for its protection - so they are pretty hard. That's caused by sericin, or silk gum, which is more or less a protein-based glue sticking the filaments together and hardening them into a nice, protective shell. Hot water softens the sericin so the cocoons can be reeled off (it also kills the silkworm). The glue stays on, though, getting you... gummy silk, or raw silk.

This raw silk is stiff and can feel like a stiff nylon thread, very un-like the soft silk that we know today... because modern silk is usually completely de-gummed.

The thing about de-gummed silk? If you don't twist it, it is very fragile and prone to snagging. It's hard to handle altogether (though yes, very soft and shiny). Since talking to a conservator friend years ago who told me that usually, medieval silks have a much firmer structure than modern ones, I've been wondering about the use of gummy or partially gummy silk in history. The more recent research about the Albecund band is making me more and more convinced that gummy silk would be the solution to a few of the issues with weaving such a band.

One of the questions in that regard was - how does dyeing gummy silk work? Will it dye well? And will the dye be fast? (Side question - what happens if you de-gum it after dyeing?)

Well, I've gotten back two skeins that were test- dyed together, as in both mordanted and dyed together.


The gummy silk took on the colour much, much better... isn't that fascinating?

 
0

By accepting you will be accessing a service provided by a third-party external to https://pallia.net/

Contact