Latest Comments

Harma Blog Break .
29 April 2024
Isn't the selvedge something to worry about in a later stage? It seems to me a lot more important th...
Beatrix Experiment!
23 April 2024
The video doesn´t work (at least for me). If I click on "activate" or the play-button it just disapp...
Katrin Spinning Speed Ponderings, Part I.
15 April 2024
As far as I know, some fabrics do get washed before they are sold, and some might not be. But I can'...
Kareina Spinning Speed Ponderings, Part I.
15 April 2024
I have seen you say few times that "no textile ever is finished before it's been wet and dried again...
Katrin How on earth did they do it?
27 March 2024
Ah, that's good to know! I might have a look around just out of curiosity. I've since learned that w...
JAN
22
0

Experimental Archaeology Exhibition...

The MAMUZ, the museum in Asparn/Zaya in Austria, is preparing an exhibition about experimental archaeology (more about it here, in German). The exhibition will then move on as a wandering exhibition, showing objects from archaeological experiments and explaining the objects, and the experiments, in video clips.

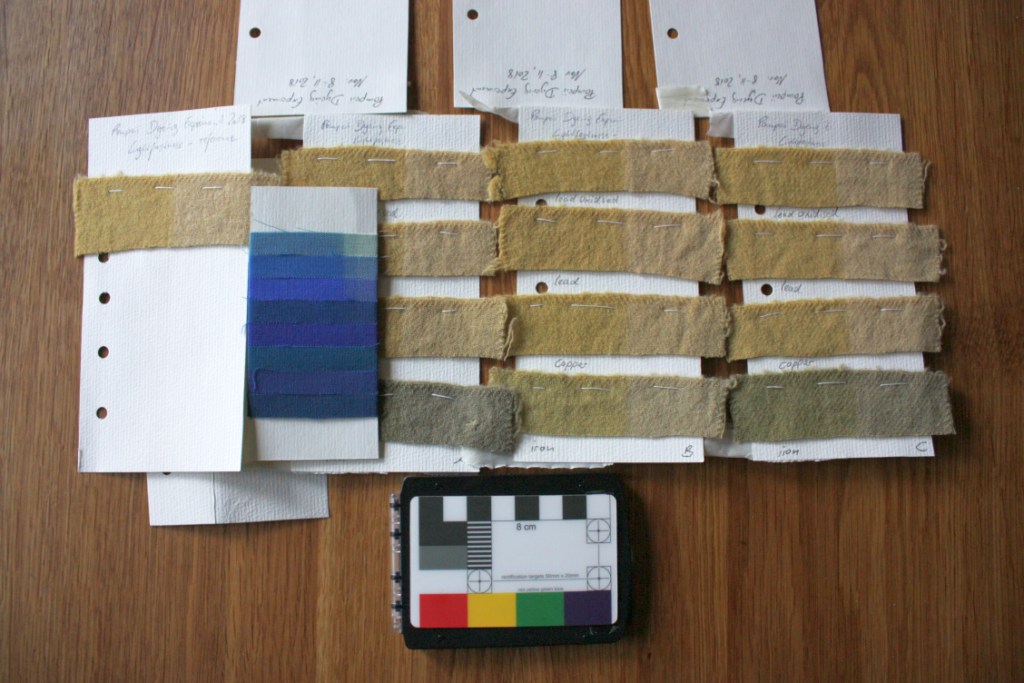
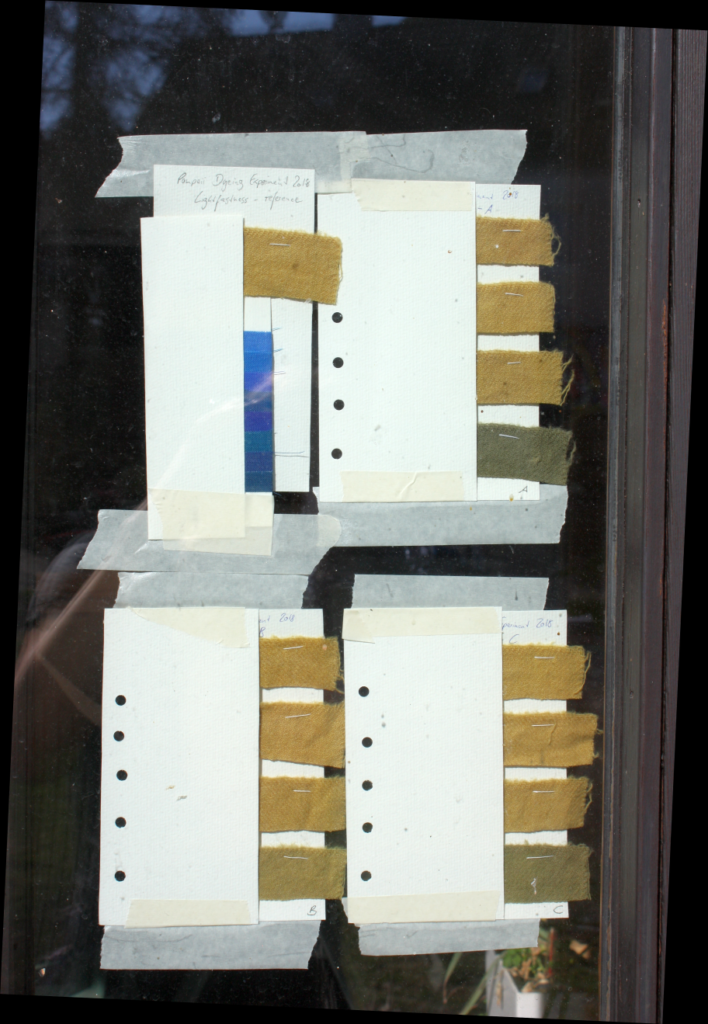
So I've been busy doing video stuff, including the cutting and editing, and doing all the other bits and things necessary to prepare. What ate a lot of time - much more than I had expected - was making a colour sample card as the object to go in there to represent the Pompeii Dyeing Experiment.  This started in 2012 with a first run, and there was an add-on made in 2013, followed by two more runs of the experiment in 2016 and 2018. The aim was to find out how a metal kettle would influence the results of the dyeing process, both due to the presence of metal in the mordanting bath, in the dyeing bath, and in both.


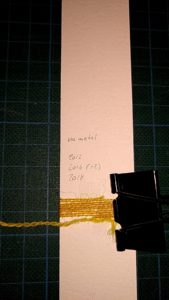
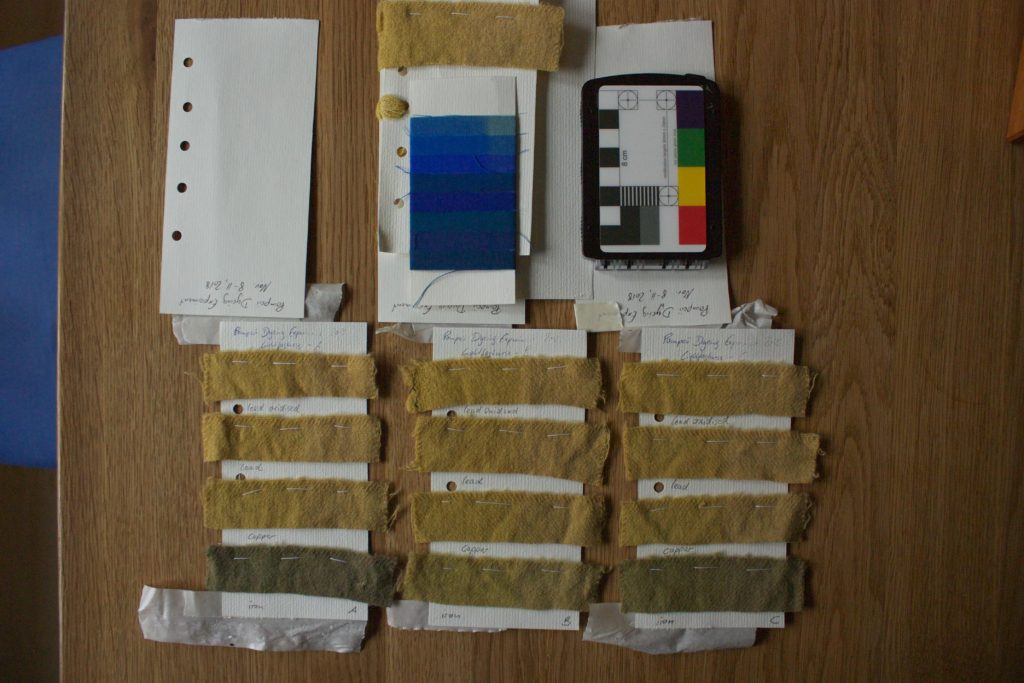
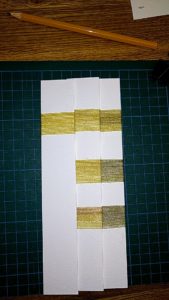
For the exhibition, I wound the samples onto strips of cardboard, grouped by kind (mordant, dye, both) and by metal. Nine turns of the thinner wool, used in 12/13 and 2018, and six turns of the thicker wool used in 2016. All neatly in the same position on each strip...


...and it's amazing how much of brain such a simple task can eat.

My personal main takeaway from this experiment, by the way, is the importance of repetition - plus a much higher appreciation of just how much variation natural materials can introduce, and how much of a role sheer luck plays in even the best controlled experiment.

In the 2012 run, we ended up with a reddish colour on the yarn dyed in the copper and the clean lead kettle - which made a kettle made from lead with an oxide layer on the surface the neutral kettle, very close to the actual control dyed in a glass jar with no metal plate added at all. In the following runs, we were never able to reproduce that reddish colour - apart from the iron, our samples all turned out pretty yellow, and much the same across all kettles. If not for that chance aberration in the first run, we would have thought that there is no real difference between the kettle materials, at least not when using madder or birch leaf as a dye.

I'm actually tempted to run the experiment again next time that the Forum will happen (2021, I'm looking at your autumn with a critical eye!), with weld as a dyestuff instead of birch leaf, and see if results are giving us a clear difference there.

Anyway - the card has been finished, which involved lots of glueing, and the use of some of my bookbinding equipment, and now it will go on its way to Asparn!

[caption id="attachment_5775" align="alignnone" width="169"] 
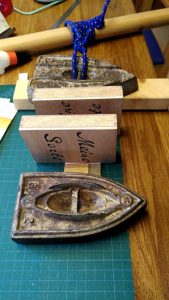
Pressing with weights until the glue has set...
0
SEP
15
0

Cuthbert Maniple Interview!

Another thing that happened while I was away: The interview that Alex Makin did with me and Margit from Alte Künste went live!

In that post, we talk about the process of finding and dyeing the threads for the Cuthbert maniple project that Alex works on, including some details on the problems and decisions made. It was a lovely, exciting, wonderful sub-project for the Maniple Project, and I'm very proud and very happy to have been part of it.

[caption id="attachment_4346" align="alignnone" width="300"] 
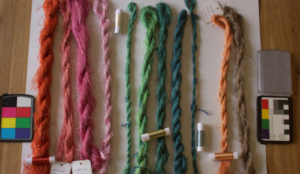
Some of the silks dyed for the project, still in skeins.


You can read the full interview (and see the pictures) here on Alex' blog Early Medieval (Mostly) Textiles. Enjoy!
0
MAY
05
0

Weekend Event!

I'm beyond delighted to be part of an event this coming weekend: The Open-Air Laboratory Lauresham has made their Experimental Archaeology Weekend go digital!


Originally, this was planned as a weekend event at Lauresham, but due to the Corona closures of all museums, and the restrictions on meetings of people outside one's own household, this was of course not possible.

So instead, the weekend event will now take place online, and Lauresham has taken the opportunity to make it more international as well, by having English presentations and German presentations with English subtitles. My contribution will be on as a part of the presentation "Made with gentle hands" on Sunday, 11:30 to 12:30 German time. There will be a discussion on Discord afterwards - all very new and exciting for me!

Go check out the schedule, and maybe I'll see you virtually on the weekend!


0
NOV
20
0

Dear Volunteers... Thank You.

I got to meet a lot of old friends at the Texel Stockings conference, and I also got to know (or know better) a bunch more people. Among them some of the absolutely and utterly amazing volunteer knitters who knitted an entire stocking reconstruction.

An entire one. It's not a sock, mind you. It is a stocking - more than knee-high. We're talking about a piece knit from fine silk, with about 200 stitches to cast on, and about 83 stitches per 10 cm. It took the volunteers between 170 and 350 hours to knit one stocking... no wonder these things were precious. My full and utter respect, and admiration, to the group of volunteers that, up to yesterday, handed in twentyseven complete stockings for the project.

You are heroes for science. Truly. Thank you so, so much for giving such an enormous amount of your time, your skill, and your love to a science project that could not have been done without you. People like you make the world of textile archaeology a better place, and I know from my own personal experience that all of the academics involved in the project will carry you forever in their hearts - like I do my volunteers from the Spinning Experiment that I did ten years ago.

Words are not enough to express how important your work is. Your contribution. Archaeology, especially experimental archaeology and textile archaeology both, are low-budget disciplines. Researchers often work all on their own, trying hard to make projects happen, and there's a constant struggle to source the correct and fitting information, workspace, tools, and materials. If you are very lucky, you can get financial support from an organisation, but a lot of archaeology projects are just fund-your-own research ventures.

Sometimes, this means you are working all on your own for a long while. It feels lonely, and it can be hard. Not only because you feel like there is so much to do, so much to find out, and so little time - but sometimes, as you muddle along crunching data and looking for pictures and written evidence and try to find solutions, it happens that you wonder if your work is interesting or important to anyone else.

Your volunteer support is not only helping us do science. It is also showing us that we are not writing for a dusty stack of paper, to be forgotten in some corner of a neglected library somewhere. It tells us, not only with words but with your actions, that what we are doing is interesting. It is relevant. It helps us find out things about the past, about textiles, about human work and human crafts and human lives - and you, too, are interested in this, and in the connection we today still have. In how our lives are similar, or different. Maybe also in how we can make the world a better place tomorrow, learning from yesterday's techniques, from yesterday's successes, from yesterday's mistakes.

Thank you so, so much. You are wonderful, and I am honoured to have seen, touched, and even tried on some of your hard, meticulous work. I hope you are proud of your work for the project, and that it will continue to warm your heart as it has warmed mine, and that of so many of my colleagues involved in the project.
0
APR
24
0

Lightfastness Test Finished.


I've taken out the lightfastness test on April 18, and I can now say that in my opinion, the fastness is smack dab in the "3" range - and I can see no difference between the fading with different metals.


But decide for yourselves:


So... lightfastness test: done.

0
APR
03
0

Lightfastness Tests - with pictures!


For those of you interested in the lightfastness tests, here are pictures!


This was how the setup looked at the start...


I covered the parts to be protected with cardboard and stuck the whole shebang into the window of our wintergarden, facing south. After 7 days, I took it all down and checked the fading.


On the blue wool scale, each reference strip takes about two to three times longer to begin fading as the next lower strip in the scale. As the Material Technologies Limited website states:


Under normal solar testing conditions, reference 1, the least permanent, will begin to fade in 3 hours to 3 days, depending on geographic location, season, cloud cover and humidity; reference 3 will fade in 5 days to 2 weeks; reference 6 in 6 to 16 weeks; and reference 8, the most permanent, in 6 to 15 months.) These scales are used for paint lightfastness testing under international standard ISO 105-B, and are also used by gallery curators to measure the accumulated amount of light received by museum displays of paintings, textiles or photographic prints. 


This fits in fairly well with the speed of fading that I had, with reference strip 3 already noticeably faded after the 7 days that I took it down for the check. And this is how the birch looked:


As you can hopefully see, there's distinct fading on the first blue strip, and there also is fading on the second and third one. It is not so easy to see on the photograph, but in actual natural daylight, there also is a little fading visible on the birch-dyed cloths. That would place the colour fastness regarding light of these strips somewhere between strip 3 or 4 - not too bad, seeing that modern recommendation for clothing dyes is to have 4 or better.


This, by the way, is another example of it being rather difficult to document nicely and clearly - not everything is easy, or even possible, to show on a photo.


After taking these pictures, the strips were covered again and went back into the window. I'll take them down once more soon, and see how things look then.

0
FEB
14
0

More about Lightfastness Tests (part 2)

 
For the industry, which has a considerable interest in knowing if their products will stand the test of time (especially if stuff is intended for outdoor use), there are a variety of tests and testing apparatus available, from placing things into the Arizona desert (yes really!) to simulating direct sunlight with filtered special lamps. Even there, though, a lot of different parameters are not closely monitored or regulated (there's a nice German pdf here about the challenges, from a symposium on the topic of colour fastness).

So if even the industry has some trouble getting comparable results... well. Let's face it: Our household methods will always be squishy. It's like dyeing tests, or so many other experimental archaeology things using natural resources: a huge amount of variables, many of them not easily measurable or not measurable at all.

I had a chat with a conservator about just the topic of how reliable these tests are, or how helpful, because of anti-UV-coatings on windows, a while ago. Basically, what I remember her saying was that yes, some of the UV is filtered out - but as the coatings also degrade with time, it is hard to say what comes through, and how much of it.

However, these household method lightfastness tests usually serve one of two purposes - an absolute indication or an indication of relative lightfastness, compared between different dyes or procedures.

One, trying to get an "absolute", is of course difficult - but if we accept that the absolute is not necessarily comparable to other tests, or will not give a definite number, it can still be useful. A case for this could be: a dyer wants to know if she can use a specific dye method (type and amount of mordant, type and amount of dyestuff, and method of mordanting and dyeing) to get lightfast results. Or someone has fabric or yarn with unknown dye used on it and wants to figure out if the colour will last when used for a garment before investing knitting or sewing time. In that case, as most of the textiles will be used mostly indoors, having a fastness test inside a window will simulate real life nicely enough - and hanging stuff into a window for 3 or 4 months in summer should show if the fade is strong, or within tolerable limits for everyday use. This will, of course, have different results depending on how sunny the exposure time is, what place the test is taking place at, the humidity, the type of glass and so on, but it should still give an indication for the useability of the dye run.

The relative lightfastness, use number two, is our reason for the lightfastness tests. It's intended to give a direct comparison between different dyes or different procedures, in our case if there is any difference in fading between the samples that have a very similar colour to start with. I fully expect there to be fading, even significant fading, as birch leaf is not the most lightfast yellow to start with, and we used weak end-of-year birch to boot, but no matter how strong the fade will be - as long as there is noticeable fade, we will have the possibility to directly compare the fade between similar colours.

Another use for this relative test would be testing the relative lightfastness of different dyestuffs resulting in a similar colour, such as birch, weld, onion skins (widely famed for their rapid fading) and friends (much of what grows green dyes yellow, so there's no dearth of choice here), or testing the relative lightfastness when using different mordants, or different dyeing temperatures, or different lenghts of immersion, and so on. In these cases, as all the samples are stuck into a given place at the same time, and thus have the same conditions over the course of their test, it is again of little matter whether these conditions are normed or not.

So, to sun, er, sum it all up: Yes, lightfastness tests done by sticking stuff inside windows are not really comparable or give absolute numbers, and it's unknown how much bleaching actually takes place through the glass as compared to unfiltered light, but this very simple test still serves its purpose.

If there is a real necessity to make the results a little more comparable, and get something more in the direction of absolute values, there is a possibility - which is using a comparison scale with known lightfastness values as a benchmark. One of the things used for this is called the Blue Wool Standard, a card with textile strips on it that are dyed blue in progressing depths. These bleach out at a known number of megalux hours, so there is an absolute indication of lightfastness of your candidates. If you are a dyer or an experimental archaeologist who needs something like this, you can buy the scales, for instance here. (No, I'm not affiliated in any way.)
0

Contact