Latest Comments

Guest - Katrin Sprang Discussion
18 September 2026
Hi Rachel, I have looked for more photos of you, but that was not very successful. I found a link on...
Guest - Beatrix Sprang Discussion
15 September 2026
That lozenge pattern element is not a photograph, but a scan. So it should be to scale. But I pinned...
Guest - Katrin Sprang Discussion
15 September 2026
I was not referring to Rachel's reconstruction (is the reconstruction you refer to the one photograp...
Guest - Beatrix Sprang Discussion
14 September 2026
There is something Rachel did not mention. She told me: "Well, I worked with the measurements we too...
Guest - Katrin Sprang Discussion
14 September 2026
Well, this is certainly developing into an interesting discussion. Firstly, going from that lovely l...
NOV
20
0

Dear Volunteers... Thank You.

I got to meet a lot of old friends at the Texel Stockings conference, and I also got to know (or know better) a bunch more people. Among them some of the absolutely and utterly amazing volunteer knitters who knitted an entire stocking reconstruction.

An entire one. It's not a sock, mind you. It is a stocking - more than knee-high. We're talking about a piece knit from fine silk, with about 200 stitches to cast on, and about 83 stitches per 10 cm. It took the volunteers between 170 and 350 hours to knit one stocking... no wonder these things were precious. My full and utter respect, and admiration, to the group of volunteers that, up to yesterday, handed in twentyseven complete stockings for the project.

You are heroes for science. Truly. Thank you so, so much for giving such an enormous amount of your time, your skill, and your love to a science project that could not have been done without you. People like you make the world of textile archaeology a better place, and I know from my own personal experience that all of the academics involved in the project will carry you forever in their hearts - like I do my volunteers from the Spinning Experiment that I did ten years ago.

Words are not enough to express how important your work is. Your contribution. Archaeology, especially experimental archaeology and textile archaeology both, are low-budget disciplines. Researchers often work all on their own, trying hard to make projects happen, and there's a constant struggle to source the correct and fitting information, workspace, tools, and materials. If you are very lucky, you can get financial support from an organisation, but a lot of archaeology projects are just fund-your-own research ventures.

Sometimes, this means you are working all on your own for a long while. It feels lonely, and it can be hard. Not only because you feel like there is so much to do, so much to find out, and so little time - but sometimes, as you muddle along crunching data and looking for pictures and written evidence and try to find solutions, it happens that you wonder if your work is interesting or important to anyone else.

Your volunteer support is not only helping us do science. It is also showing us that we are not writing for a dusty stack of paper, to be forgotten in some corner of a neglected library somewhere. It tells us, not only with words but with your actions, that what we are doing is interesting. It is relevant. It helps us find out things about the past, about textiles, about human work and human crafts and human lives - and you, too, are interested in this, and in the connection we today still have. In how our lives are similar, or different. Maybe also in how we can make the world a better place tomorrow, learning from yesterday's techniques, from yesterday's successes, from yesterday's mistakes.

Thank you so, so much. You are wonderful, and I am honoured to have seen, touched, and even tried on some of your hard, meticulous work. I hope you are proud of your work for the project, and that it will continue to warm your heart as it has warmed mine, and that of so many of my colleagues involved in the project.
0
APR
24
0

Lightfastness Test Finished.


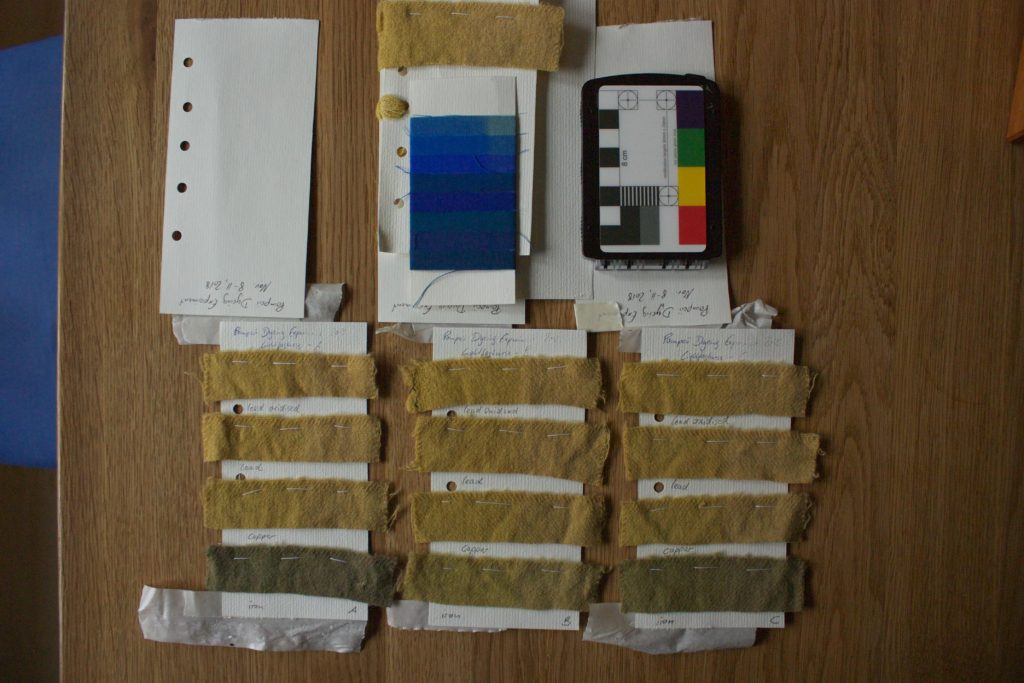
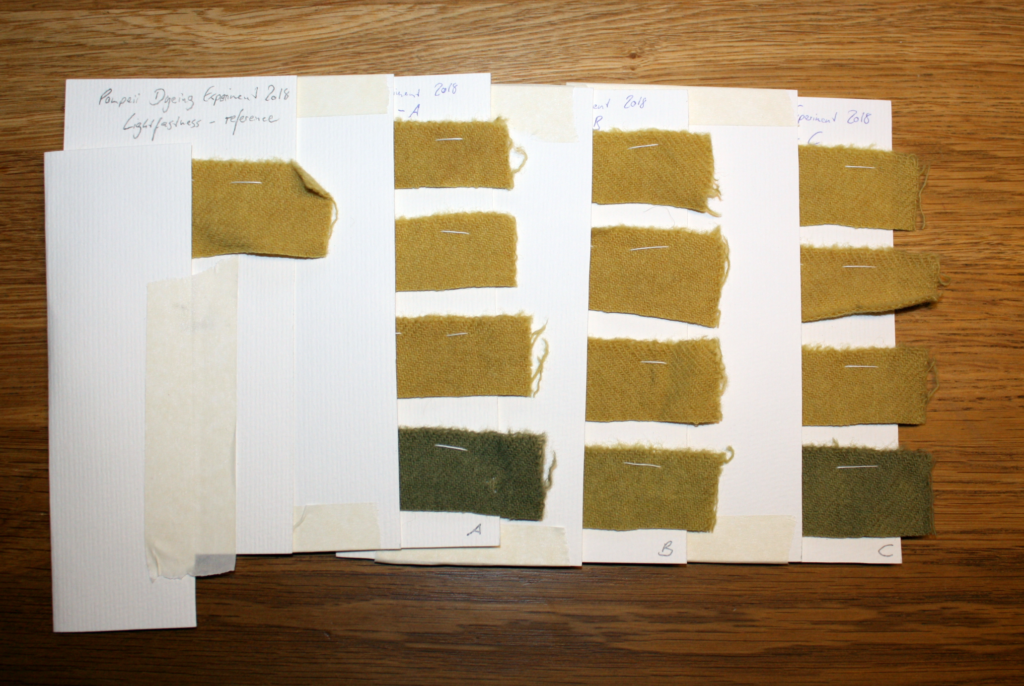
I've taken out the lightfastness test on April 18, and I can now say that in my opinion, the fastness is smack dab in the "3" range - and I can see no difference between the fading with different metals.


But decide for yourselves:


So... lightfastness test: done.

0
APR
03
0

Lightfastness Tests - with pictures!


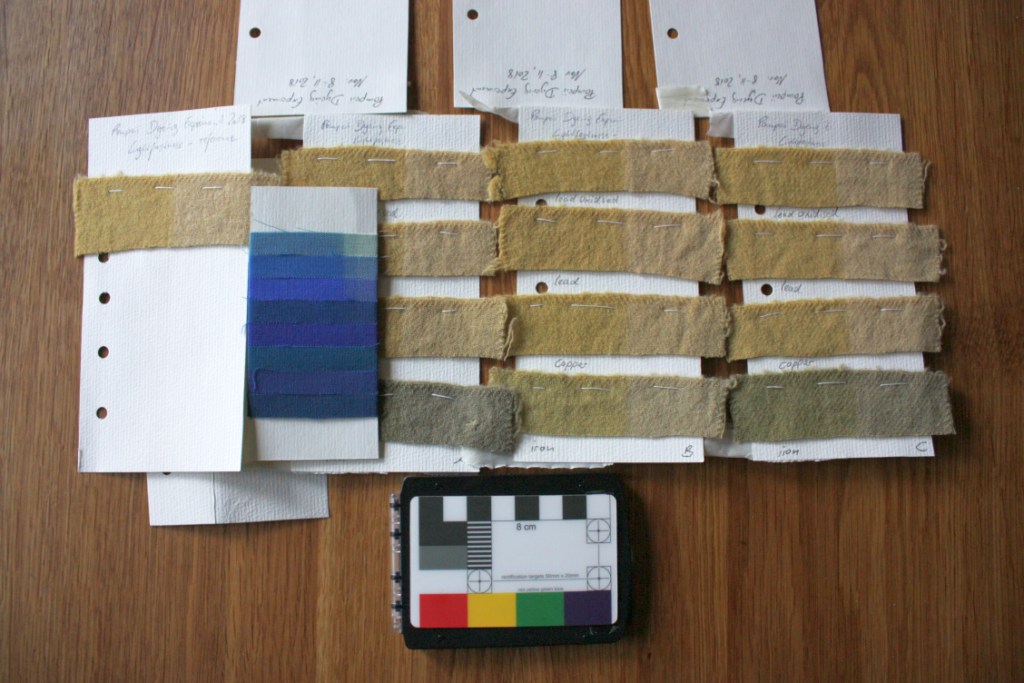
For those of you interested in the lightfastness tests, here are pictures!


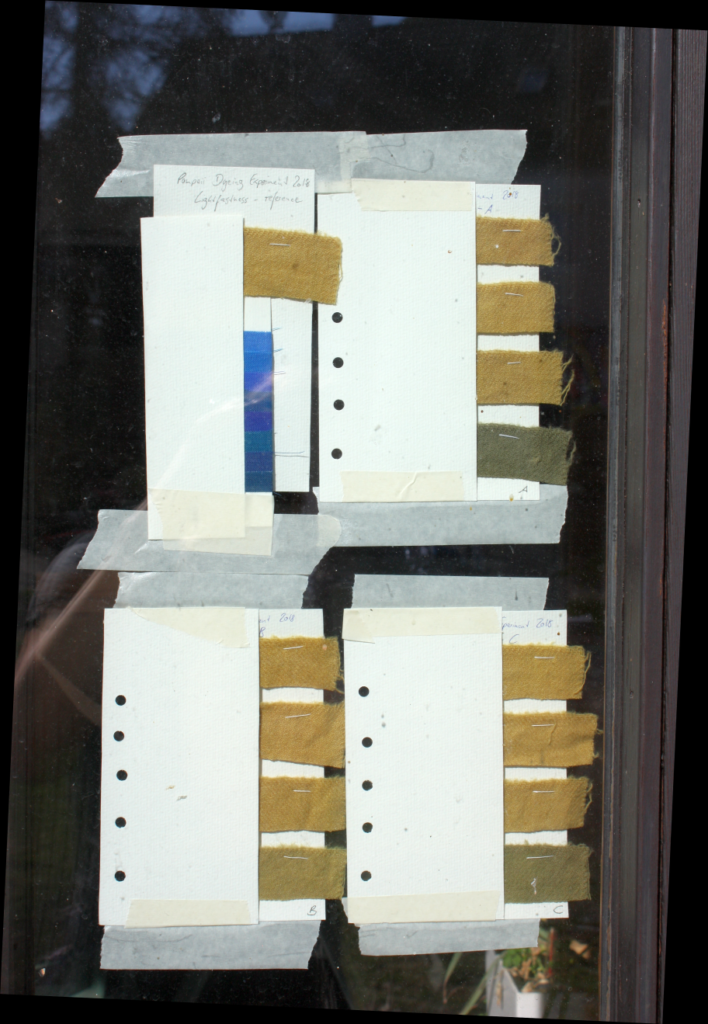
This was how the setup looked at the start...


I covered the parts to be protected with cardboard and stuck the whole shebang into the window of our wintergarden, facing south. After 7 days, I took it all down and checked the fading.


On the blue wool scale, each reference strip takes about two to three times longer to begin fading as the next lower strip in the scale. As the Material Technologies Limited website states:


Under normal solar testing conditions, reference 1, the least permanent, will begin to fade in 3 hours to 3 days, depending on geographic location, season, cloud cover and humidity; reference 3 will fade in 5 days to 2 weeks; reference 6 in 6 to 16 weeks; and reference 8, the most permanent, in 6 to 15 months.) These scales are used for paint lightfastness testing under international standard ISO 105-B, and are also used by gallery curators to measure the accumulated amount of light received by museum displays of paintings, textiles or photographic prints. 


This fits in fairly well with the speed of fading that I had, with reference strip 3 already noticeably faded after the 7 days that I took it down for the check. And this is how the birch looked:


As you can hopefully see, there's distinct fading on the first blue strip, and there also is fading on the second and third one. It is not so easy to see on the photograph, but in actual natural daylight, there also is a little fading visible on the birch-dyed cloths. That would place the colour fastness regarding light of these strips somewhere between strip 3 or 4 - not too bad, seeing that modern recommendation for clothing dyes is to have 4 or better.


This, by the way, is another example of it being rather difficult to document nicely and clearly - not everything is easy, or even possible, to show on a photo.


After taking these pictures, the strips were covered again and went back into the window. I'll take them down once more soon, and see how things look then.

0
FEB
14
0

More about Lightfastness Tests (part 2)

 
For the industry, which has a considerable interest in knowing if their products will stand the test of time (especially if stuff is intended for outdoor use), there are a variety of tests and testing apparatus available, from placing things into the Arizona desert (yes really!) to simulating direct sunlight with filtered special lamps. Even there, though, a lot of different parameters are not closely monitored or regulated (there's a nice German pdf here about the challenges, from a symposium on the topic of colour fastness).

So if even the industry has some trouble getting comparable results... well. Let's face it: Our household methods will always be squishy. It's like dyeing tests, or so many other experimental archaeology things using natural resources: a huge amount of variables, many of them not easily measurable or not measurable at all.

I had a chat with a conservator about just the topic of how reliable these tests are, or how helpful, because of anti-UV-coatings on windows, a while ago. Basically, what I remember her saying was that yes, some of the UV is filtered out - but as the coatings also degrade with time, it is hard to say what comes through, and how much of it.

However, these household method lightfastness tests usually serve one of two purposes - an absolute indication or an indication of relative lightfastness, compared between different dyes or procedures.

One, trying to get an "absolute", is of course difficult - but if we accept that the absolute is not necessarily comparable to other tests, or will not give a definite number, it can still be useful. A case for this could be: a dyer wants to know if she can use a specific dye method (type and amount of mordant, type and amount of dyestuff, and method of mordanting and dyeing) to get lightfast results. Or someone has fabric or yarn with unknown dye used on it and wants to figure out if the colour will last when used for a garment before investing knitting or sewing time. In that case, as most of the textiles will be used mostly indoors, having a fastness test inside a window will simulate real life nicely enough - and hanging stuff into a window for 3 or 4 months in summer should show if the fade is strong, or within tolerable limits for everyday use. This will, of course, have different results depending on how sunny the exposure time is, what place the test is taking place at, the humidity, the type of glass and so on, but it should still give an indication for the useability of the dye run.

The relative lightfastness, use number two, is our reason for the lightfastness tests. It's intended to give a direct comparison between different dyes or different procedures, in our case if there is any difference in fading between the samples that have a very similar colour to start with. I fully expect there to be fading, even significant fading, as birch leaf is not the most lightfast yellow to start with, and we used weak end-of-year birch to boot, but no matter how strong the fade will be - as long as there is noticeable fade, we will have the possibility to directly compare the fade between similar colours.

Another use for this relative test would be testing the relative lightfastness of different dyestuffs resulting in a similar colour, such as birch, weld, onion skins (widely famed for their rapid fading) and friends (much of what grows green dyes yellow, so there's no dearth of choice here), or testing the relative lightfastness when using different mordants, or different dyeing temperatures, or different lenghts of immersion, and so on. In these cases, as all the samples are stuck into a given place at the same time, and thus have the same conditions over the course of their test, it is again of little matter whether these conditions are normed or not.

So, to sun, er, sum it all up: Yes, lightfastness tests done by sticking stuff inside windows are not really comparable or give absolute numbers, and it's unknown how much bleaching actually takes place through the glass as compared to unfiltered light, but this very simple test still serves its purpose.

If there is a real necessity to make the results a little more comparable, and get something more in the direction of absolute values, there is a possibility - which is using a comparison scale with known lightfastness values as a benchmark. One of the things used for this is called the Blue Wool Standard, a card with textile strips on it that are dyed blue in progressing depths. These bleach out at a known number of megalux hours, so there is an absolute indication of lightfastness of your candidates. If you are a dyer or an experimental archaeologist who needs something like this, you can buy the scales, for instance here. (No, I'm not affiliated in any way.)
0
FEB
13
0

More about Lightfastness Tests (part 1)

There's been comments about the lightfastness test setup which, in most cases for hobby and smallscale professional dyers, consists of picking a south-facing window and sticking stuff in there for a given amount of time... which is very obviously not a scientific way for evaluating lightfastness.

First of all, though - let's take a closer look at the things that happen when light hits that textile. I've brushed up my knowledge a little bit, but please note that I'm not an expert, and I'm going to put what happens, as I understood it, into very simple terms. If you want the nitty gritty details, you can check out "Chemical Principles of Textile Conservation" by Agnes Timar-Balazsy and Dinah Eastop (published 1998), where pages 88-92 and 225-232 will bring you many insights.
Basically, what happens is that the light hitting the fabric inserts energy, and this energy can cause chemical reactions on molecular levels. One of these processes is photolysis, where bonds in the dye molecules are destroyed, leading to a different chemical structre and thus a change or loss of colour.

The second process, and even more important than straight photolysis, is photo-oxidation. When this happens, a carbonyl group in the dye molecule changes to  carboxyl group, leading to a shortening of the dye molecule and thus a colour fade. This process is usually slower if humidity is very low, and can also be slowed down by an atmosphere with less oxygen (though some colours may fade faster in a vacuum - so you can't be sure if that is good or not). Metals including iron and copper, as well as their compounds, can aid photo-oxydation. Even nastier about this process is that it can result in active radicals such as hydrogen peroxide, which is a bleaching agent, speeding up the fading of the textile.

Different dye molecules are more or less prone to these reactions to light, which explains the varying lightfastness levels of dyes. Both UV light and visible light provide energy for these reactions, but the wavelengths do make a difference.

So... now that we all know, more or less precisely, what happens when the dyes fade, we can get back to testing.
0
FEB
12
2

Lightfastness Tests!

Well, it's a bit to wait until the prime season for lightfastness tests (three months in a south-facing window in summer, I've been told, would be the perfect thing), but the fabrics from the Dyeing Experiment are all set and prepped... and I might hang them into a window a bit earlier than full summer:


I'm really, really curious to see how well these will hold up, and if there is any difference between the metals that have not made very obvious changes to the colour, and the reference.

So. Summer. I'm ready for you.
0
JAN
31
1

Finishing Stuff.

One of the things about archaeological experiments is that they always take longer than expected... and then, in the aftermath, there's... the aftermath.

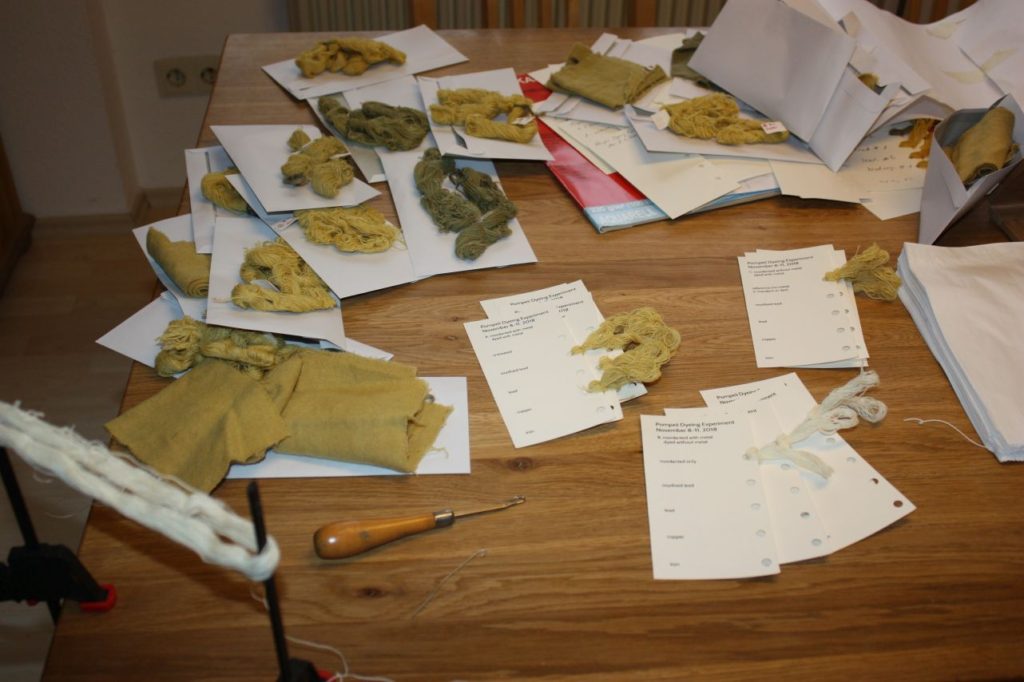
Which, in the case of the Pompeii Dyeing Experiment, involves making reference cards for the different dyeing results. Which means labeling sheets of cardboard, punching holes next to the labels, and then winding off tiny skeins of yarn which are in turn pulled through these holes and fastened.

If you have never done something of the sort, let me tell you: it takes a ridiculous amount of time, and it is stunningly boring work, and I can totally, utterly understand if a dyer does not do yarn colour reference cards (which are only an indication of what colours are possible anyways) and even better why they are not handed out to customers.

[caption id="attachment_4258" align="alignnone" width="640"] Work in progress - I'm less than halfway through here. Altogether, it's four sets of three cards with five skeins each, so it's sixty samples to wind and attach. Can you feel the boredom oozing through the picture?


Now, though, it's finally done, and I can send off the cards to their respective owners (among them the Lab for Experimental Archaeology, for their archive of experiments done at their place). And then, some samples will go into a different lab for testing - so there's a post office run in my near future, which will be followed by a deep, heart-felt sigh of having finally finished that part of the Textile Forum Aftermath!
0

By accepting you will be accessing a service provided by a third-party external to https://pallia.net/

Contact