Latest Comments

Guest - Katrin Sprang Discussion
18 September 2026
Hi Rachel, I have looked for more photos of you, but that was not very successful. I found a link on...
Guest - Beatrix Sprang Discussion
15 September 2026
That lozenge pattern element is not a photograph, but a scan. So it should be to scale. But I pinned...
Guest - Katrin Sprang Discussion
15 September 2026
I was not referring to Rachel's reconstruction (is the reconstruction you refer to the one photograp...
Guest - Beatrix Sprang Discussion
14 September 2026
There is something Rachel did not mention. She told me: "Well, I worked with the measurements we too...
Guest - Katrin Sprang Discussion
14 September 2026
Well, this is certainly developing into an interesting discussion. Firstly, going from that lovely l...
APR
27
0

The Humble Pin.

One of the nice things about events such as the IRM, or other fairs, is that you meet up with colleagues and get to chat with them about all kinds of things. Which includes learning about stuff...

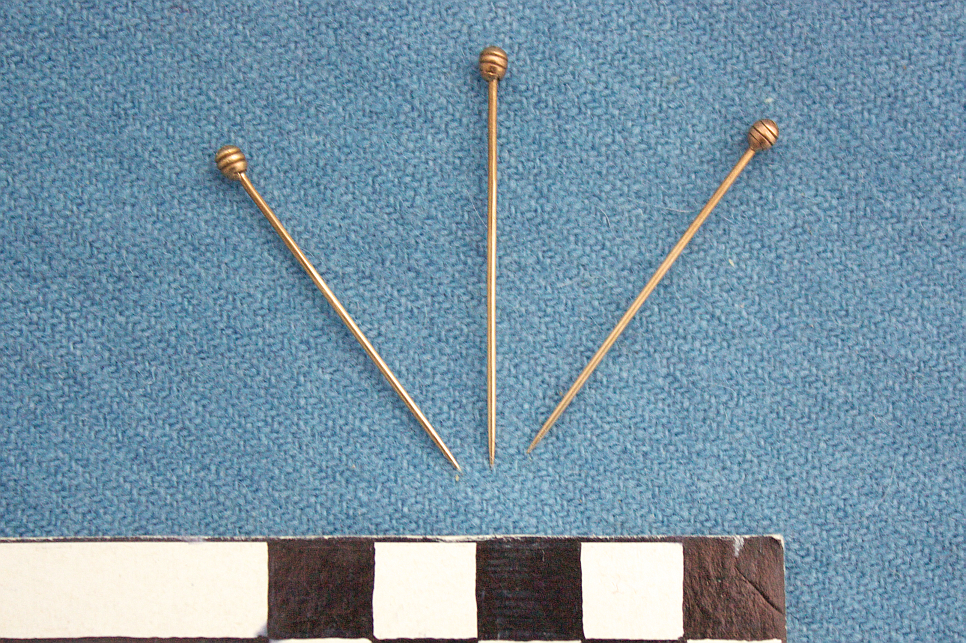
When I met up with the guy who makes my bronze sewing needles and bronze pins, he told me about having had trouble with his arm (which had kept him from working for several weeks); and he also told me about having counted the tools and aids and other items that he uses to make a single humble pin.

Can you guess how many?

Twenty-one. Twenty-one items are used to produce each single pin, ranging from general things such as hammer and anvil and abrading medium to several special items such as the tool to wind the wire into spirals for the heads, and the special tool to compress the wire coils into the nice round shape they are supposed to have.

I think this is fascinating - and it shows again how easy it is to underestimate production procedures for small, everyday things.
0
APR
06
0

New things in the shop, too!

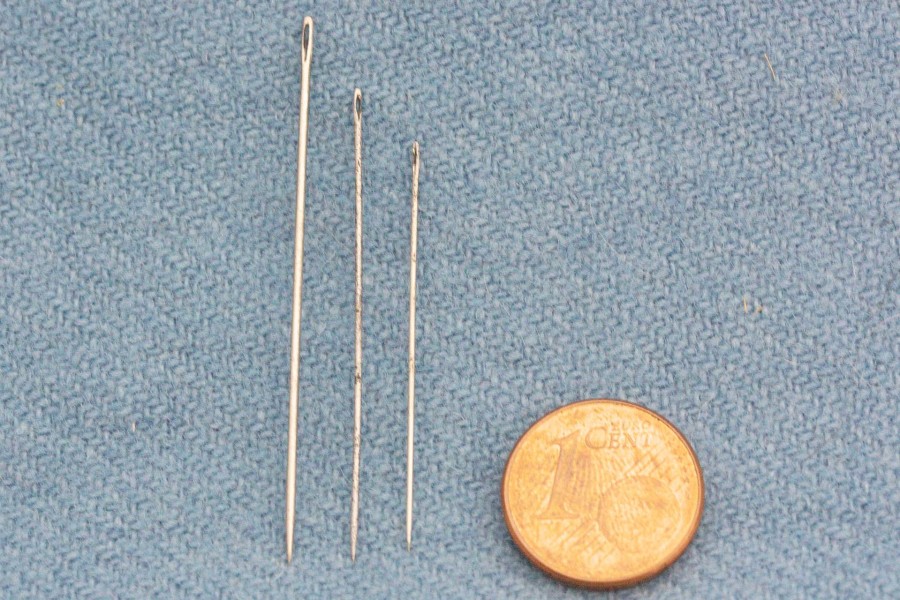
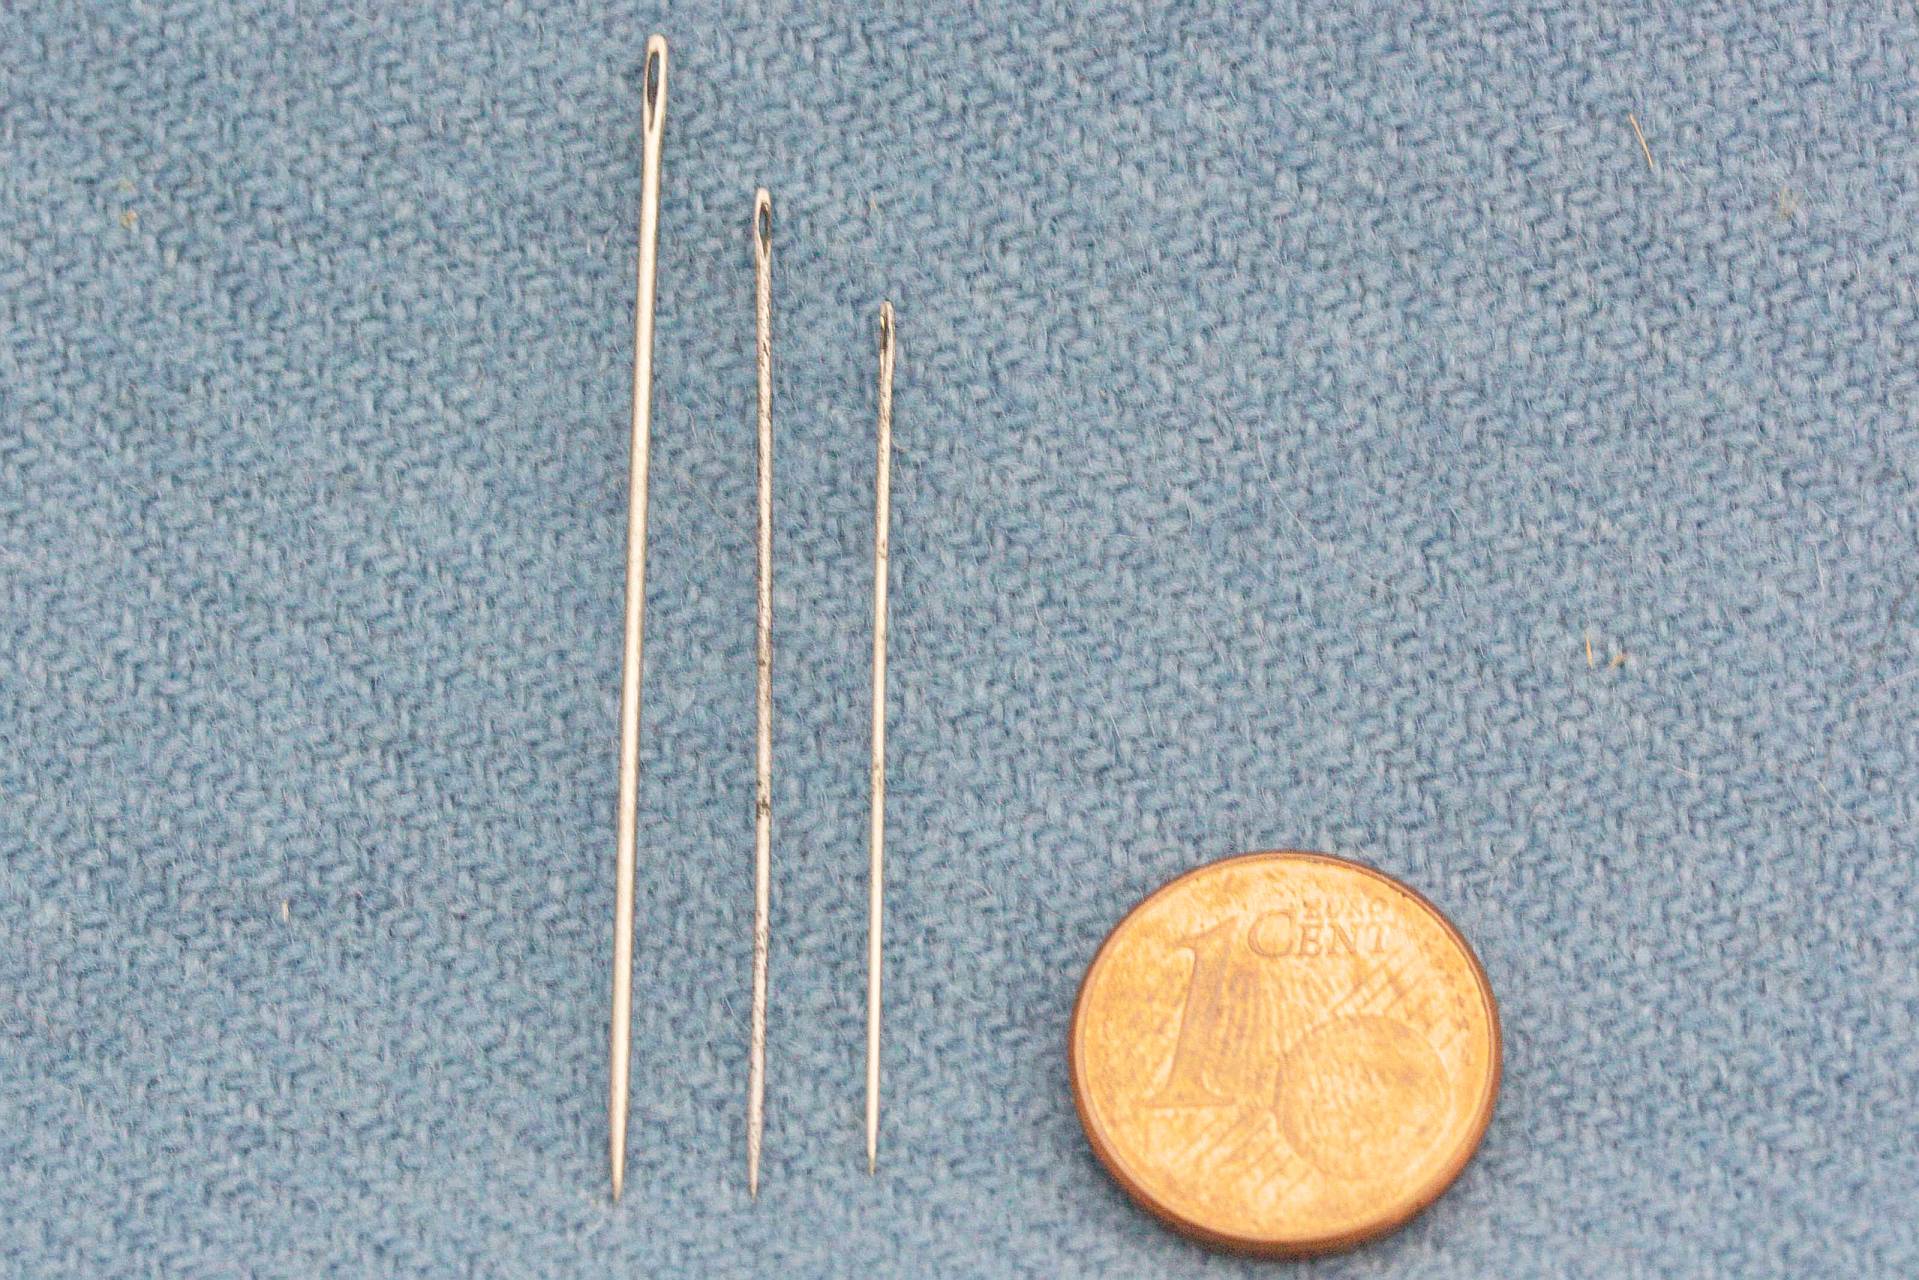
There's not only seedlings sprouting, there's also, finally, something new in the shop again: Handmade iron needles!

eisennadeln1
I was able to buy the remaining stock from someone who made these needles for a while, and they are finally all sorted, polished, and ready to be sold.

Making needles such as these, I've been told, is not easy - there's a lot of breakage when the eye is punched in, for instance.

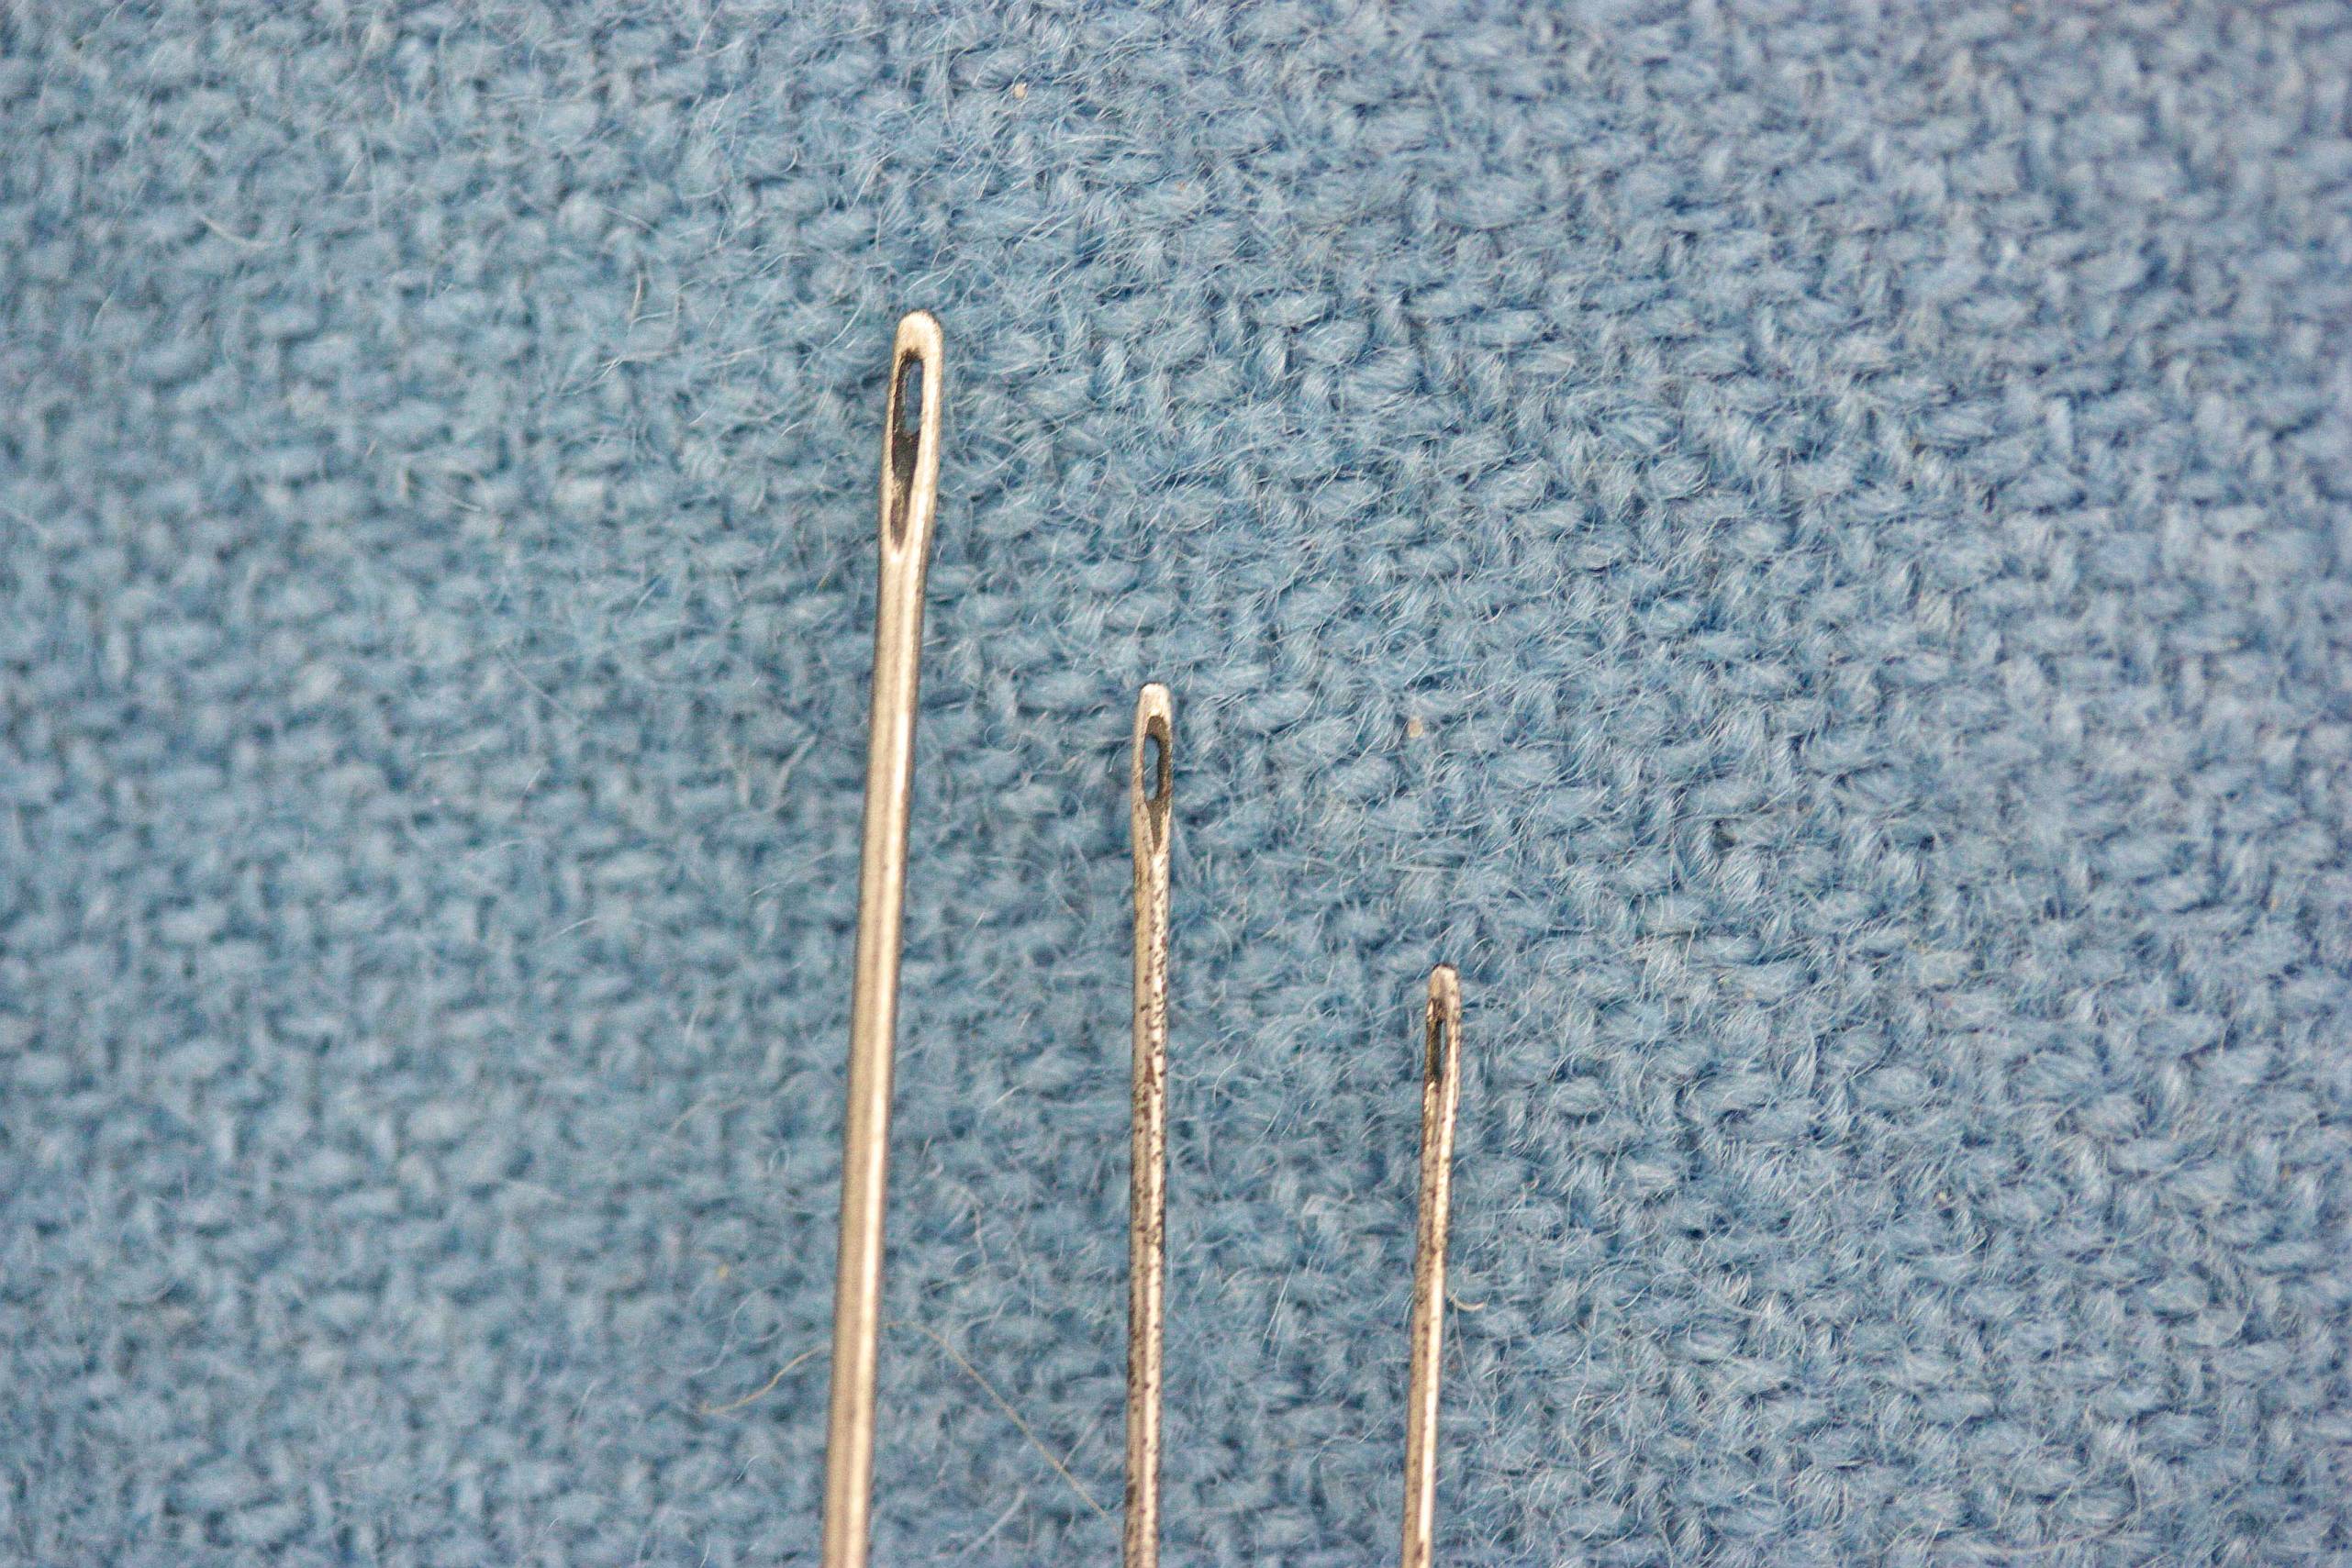
[caption id="attachment_2330" align="alignnone" width="640"]Closeup of the needle eyes. You can still see some of the dark oxidisation residue from the process of making the needles. Closeup of the needle eyes.


That's one of the reasons the needlemaker stopped doing this, so the small stock I have of these needles are all that remain, and probably all there will be. So, like so often when I get my hands on remaining stock, I'm all torn between happiness that I have at least a few of the wonderful items, and sadness that these are the last, and there will be no more of it in the future.

For now, though, there are needles - and I am very happy about that!
0
MAR
15
0

Time-Munching Monsters.

Well, it's not exactly monsters that are munching all the time... but there are a few things afoot right now that do. One of them, due this morning: another update of the webshop, followed by a few necessary tweaks. There's some more coming up, as I will finally get the fix (it's on its way) for an issue-free login possibility with email address instead of the username (that nobody remembers anyway).

There's some other stuff going on behind the scenes - more prep work for events later in the year. Taking care of some insurance stuff for my one-woman company. Organising things to prepare for the Great Tax Filing of 2016 (as every year). Plus, we're having my parents over for a few days at the moment, so some family time tends to creep in - no wonder the time wooshes by faster than I can say "wow, it's afternoon already".

Also? It has snowed again today. Huge big flakes. Just when I thought we're finally going for spring... oh well.
0
MAR
02
6

Spindles, detachable whorls, and why they might fall off.

Yesterday I received an email, asking about spindle whorls slipping off the spindle stick while spinning - and I suddenly realised that this issue is not that uncommon, and that I should maybe write a little info thingie to go with the spindle sticks and whorls. So here you are - it's coming to the blog first, so please feel free to comment and ask further questions!

Medieval-style spindles, as opposed to modern spindles, don't have the whorl attached permanently. Instead, the shape of the two pieces makes it possible to attach the whorl to the tapering stick by just pushing it on. This means easier storage of the spindles plus more flexibility, as you can use one whorl with several sticks, or exchange the whorl for a lighter one to account for more weight of the yarn on a partly-filled spindle stick. You could also use the filled spindle stick directly as a shuttle for weaving on a warp-weighted loom, if you were so inclined.

This method of fitting the whorl onto the spindle stick relies on enough friction between the two parts. To avoid the whorl falling off, there are two things to take into account: Firstly, fitting it securely enough when you place it on the stick, and secondly, making sure that there is no downward pressure onto the whorl while working.

To fit the spindle whorl to the stick, I recommend sliding it up the stick as far as it will go up easily, then give a light twist to the whorl and gently pressing it upwards at the same time. Gentle pressure will suffice, and just a few millimetres of twisting of the spindle against the whorl. It should now sit quite firmly on the shaft. You can test the fit by gently tugging downward on the whorl; it should not budge.

If you have mounted the whorl like this, it should stay there throughout your spinning. If you drop the spindle, the whorl might come off - that is perfectly normal, just put it back into place as before, and carry on.

If the whorl falls off even though you have not dropped the spindle, there are two possible reasons for this.

If you have used the spindle stick a lot with the same whorl over and over, there might be a compressed spot where the whorl grips the wood. This is especially an issue with spindle sticks made from soft wood (such as pine or fir, for example). If that is the issue, you can usually see a ridge where the top of the whorl usually sits. The compressed part of the spindle can't provide enough friction with the whorl anymore, and the whorl cannot slide further upwards over the ridge, so it will not sit securely anymore. Should that ever be a problem, you can revive the stick by placing it in water; the compressed wood fibres will soak up the liquid and swell back into place. Let it dry thoroughly before you use it again.

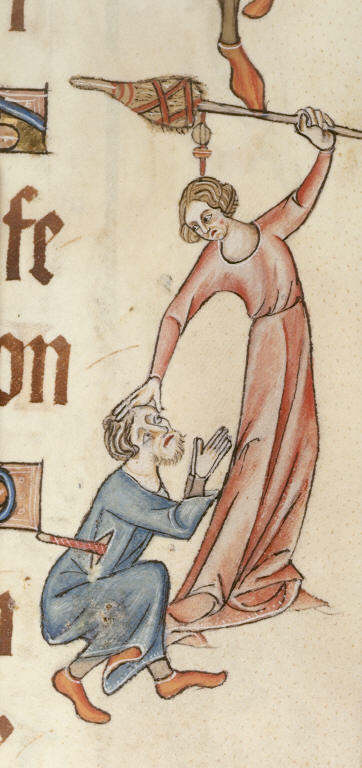
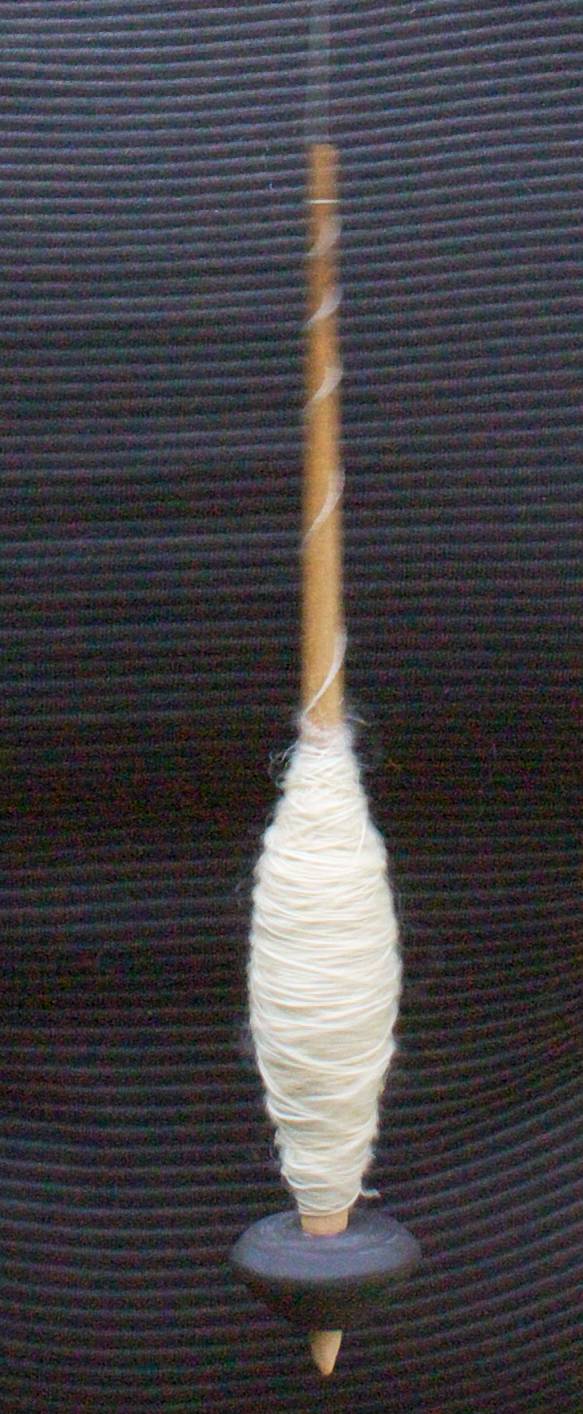
Most times, however, the spindle whorl slips off because the cop of yarn is pressing against it. If you look at medieval images of spindles, you can see that the yarn is in a sort of rugby-ball-shape or spindle-shape, and it is usually quite clearly wound onto the middle of the spindle stick, with a distance to the whorl. (Sometimes there is no whorl discernible at all, especially when the spindle looks like it's quite full already, but the cop is always this rugby-ball-shape or spindle-shape.)

[caption id="attachment_2257" align="alignnone" width="362"]British Library MS Additional 42130, f.60. A woman striking a man with her distaff. Note the very round cop of yarn on the spindle - it is keeping its distance from the whorl. British Library MS Additional 42130, f.60. A woman striking a man with her distaff. Note the very round cop of yarn on the spindle - it is keeping its careful distance from the whorl.


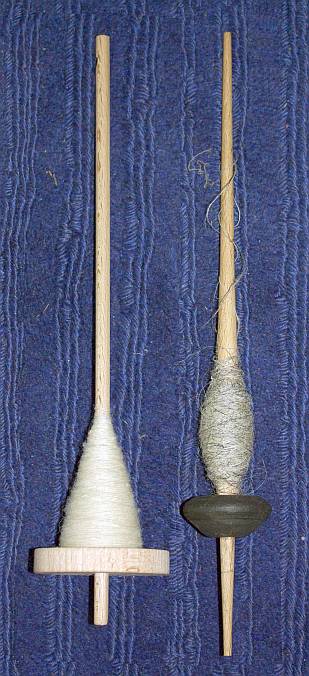
Many modern spinners are used to whorls that are glued onto their spindle, and there's a habit of winding in a sort of cone that rests against the whorl. This cone can put a surprising amount of pressure onto the whorl, so if you wind in this modern way with a medieval spindle, it will definitely press the whorl off the shaft at some point.

[caption id="attachment_2254" align="alignnone" width="309"]Modern-style winding on the left, medieval-style winding on the right. The modern, cone-shaped cop rests against the (permanently fixed) whorl. Modern-style winding on the left, medieval-style winding on the right. The modern, cone-shaped cop rests against the (permanently fixed) whorl.


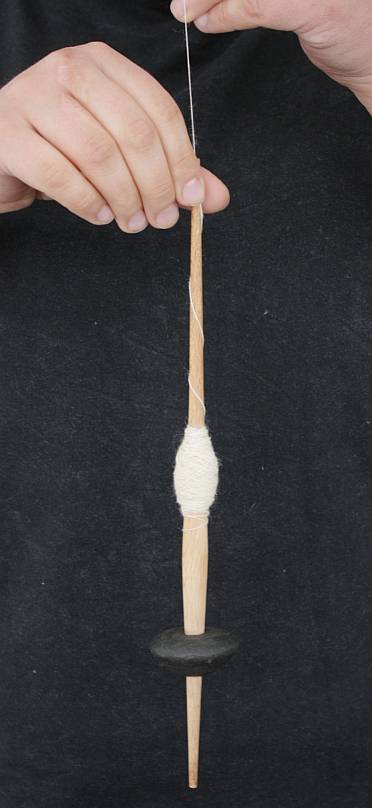
So you need to build a yarn cop that is stable enough not to need support by a whorl. You can achieve this by winding in a criss-cross fashion, instead of winding in a right angle around the spindle shaft with the windings parallel to each other. Start your yarn cop at a good distance to the whorl; this makes sure that you will have enough space to build up a sizeable cop before running into the whorl.

[caption id="attachment_2253" align="alignnone" width="372"]Starting the yarn cop in the middle of the spindle stick leaves lots of space to build it up. Starting the yarn cop in the middle of the spindle stick leaves lots of space to build it up.


You can alternate winding parallel and criss-crossing the yarn over the cop; winding the yarn in these two fashions lets you build a stable and dense cop.

[caption id="attachment_2255" align="alignnone" width="371"] You can see the parallel winding on top of a criss-crossed layer here: At the top of the cop, the criss-cross structure is still visible, but the middle part is wrapped over in parallel.
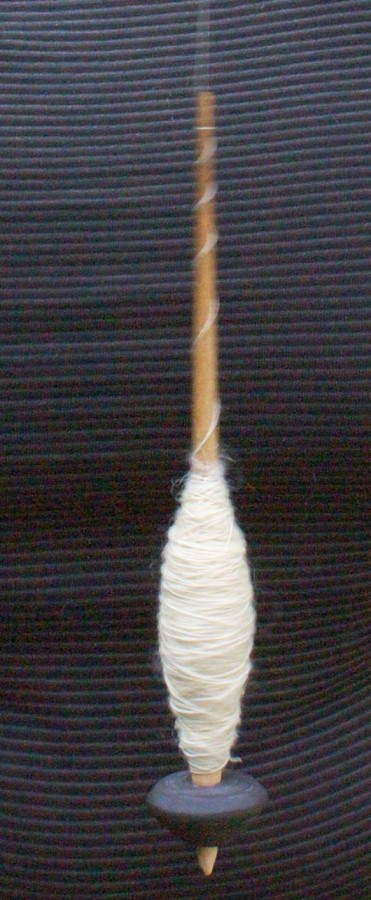

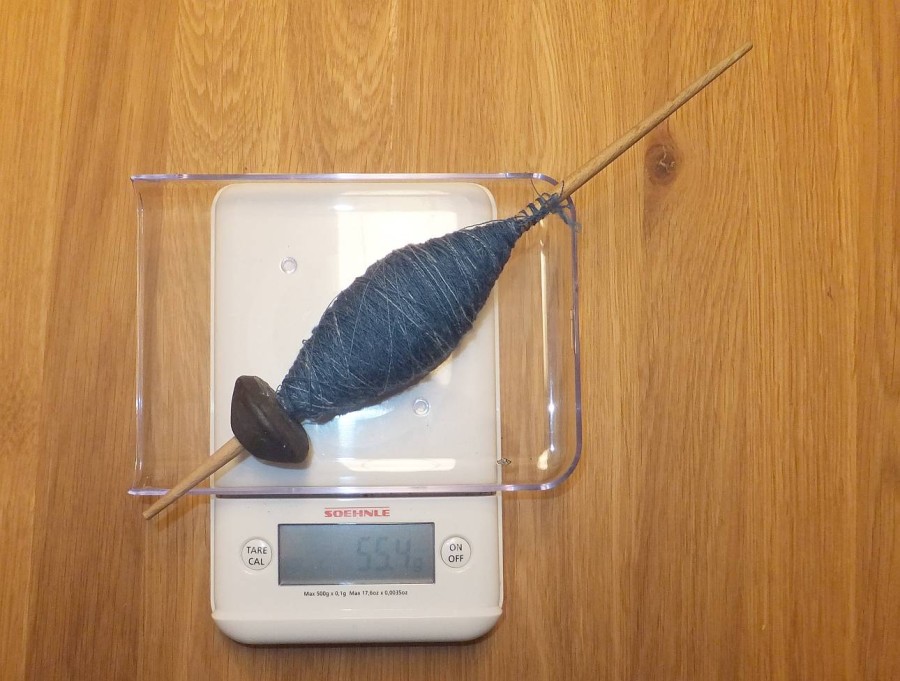
Eventually, your yarn will start to touch the whorl. You can then go on spinning until the yarn pushes the whorl off the spindle; you might be able to fill it even further if you try to wind more towards the top of the cop than towards the bottom.

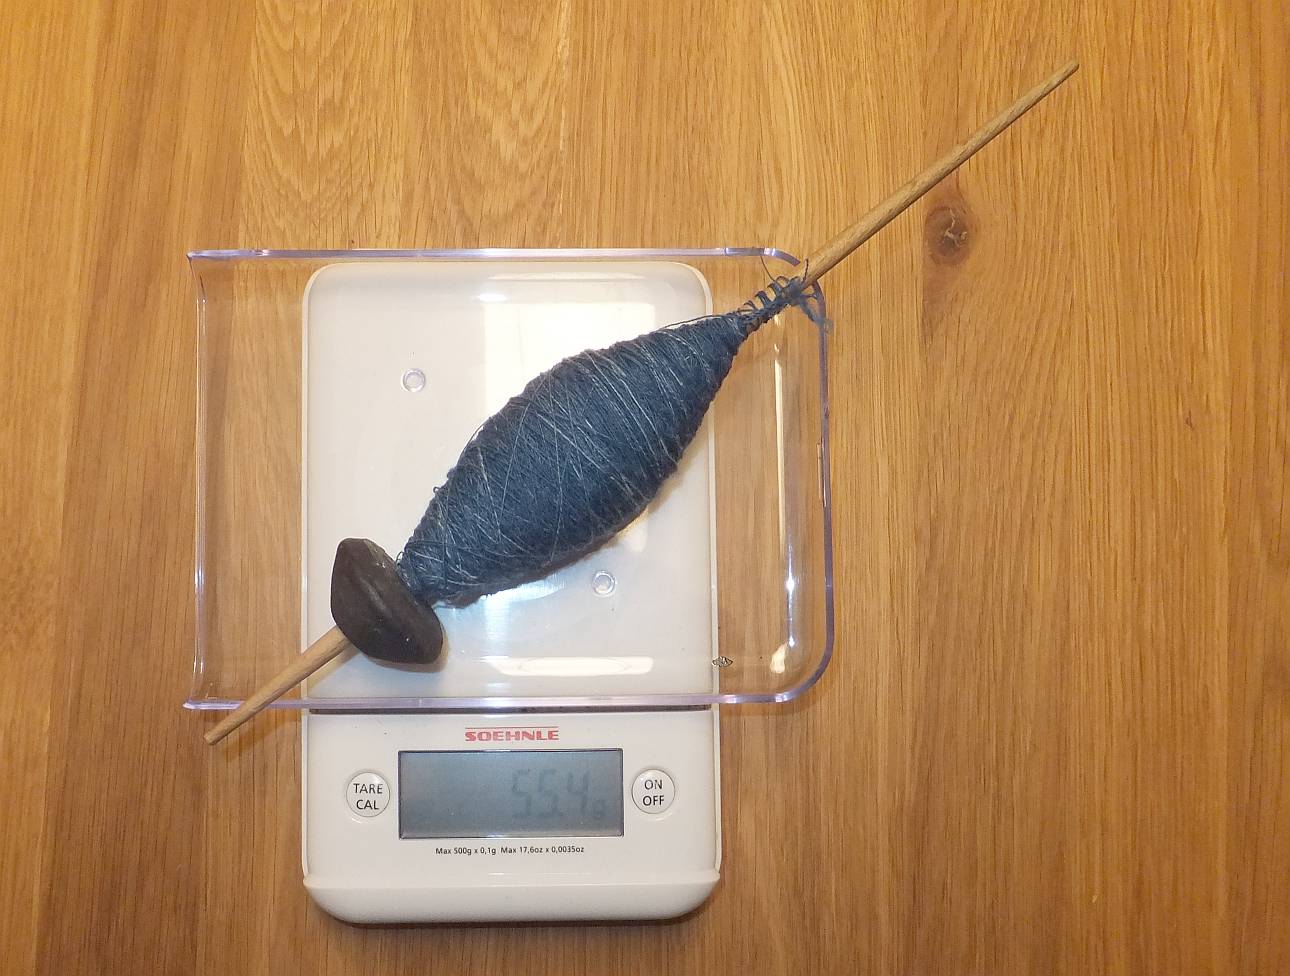
[caption id="attachment_2256" align="alignnone" width="640"]The yarn cop has grown so much that it now touches the whorl. Empty weight of the spindle was 35.4 g, so there's about 20 g very finely spun yarn on this spindle. The yarn cop has grown so much that it now touches the whorl, though there is still no pressure onto the whorl, and the cop could be built up more towards the top of the spindle. (Empty weight of the spindle was 35.4 g, by the way, so that's 20 g very finely spun yarn.)


In any case, once your whorl comes off, you can either declare the spindle as full, or you can leave the whorl off and continue spinning either with a (typically lighter) whorl that sits further down the spindle shaft, or without any whorl at all.

Happy spinning, and happy winding!
0
FEB
23
2

Course Planning.

A while ago - last autumn, to be precise - I was asked about a workshop or course on tablet weaving. This has been on my agenda for a while, and I have taught tablet weaving before, but not just the course I really want to teach.

Said course, as I plan it, will be suitable for beginners as well as for people who already know a bit about tablet weaving. It will be teaching solid basics, with a strong emphasis on the underlying mechanics - so after the course, you will have an understanding of what happens when and why. With that understanding, reading and making (writing and designing) your own patterns will be possible. And if you feel so inclined, you will also have the tools necessary to work 3/1 broken twill patterns.

This is, admittedly, a stiff programme. Which means it needs careful developing (what will I introduce when? For the many elements of tablet weaving that are linked together, how can I best structure them?) and also time-management (which includes deciding on whether I will teach how to setup the warp or not, and whether to prepare warps for the participants or not).

There's also the problem of logistics. There's a difference in necessary equipment between teaching a simple introduction and teaching the course I have in mind. I have space, but I will also need either a lot of table space or a lot of (simple, medieval-style) tablet-weaving frames. I also need tablets that are both suitable for the weaving that we'll do (as in large enough) and affordable, plus suitable yarn in at least two colours and enough length.

So all this has been stewing in the background for a good while now, and yesterday I finally solved the yarn-and-tablets problem. Which means two things: a lower price alternative to the parchment tablets will turn up in the shop very soon, and I can finally do a test-run for the weaving course plan that I have!
0
SEP
03
0

Things on the "deal with today" list.

It's already September - I have a hard time believing that. But I'd better, since my calendar is adamant about this.

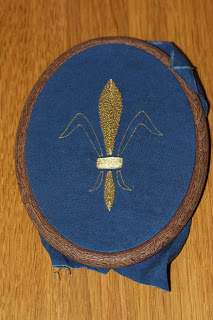
Which means there are barely four weeks left to prepare the things for the Nadelkunst in Weikersheim... I have to make new spindle whorls (which need enough time to dry, and then they have to be fired), and I also have to sit down to do some embroidery today. The pictures for the instructions are all done, apart from the title picture with the finished fleur-de-lis embroidery... so it's high time to finish that off.

Here's the slightly-advanced state of the piece at the moment:


So - on today's agenda: finish at least one side of the thing, and get some of the missing writing for the instructions done. Time flies like an arrow (fruit flies like a banana)...

(There's also two other things in the works for the Nadelkunst, both of them involving natural dyes, and one of them involving knitting. No pics yet, though... we're still working on it!)
0
JUL
01
0

Someone is always bound to notice.

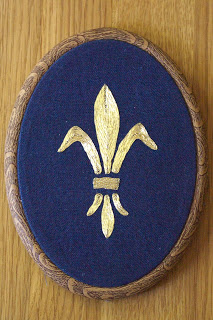
Yesterday, I posted the picture of the finished fleur-de-lis embroidery on Facebook - and promptly got a reply that the form of the fleur is not corresponding to the typical medieval form.

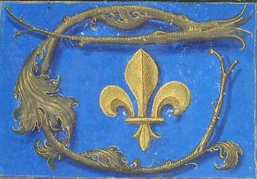
The side petals on the historic versions are much wider, much more curved, and they go out more to the sides. Does that explanation even make sense? Here, let me show you:


British Library Royal 16 F II, f. 137, detail.
Netherlands, around 1500. 


This should make it pretty clear what the differences are. If you search the British Library database for fleur de lis, you'll get some more hits, some of them shapes that are very far from what a modern eye would expect.

So why have I opted for something so different? Part of the differences are due to the medium. The motif is much clearer if you have gaps inbetween the individual petals, as my first tries did show - so running the individual parts together as in the 1500s version would not work just as well. Partly the decision is also due to the shape of the frame - a taller, more slender version fits better with the oval frame shape than the more squat version.

Finally, my personal experience is that motifs with the pronounced changes between slender and fat (as in the leaves of the medieval version) are harder to embroider for a beginner than shapes with only gentle changes in thickness.

The whole embroidery kit is a hybrid of medieval and modern things. Gold thread and silk thread? Medieval. Basic technique? Medieval. However, a medieval gold embroidery on linen fabric would usually cover all the ground fabric, not only a little bit of it - so having the ground fabric dyed blue with indigo, and only embroidering the lily, is a compromise as well (because embroidering everything with blue silk... that's lots of work, and quite a bit of material too).

The frame itself, with its rubber rim and plastic inner rim, and its oval shape, and the hanger so it can serve as a picture frame is very, very modern as well. So are the needles that I will supply with the kit.

It's a hybrid, a compromise to offer a chance to do gold embroidery without investing insane amounts of time and money in trying it. A compromise between appealing to today's embroiderers and offering the experience of working with historically correct materials. A compromise that results in a piece with a lot of decorative value without the need to mount it into a proper frame first.

I've put a lot of thought into this, and I hope that it will turn out to be a good compromise. Let me know what you think, please?
0

By accepting you will be accessing a service provided by a third-party external to https://pallia.net/

Contact