Latest Comments

Guest - Katrin Sprang Discussion
18 September 2026
Hi Rachel, I have looked for more photos of you, but that was not very successful. I found a link on...
Guest - Beatrix Sprang Discussion
15 September 2026
That lozenge pattern element is not a photograph, but a scan. So it should be to scale. But I pinned...
Guest - Katrin Sprang Discussion
15 September 2026
I was not referring to Rachel's reconstruction (is the reconstruction you refer to the one photograp...
Guest - Beatrix Sprang Discussion
14 September 2026
There is something Rachel did not mention. She told me: "Well, I worked with the measurements we too...
Guest - Katrin Sprang Discussion
14 September 2026
Well, this is certainly developing into an interesting discussion. Firstly, going from that lovely l...
DEC
02
0

Aarhus Uni gives you an early present!

Aarhus University Press has a long list of books in their catalogue, and they include Else Oestergaard's "Woven into the Earth", the wonderful book about the garment finds from Greenland. They also have a monthly campaign of one e-book that they post on their site, downloadable for free.

Guess what this month's ebook is? Right - Woven into the Earth. Go here to download it, and feel free to spread the word. The book is absolutely wonderful and a must-have if you are interested in medieval garments. (h/t to Christa, who found this first.)

Other delightful news - the open-air museum village in Düppel, where I went to give a presentation this summer, has won a cultural award given out by Berlin. Congratulations!
0
DEC
01
0

Very Old Knitting, Part 4.

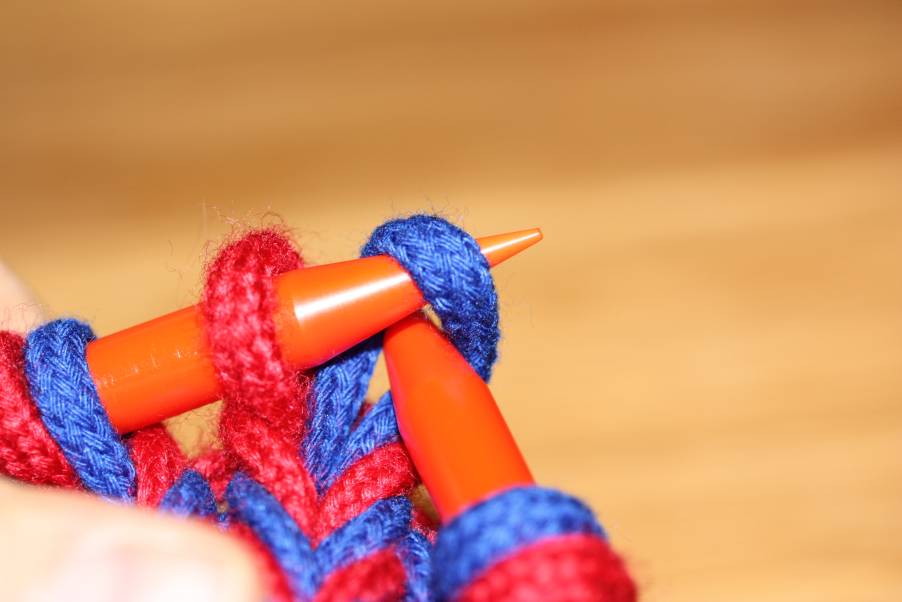
Time for some more knitting stuff! In the last installment of this little series, we've identified the stitches in the row worked from the left onto the right needle as the culprit for the twisted stitches - or, to be more precise, the alignment of these stitches. The stitches worked in this row sit with the right leg in front of the needle, and when they are pulled over the newer stitches off the tip of the needle, their legs cross.

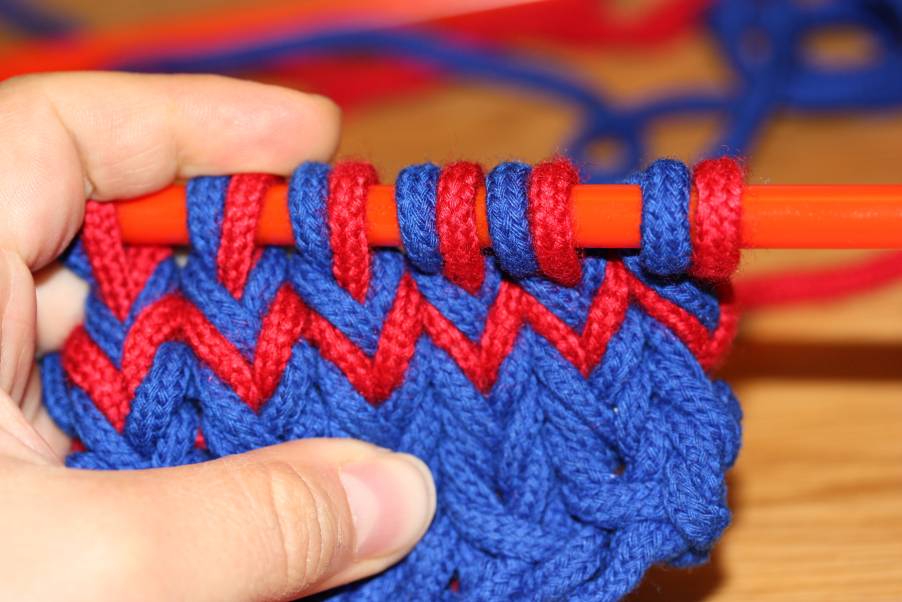
Oh, and I've taken the whole shebang over to utterly oversized demo needles - so things should be clearer visible now. The "regular" towards-the-right row is knit in blue, the return row in red. As you can see, the blue stitches are all twisted (left leg crosses over right), while the red stitches all are untwisted.

[caption id="attachment_2043" align="alignnone" width="300"]The result of the return row: the stitches are untwisted. The result of the return row: the stitches are untwisted.


Remember the observation that the stitches lie differently from the first post in the series?

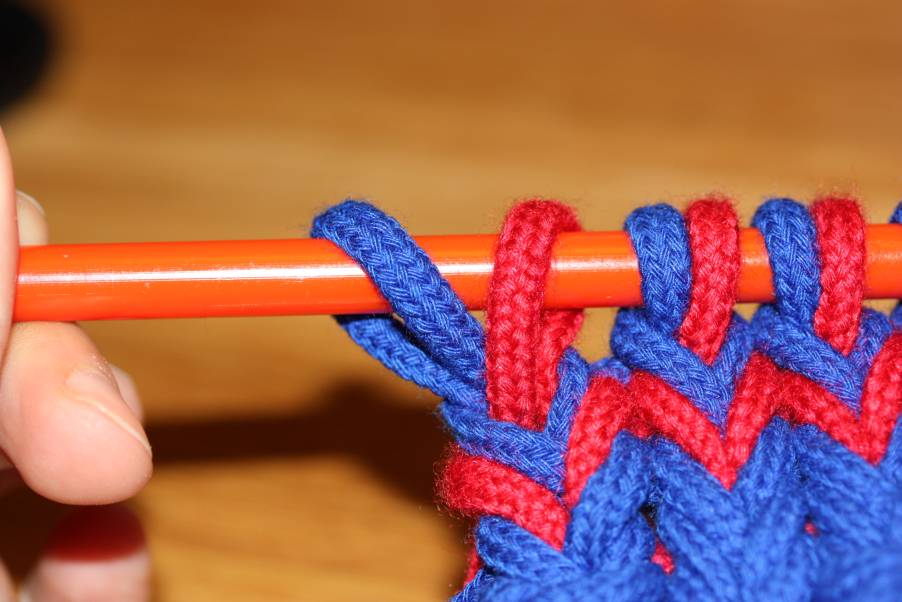
[caption id="attachment_2042" align="alignnone" width="300"]Stitch alignment as resulting from following the instructions correctly: red stitches with left leg in front, blue with right leg in front. Stitch alignment as resulting from following the instructions correctly: red stitches with left leg in front, blue with right leg in front.


The instructions result in a different alignment of the stitches, so that the stitches of the return row (which is worked onto the left needle) are sitting with the right leg in the back. Consequently, when working only the return row, all stitches will be untwisted, resulting in the correct fabric. When working the two rows alternatingly, the towards-the-right row (blue) stitches are twisted and the return row (red) stitches aren't.

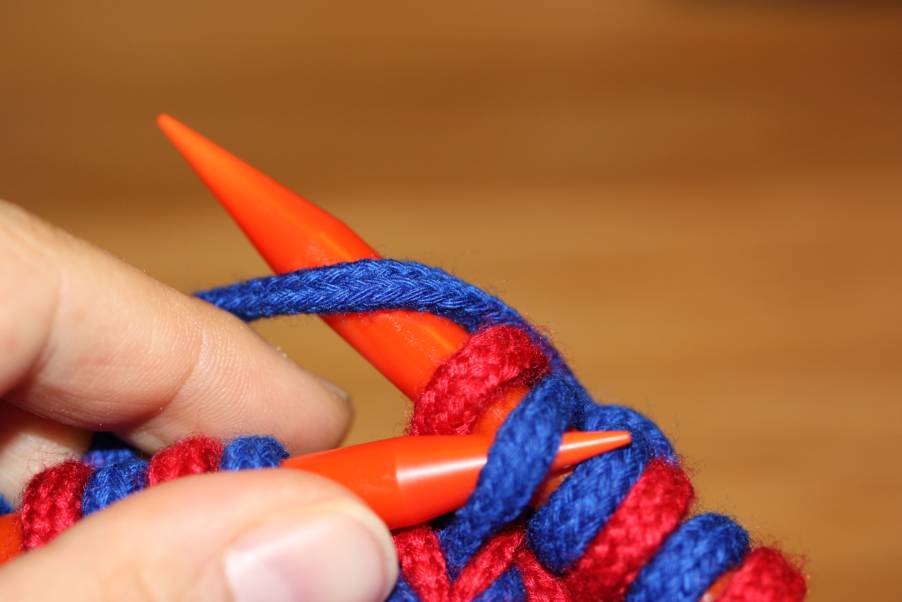
There are two possibilities to deal with this. As you are slipping stitches a lot anyways, you could just slip the two stitches individually on the towards-the-right row, re-aligning the first one (the one on the right) so that the left leg is in front.

[caption id="attachment_2041" align="alignnone" width="300"]One option: realign the stitch to be pulled over so the left leg is in front of the needle. One option: realign the stitch to be pulled over so the left leg is in front of the needle.


Or you wrap the yarn around the needle the opposite way when knitting the towards-the-right row.

[caption id="attachment_2040" align="alignnone" width="300"]Wrapping yarn the other way around, so the left leg of the stitch will lie in front. Wrapping yarn the other way around, so the left leg of the stitch will lie in front.


Both options will work, and you will end up with the fabric as intended: each stitch going through two other stitches instead of just through one, as modern knitting does as a rule, and with no twisted stitches. It will still involve a lot of slipping, however, even if you work in the round.

So, to return to one of the earlier questions... is there a less slippery, possibly more efficient way to do this? Stay tuned to find out more!
0
NOV
27
0

Very Old Knitting, Part 3.

As Harma pointed out yesterday in the comments, there' s an issue with crossed stitches in the knitting method I've shown. Well. Let' s tackle this issue right away, shall we?

I took very good care to follow the instructions exactly, including the direction the yarn wraps around the needle. Which, indeed, results in twisted stitches (the legs crossing) every other row... why? Because of the stitch alignment. Remember that I mentioned how the stitches lie on the needle in that method, partly with the right leg in front and partly with the right leg in the back?

Having twisted stitches every other row points to there being an issue in only one of the rows - either when working on to the left needle, or when working on to the right needle. So let's make things easier to sort it out by restricting ourselves to one direction only. This is done by working in the round (all the extant pieces I know of, by the way, were worked in the round). Or, if you are a lazy person like me who just wants to do a few test stitches and not fiddle too much, on a pair of double-pointed needles. (The trick is to just move the knitting over to the other end of the needle, let the yarn go right across the back of the fabric, and knit the next row in the one and only working direction.)

I'll be sticking with the first row for now... here we go:

[caption id="attachment_2025" align="alignnone" width="300"]After a few rows of working on to the right needle. After a few rows of working on to the right needle.


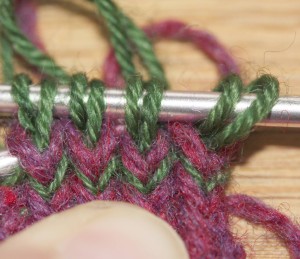
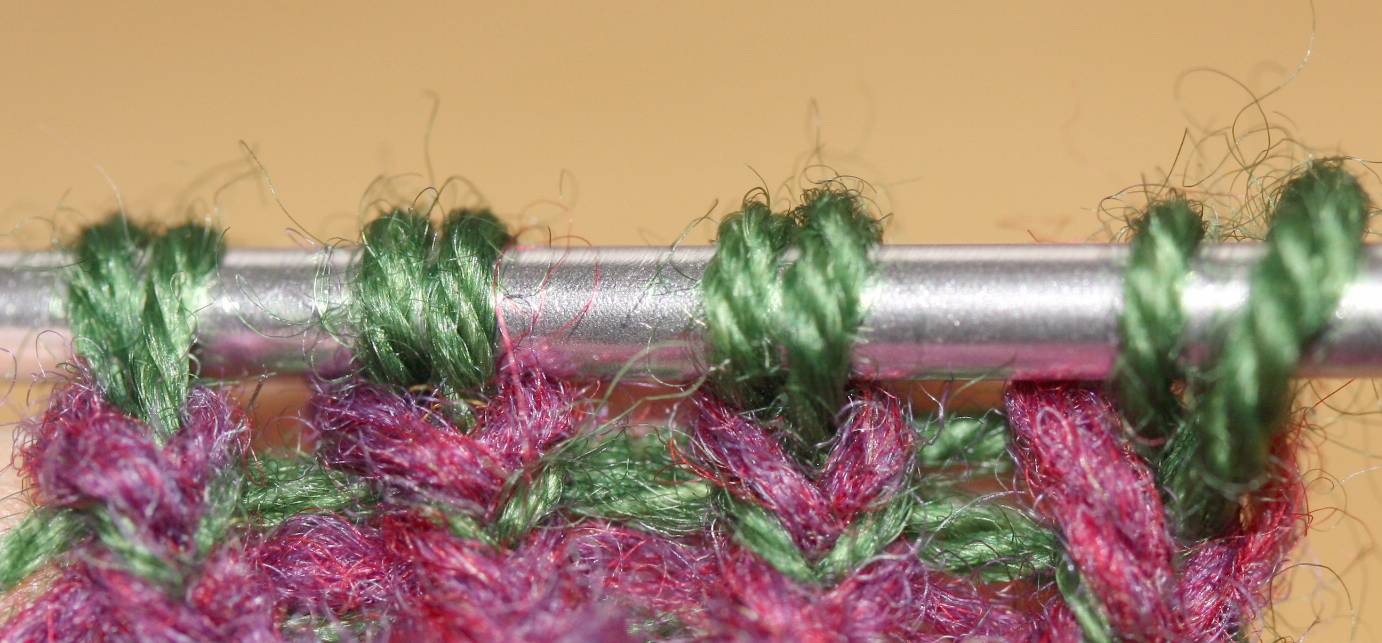
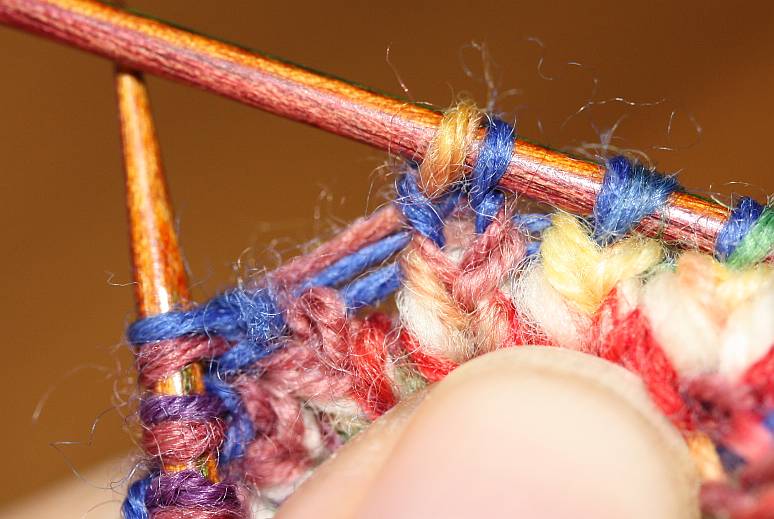
This is what it looks like after a few rows, always working from the left needle on to the right needle (following the instructions). All stitches are aligned in the same way: with the right leg in front of the needle, as customary in modern Western European knitting. And you can hopefully see that all the stitches are twisted - the left leg crosses over the right leg in every stitch. So this is the row, obviously, where something happens that should not happen.

Where does the twisting occur? Here' s what happens:

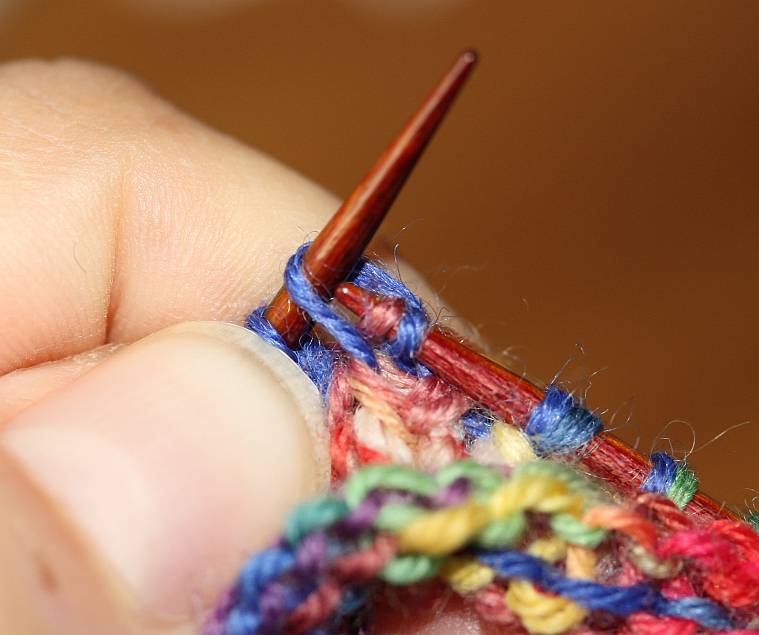
[caption id="attachment_1935" align="alignnone" width="300"]... and pull through. ... and pull through.


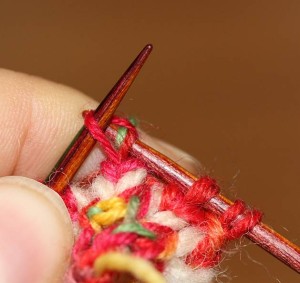
The right stitch, with its right leg in front of the needle, is drawn over the two newer stitches. The right leg is thus drawn to the left of the two stitches - resulting in a twisted stitch.

Sometimes it can be hard to see whether stitches are twisted or not - if in doubt (and the fabric can take it, obviously that' s not possible with archaeological knitting) just stretch the thing out.

If the stitches are untwisted, it opens up completely:

[caption id="attachment_2029" align="alignnone" width="300"]Knitting from the dolly, in its normal state... Knitting from the dolly, in its normal state...


[caption id="attachment_2030" align="alignnone" width="300"]... and stretched horizontally. Stitches and ladders between stitches both open up. ... and stretched horizontally. Stitches and ladders between stitches both open up.


When you stretch out the knitting with twisted stitches, the ladders between the stitches open up, but the stitches themselves are pulled tighter, forming firm little columns between the ladders:

[caption id="attachment_2031" align="alignnone" width="300"]IMG_8112 The knitting stretched out - you can see that the stitches are pulled tighter together. 


So. Our twisty issue lies with the stitches in the row working onto the right needle, and it' s related to the alignment of the stitch on the needle when pulling the stitch over. There you go. Next time, we'll take a look at the other row...
0
NOV
25
0

Very Old Knitting, Part 2.

So... as seen yesterday, working compound knitting (or double-depth knitting) on a dolly or similar thing is very easy. Let's add some challenge - off to the needles with this!

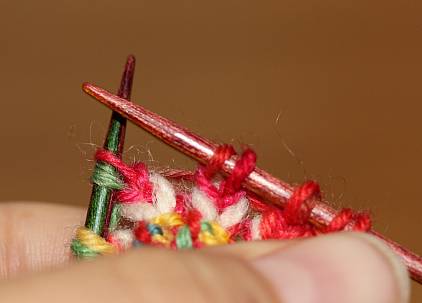
Ruth Gilbert (who is one of the reasons I started knitting a few years back) brought instructions with her to the Textile Forum, taken from Marianne Erikson's book Textiles in Egypt 200-1500 A.D. in Swedish Museum Collections, Gothenburg: Rohsska Museet. You can find them on p. 235, fig. 23. Or look at the following knitting pictures, where I'm following her instructions.

You're always working with a pair of stitches (so cast on double the amount you want to work).

Transfer both stitches to the right needle.

[caption id="attachment_1929" align="alignnone" width="422"]Unworked stitches on the right needle... Unworked stitches on the right needle...


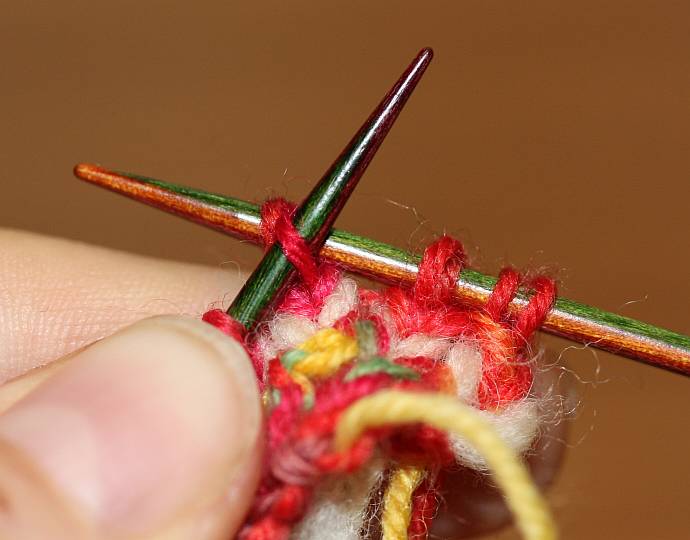
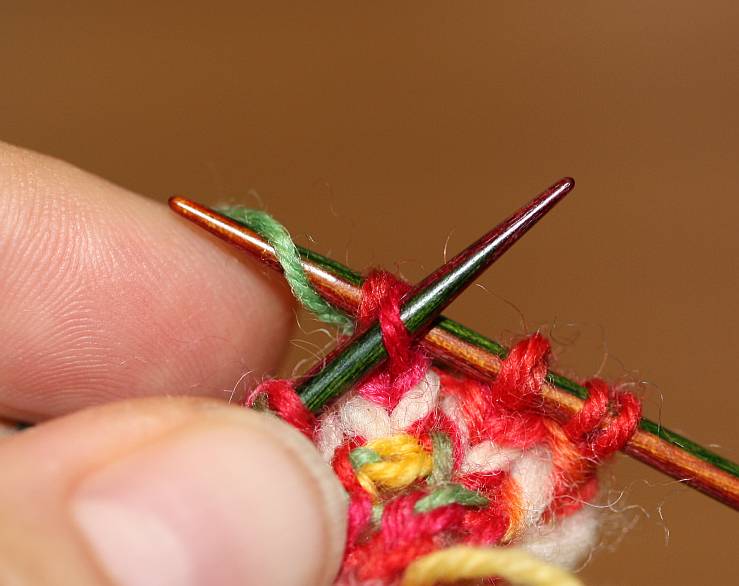
Insert left needle into the right stitch, loop yarn around right needle, and pull yarn and stitch through.

[caption id="attachment_1928" align="alignnone" width="420"]Needle inserted... Insert left needle into the right stitch...


[caption id="attachment_1936" align="alignnone" width="420"]IMG_8086 ...loop yarn around...


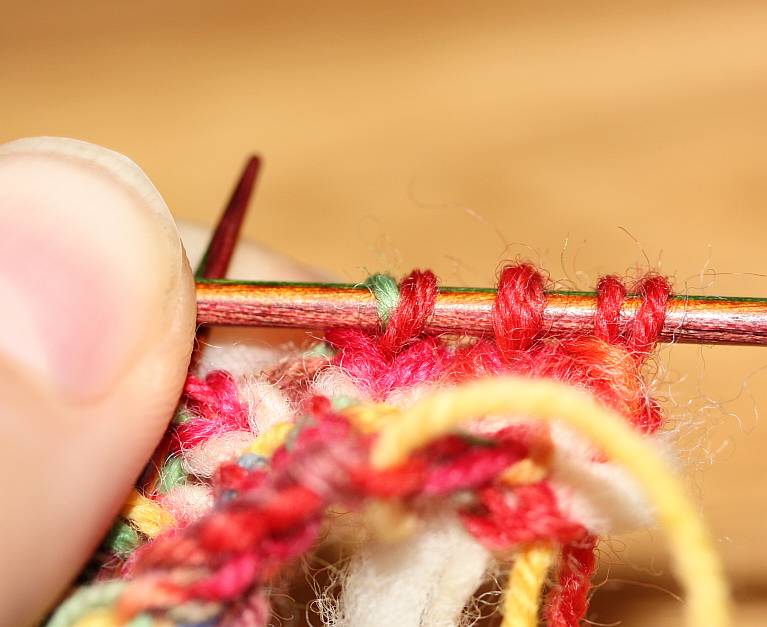
[caption id="attachment_1935" align="alignnone" width="422"]... and pull through. ... and pull through.


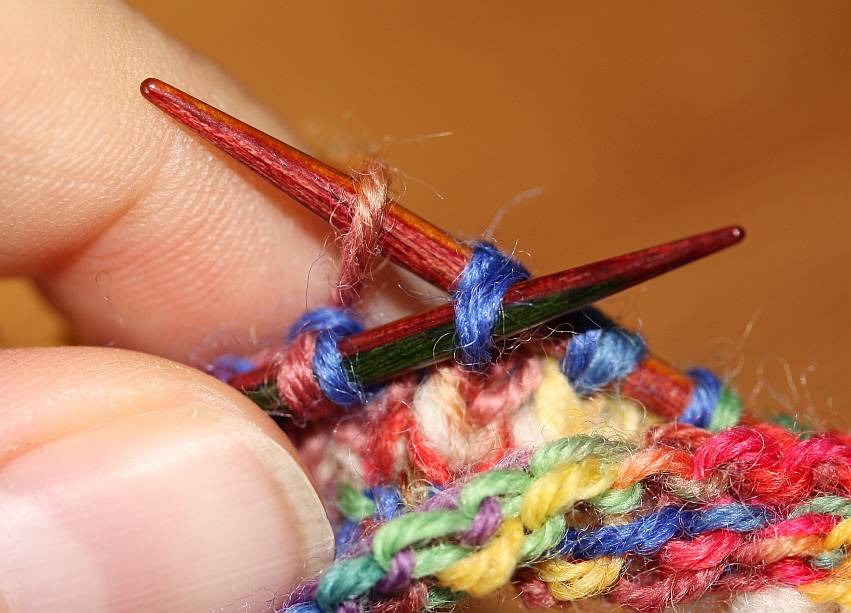
Note the alignment of the stitches: The older stitch lies to the right, its right leg behind the needle; the new stitch lies to the left, its right leg in front of the needle (as is the customary orientation in Western European knitting).

[caption id="attachment_1934" align="alignnone" width="300"]Stitch alignment. Stitch alignment.


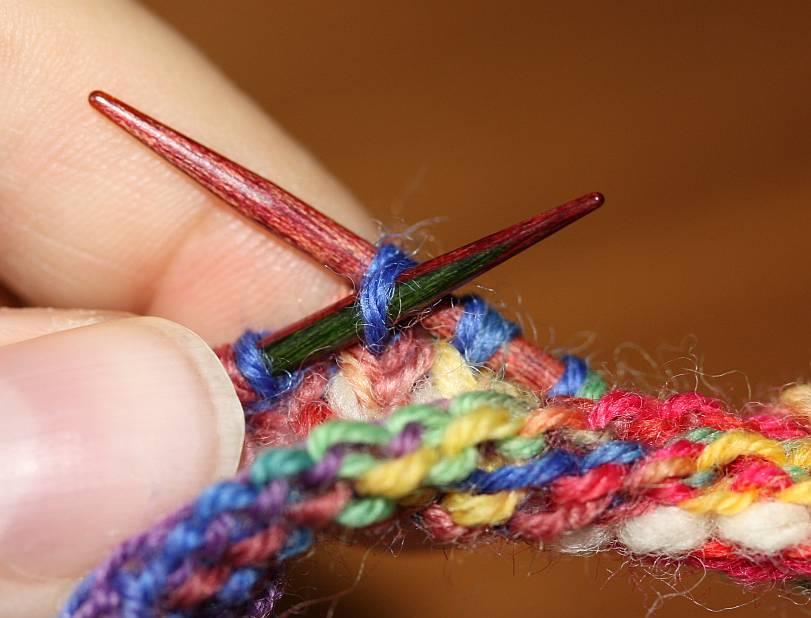
For the return row (if you are knitting flat), you insert the left needle into the second stitch on the right needle,

[caption id="attachment_1933" align="alignnone" width="300"]Insert left needle into right stitch on right needle... Insert left needle into right stitch on right needle...


loop the yarn around the right needle, and draw yarn and the stitch on the right needle through.

[caption id="attachment_1932" align="alignnone" width="300"]... loop yarn around... ... loop yarn around...


[caption id="attachment_1931" align="alignnone" width="300"]...and draw through. ...and draw through.


The older stitch now lies again to the right of the pair, with its right leg in the back; the old stitch on the right has its right leg in the front.

[caption id="attachment_1930" align="alignnone" width="300"]Stitch alignment. New stitch to the left, old to the right. Stitch alignment. New stitch to the left, old to the right.


Now transfer both stitches to the left needle and continue.

These instructions totally work - and they are a lot of slipping stitches. It gets less slippery if you work in the round (where you only use the instructions for the first row, working from left to right), but it still feels... awkward.

Is there a better way to do it? One more efficient, and involving less slipping? We'll see. Later this week.
0
NOV
24
1

Very Old Knitting, Part 1.

After all the computery shenanigans, it's high time for a proper textile post again. And fortunately, I have just the topic!

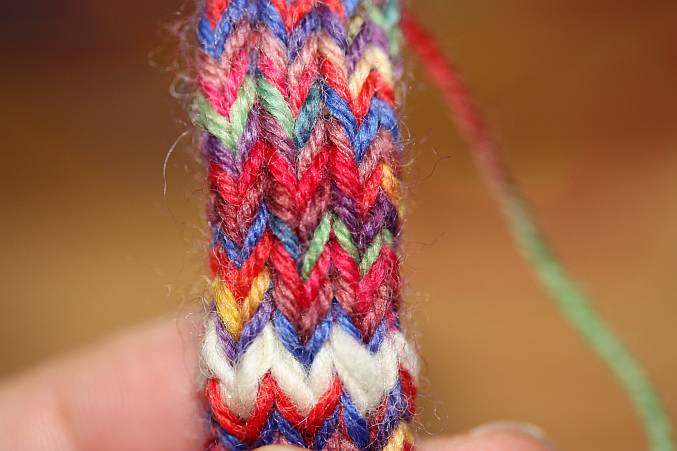
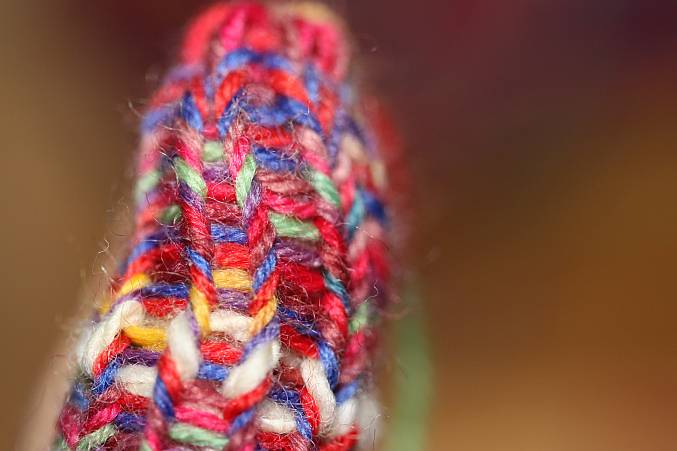
When I was at the Textile Forum, one of the presentations was about old knitting, more specifically what can be called "compound knitting". These really early knitting finds (from Egypt, dated to about the 5th to 7th century, to give you a rough timeframe) are not showing the same knit structure as we are used to. Modern knitting goes through the stitches in the last row to add the next row to the top. These finds done in compound knitting go through the last two stitches to add the next row. Are you confused yet?

The pieces presented at the Forum are all tubular, usually rather narrow, and sometimes striped across or worked in colour sections. They might have been worked on a knitting dolly, or worked on needles - it is hard to tell. We can look a bit at the different methods, though.

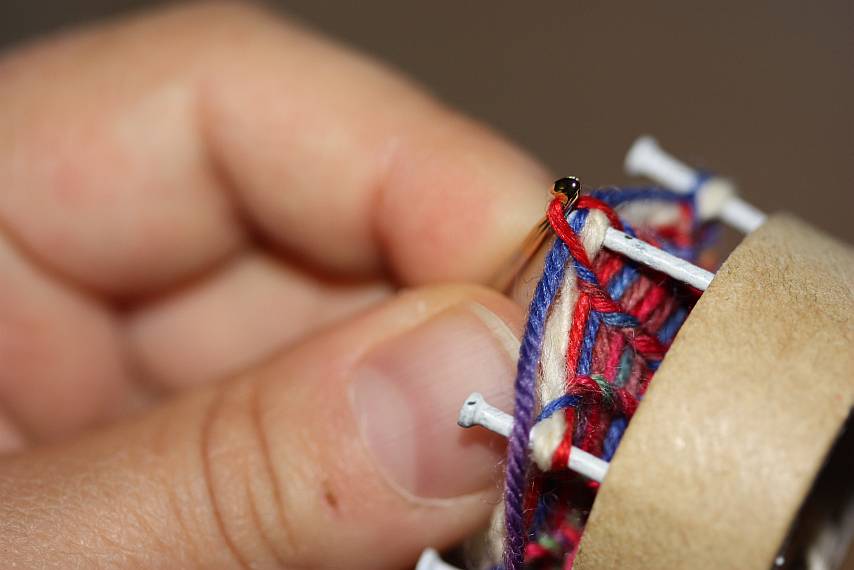
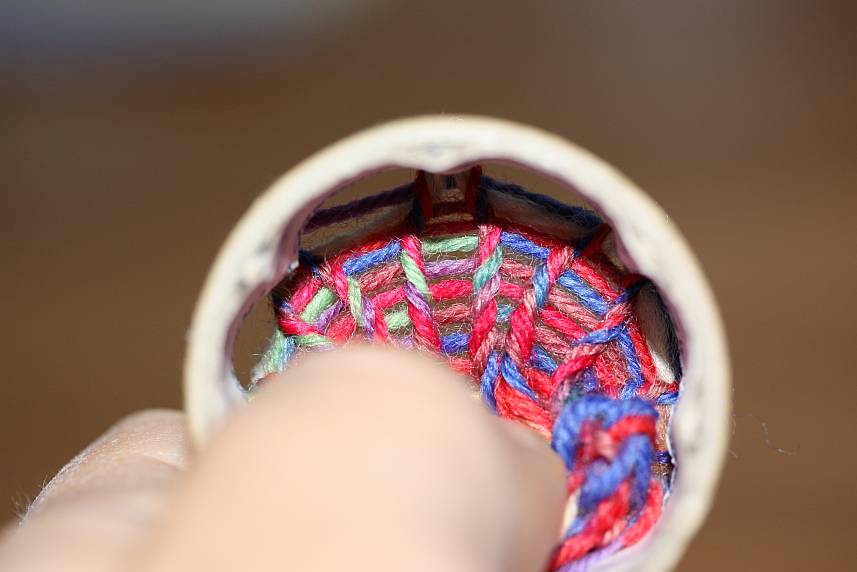
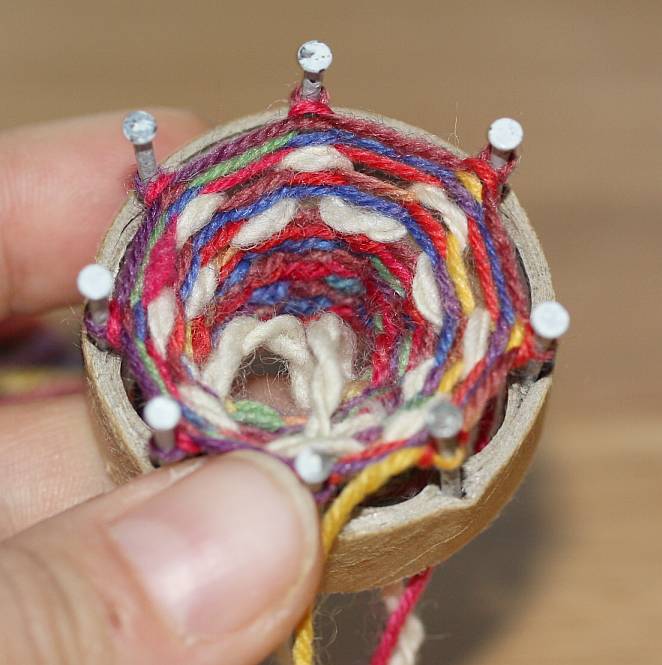
Compound knitting is very, very easy to do on a knitting dolly (or however you call these gadgets with pins to loop your yarn over) - you set up as usual, with base loops, and then you wrap the working yarn around the dolly twice instead of just once. Now when you are working your first round, lift the bottom loop over both the strands above it.

Here's how it looks when you are a few rounds in:

[caption id="attachment_1920" align="aligncenter" width="428"]Lifting the lowest of the loops on the dolly over the one on top of it and the working thread. Lifting the lowest of the loops on the dolly over the one on top of it and the working thread.


The white thread is there for better orientation. You can see the red (lowest) thread being lifted up over the white thread (which has been on the dolly for one round now) and the blue working thread. (The dolly, by the way, is a very crude homemade version that sports some nails left over from my active digging days.)

As a result, you get the compound stockinette fabric.

[caption id="attachment_1917" align="aligncenter" width="437"]Compound knitting on the dolly, knit side. Compound knitting on the dolly, knit side.


It doesn't look much different from regular modern knitting, but you can see that the stitches go through two of the previous rows - look at the green stitch in the top middle, for instance. This is even easier to see when you use a contrasting thread and look at that:

[caption id="attachment_1919" align="aligncenter" width="386"]Compound knitting on the dolly, seen from the inside. Compound knitting on the dolly, seen from the inside.


When you knit in a single row in a different colour in regular modern knitting, you have the little "dashes" on the purl side in one row, followed by a row of your regular colour, followed by the contrast colour row again. In compound knitting, the dashes are one extra row apart, as you can see in the picture.

Working this on a dolly takes no extra effort to do (it might be a tiny bit more fiddly to pick the loop to pull over, but it doesn't make much of a difference). The resulting fabric, though, is a different creature from regular modern knitting: it is much thicker while still very stretchy.

It gets really interesting when we try to take this to the needles, though... which is something for the next post.
0
SEP
09
1

Linkage.

Time again to clear out some of those open tabs and pelt you with links!

Here's a comic explaining how the desperate situation in Syria developed.

PhD Scholar blogs about finding answers to questions she didn't have through research - oh, how I know that effect!

Viveka Hansen writes about Nordic Iron Age clothing and dyes on her blog TEXTILIS.

If you are interested in textile conservation, check out the online workbook "Clothes tell Stories", intended to make aware of conservation issues and help with choices in museums and collections where there's no access to a professional conservator to help.

Andrea Phillips has a lovely and thoughtful post about Equal-Opportunity Objectification.

And one last women-/gender-related link: Doug posts about a conference session regarding professional women in archaeology, with links. Highly recommended!


0
AUG
31
0

Un-busy Monday.

I spent this Saturday giving a long workshop, so today is destined to be non-busy, making up for the half-weekend. The cat, as usual, is happy to help relaxing by snoozing right at my feet (and also making it nearly impossible to move the chair).

For you who are busy, though, I have some links!

Apart from the famous Herjolfsnaes garments, there's another site with textile remains in Greenland, called Garden under Sandet. The fur finds from there have recently been analysed, and what was thought to be bison, muskox and bears have turned out to be horse and goat. The full article is up at Elsevier (paywall).

A video on Youtube shows several historic egg preservation techniques.

Finally, if you read German, Mathis from Schauhuette has posted a thoughtful piece about the payment and situation of private archaeology businesses in Germany.
0

By accepting you will be accessing a service provided by a third-party external to https://pallia.net/

Contact